Trying to find all Svartalfheim collectibles in God of War Ragnarok? Each realm has a checklist of items to locate as you explore them, and it's well worth your time. You'll get more lore on the game's world and characters, earn valuable rewards, and even stumble into some optional bosses.
On this page, we're going to outline where to find all Svartalfheim collectibles. If you're looking for collectibles and checklist items in other realms, be sure to find the full list over in our God of War Ragnarok guide.
God of War Ragnarok: All Svartalfheim Collectibles
Below, we'll tell you how to find every collectible in Svartalfheim.
All Svartalfheim Collectibles Across the Realms
Across the Realms is a Favour in which you must track down four ingredients for a special recipe. These are spread across four of the nine realms.
All Svartalfheim Collectibles Across the Realms Prongfruit
Location: The Forge
Found during Forging Destiny. After emerging from Myrkr Tunnels, you'll be back at The Forge, which you visited earlier in the game. Turn left and head down the walkway, turning left again. On the right, you will see a green love heart on a rock. A little further into this area, the Prongfruit will be visible on the ground.
All Svartalfheim Collectibles Artefacts
Artefacts give off a purple glow in the world. They come in various shapes and sizes, offering more background on certain characters and locations. You need to find all Artefacts to unlock the Trophy named The Curator.
All Svartalfheim Collectibles Artefacts Hreidmar's Brassard
Location: Aurvangar Wetlands
Found during The Quest for Tyr. After setting sail on the boat, you'll shore up on a beach with a geyser ahead. Throw your axe at its base to freeze it and get across. To the right is a second geyser. Freeze it, and grapple up to the higher ledge. Just ahead on the right, you'll see this Artefact.
All Svartalfheim Collectibles Artefacts The Sunrise of Nothingness
Location: Aurvangar Wetlands
Found during The Quest for Tyr. This Artefact is found on the main path, after using the geysers to raise the metal block before opening the main gate. It's sat on a table next to a red chest.
All Svartalfheim Collectibles Artefacts Large Society Ground Orb, The Performance
Location: Nidavellir
Found during The Quest for Tyr. When you first arrive in Nidavellir, you'll quickly meet Sindri, who upgrades Atreus' bow with a new ability. Once you have it, return to where you docked the boat. On the right is a barrier you can destroy with a shot from Atreus, and beyond it is this Artefact.
All Svartalfheim Collectibles Artefacts Griep's Firebomb
Location: Nidavellir
Found during The Quest for Tyr. After upgrading Atreus' bow with Sindri, you'll crawl through a sewer into a new area. Head to the left to see a torchlit passageway. Destroy the barrels in the way and pass through. The Artefact is laying on the ground on the other side.
All Svartalfheim Collectibles Artefacts We Who Remain, Part the Second
Location: Lyngbakr Island
Found during The Quest for Tyr. On your way towards the second binding, you'll see some rigging you can climb on the left. Do this, then turn left and go all the way to the end. You'll find a red chest on the left and this Artefact on the right.
All Svartalfheim Collectibles Artefacts Bari's Grenade
Location: The Forge
Found during The Quest for Tyr. Follow the main path, and climb up the decorated stone ledge. Follow it around to the left and drop down to find this Artefact beneath some scaffolding.
All Svartalfheim Collectibles Artefacts Lofnheid's Whetstone
Location: Jarnsmida Pitmines
Found during The Quest for Tyr. After taking the second train towards the mine (which ends with it crashing), you'll fend off some enemies. In this area, find a chain leading down to a small platform by the water. Down here, you'll find this Artefact.
All Svartalfheim Collectibles Artefacts Tool and Bang
Location: Jarnsmida Pitmines
Found during The Quest for Tyr. After receiving the lanterns from Sindri, head over to the right to find a water stream you can pull towards you. After doing this, a huge crane will rotate in your direction. Grapple onto the stone block, then use the axe to freeze the water. Ride the block back around, then grapple down to a new path. Just ahead you'll find this Artefact.
All Svartalfheim Collectibles Artefacts Althjof's Statue
Location: The Applecore
Found during The Quest for Tyr. At the puzzle involving an elevator and water channels, to the right is a load of gold debris. If you walk towards the elevator and turn around, you can throw your axe at a pot to blow it up. This opens a new path. On the other side, grapple to the left and then up to the ledge. A door is ahead — open it, and this Artefact is on the other side to the left.
All Svartalfheim Collectibles Artefacts Durinn's Stone Statue
Location: The Applecore
Found during The Quest for Tyr. As you explore the mine, you'll discover a grapple point through some falling water. On the other side, drop down to the left. Use a sonic arrow on the glowing debris, then the Artefact can be collected.
All Svartalfheim Collectibles Artefacts Sanguinity
Location: The Applecore
Found after completing Forging Destiny. Return to The Applecore via the Mystic Gateway at Aurvangar Wetlands, using the ferry to cross the water. After descending in the lift, continue on until you see a spear embed point. Climb up with it, and then look to the left for a rock you can blow up with a thrown spear. Just beyond it is this Artefact on the right.
All Svartalfheim Collectibles Berserker Gravestones
Berserker Gravestones can be found in most of the realms, and activating each of them begins a tough, optional boss battle. You'll need to find and complete all of them as part of the Favour named Fit for a King.
All Svartalfheim Collectibles Berserker Gravestones Berserker Gravestone #1
Location: Nidavellir
Found during Forging Destiny. After descending the mountain in the train, drop down to the open area and the Berserker Gravestone will be just ahead.
All Svartalfheim Collectibles Berserker Gravestones Berserker Gravestone #2
Location: Alberich Island
Boss: Beigadr the Feared
Found after completing The Word of Fate. Return to the Mystic Gateway at The Watchtower, then sail north to Alberich Island. The Berserker Gravestone is on the beach where you land.
All Svartalfheim Collectibles Berserker Gravestones Berserker Gravestone #3
Location: Jarnsmida Pitmines
Boss: Bodvar the Fierce and Starolfr the Troublesome
Found after completing The Word of Fate. Travel to the Mystic Gateway at The Applecore, then head right. Go left and head through the gap in the rocks. Grapple up to the higher level, and follow the path out to the right. Once you're outside, the Berserker Gravestone is just ahead.
All Svartalfheim Collectibles Buried Treasure
Buried Treasure can be found by following the clues on Treasure Maps you find throughout the game. It's easy to spot thanks to a pulsing yellow circle above it.
All Svartalfheim Collectibles Buried Treasure Buried Treasure #1
Location: Modvitnir's Rig
Found after completing Forging Destiny. After getting the Treasure Map Fruits of Industry, return to Modvitnir's Rig. Once you arrive, the Buried Treasure is just up the first ledge to the right.
All Svartalfheim Collectibles Buried Treasure Buried Treasure #2
Location: Dragon Beach
Found after completing Forging Destiny. After getting the Treasure Map Washed Ashore, head back to Dragon Beach. Go over to the right of this area where you find a large skeleton. The Buried Treasure is just beside its foot.
All Svartalfheim Collectibles Buried Treasure Buried Treasure #3
Location: The Applecore
Found after completing Forging Destiny. From the Mystic Gateway at The Applecore, go back down across the spear and through to the next room. Crawl through to find yourself back at the central spiral. Go down the path as it circles to the right, and eventually you'll come to an opening where you'll find this Buried Treasure.
All Svartalfheim Collectibles Draugr Holes
Flaming holes in the ground that let through The Hateful, a recurring mini-boss. Find and close all the Draugr Holes to complete the Favour named Born from Fire.
All Svartalfheim Collectibles Draugr Holes Draugr Hole #1
Location: The Watchtower
Found during The Quest for Tyr. When you reach the Bay of Bounty, sail to The Watchtower at its centre. Facing Brok and Sindri's workshop, go up the path to the right and climb the wall. At the top, go over the wooden slope to the left, and the Draugr Hole is on the other side.
All Svartalfheim Collectibles Draugr Holes Draugr Hole #2
Location: The Applecore
Found during The Quest for Tyr. As you explore The Applecore, you'll find a grapple point that passes through a waterfall. Use it, then drop down to the left to find a large door. Go through the door and the Draugr Hole is inside.
All Svartalfheim Collectibles Hel Tears
Hel Tears are holes between realms through which Hel Walkers wreak havoc. You'll need to fend off the enemies while your ally takes some time to close the Hel Tear. Find and close all Hel Tears to complete the Favour named Hel to Pay.
All Svartalfheim Collectibles Hel Tears Hel Tear #1
Location: Aurvangar Wetlands
Found after completing Reunion. Travel to the Mystic Gateway at Aurvangar Wetlands. Sail up the river north until you get about half-way. Dock at the beach just before the giant wheel. Use the grapple point and cross this ledge, then climb down the chain. The Hel Tear is on the other side.
All Svartalfheim Collectibles Legendary Chests
Golden, glowing chests containing valuable items such as Weapon Attachments, Relics and Runic Attacks, Armour, and more. Find all Legendary Chests in the game to ensure you have all the best gear.
All Svartalfheim Collectibles Legendary Chests Legendary Chest #1
Location: Aurvangar Wetlands
Reward: Blades Attachment - Deadly Obsidian Handles
Found during The Quest for Tyr. After lowering the metal barrier in the water, sail forward and stick to the left-hand side. Pass through the narrow tunnel and moor up on the beach. On the left, grapple up and then head over to the left. The chest is guarded by a few enemies.
All Svartalfheim Collectibles Legendary Chests Legendary Chest #2
Location: Modvitnir's Rig
Reward: Muspelheim Seed Half
Found during The Quest for Tyr. In the Bay of Bounty, sail to the left to find Modvitnir's Rig. Go up and to the right, jump over to a large wooden structure, and climb it to the top. After fending off some enemies, the Legendary Chest is straight ahead.
All Svartalfheim Collectibles Legendary Chests Legendary Chest #3
Location: Althjof's Rig
Reward: Light Runic Attack - Njord's Tempest
Found during The Quest for Tyr. After reaching the chimney stack, use a sonic arrow to clear some barrels to the right. Here, you can shimmy around a corner to use a chain and get back down. Use the mechanism to move the grapple point all the way to the top. Next, climb back up the chain, turn to the left. Grapple, then in mid-air, grapple again to smash through the wall opposite. Follow the path around to the right.
All Svartalfheim Collectibles Legendary Chests Legendary Chest #4
Location: Lyngbakr Island
Reward: 5x Whispering Slab, Shield Attachment - Rond of Aggravation
Found during The Quest for Tyr. After slicing the third of the Lyngbakr's bindings, you'll zipline down a rope. On the other side, you'll find this Legendary Chest.
All Svartalfheim Collectibles Legendary Chests Legendary Chest #5
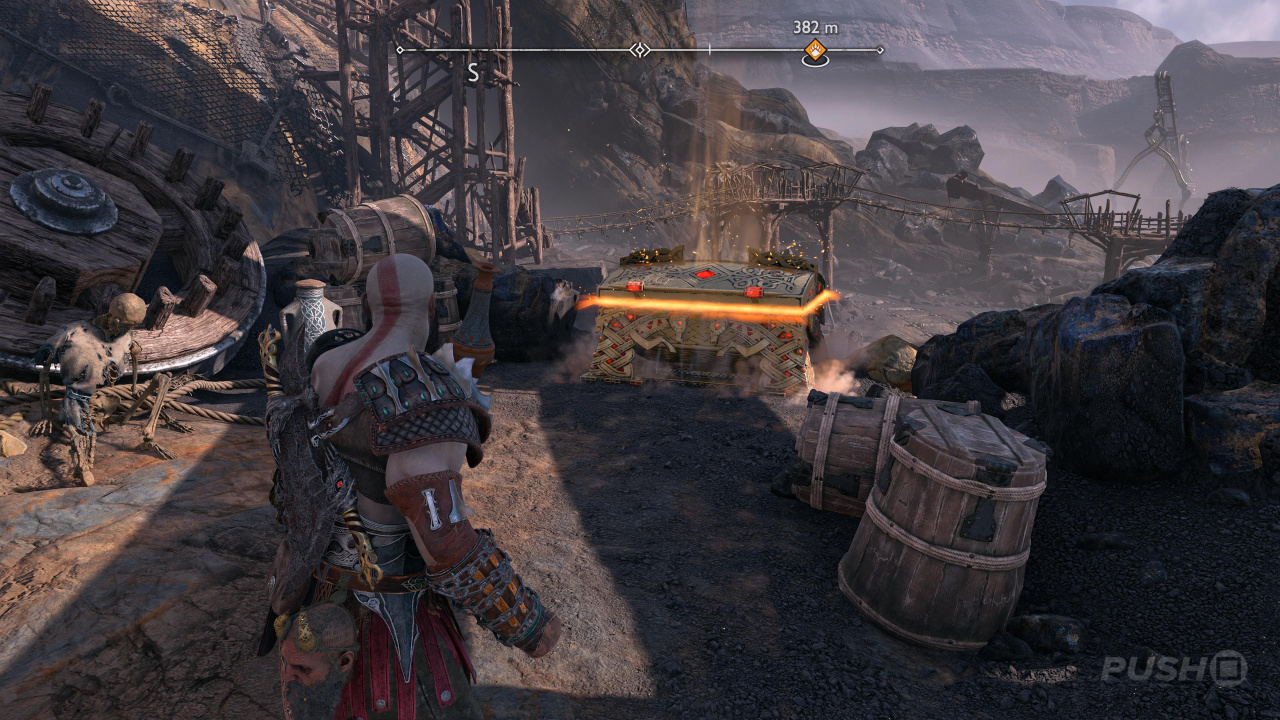
Location: Jarnsmida Pitmines
Reward: Blades Attachment - Pommels of the Undying Spark
Found during The Quest for Tyr. After receiving the lanterns from Sindri, head over to the right to find a water stream you can pull towards you. After doing this, a huge crane will rotate in your direction. Grapple onto the stone block, then use the axe to freeze the water. Ride the block back around, then grapple down to a new path. Just ahead to the right is this chest.
All Svartalfheim Collectibles Legendary Chests Legendary Chest #6
Location: The Applecore
Reward: Axe Attachment - Fortified Frost Knob
Found during The Quest for Tyr. This chest can be found in the same room you fight The Hateful. Defeat this mini-boss, then head to the back of the room.
All Svartalfheim Collectibles Legendary Chests Legendary Chest #7
Location: The Applecore
Reward: Axe Attachment - Banahogg Knob
Found after completing Forging Destiny. From the Mystic Gateway at The Applecore, head through the door to the right. Go down the path to the left and pass through the small tunnel on the left. Continue following the path up and to the right. Eventually, on the left you'll find a runic lock — open it to reveal this Legendary Chest.
All Svartalfheim Collectibles Legendary Chests Legendary Chest #8
Location: Myrkr Tunnels
Reward: Heavy Runic Attack - Fog of Fimbulwinter
Found during Forging Destiny. Progress through the tunnels until you reach a point where you need to push a cart out of the way. Take a left, and on the right will be red vines. Use a runic arrow and the Blades to burn them away, revealing the Legendary Chest.
All Svartalfheim Collectibles Legendary Chests Legendary Chest #9
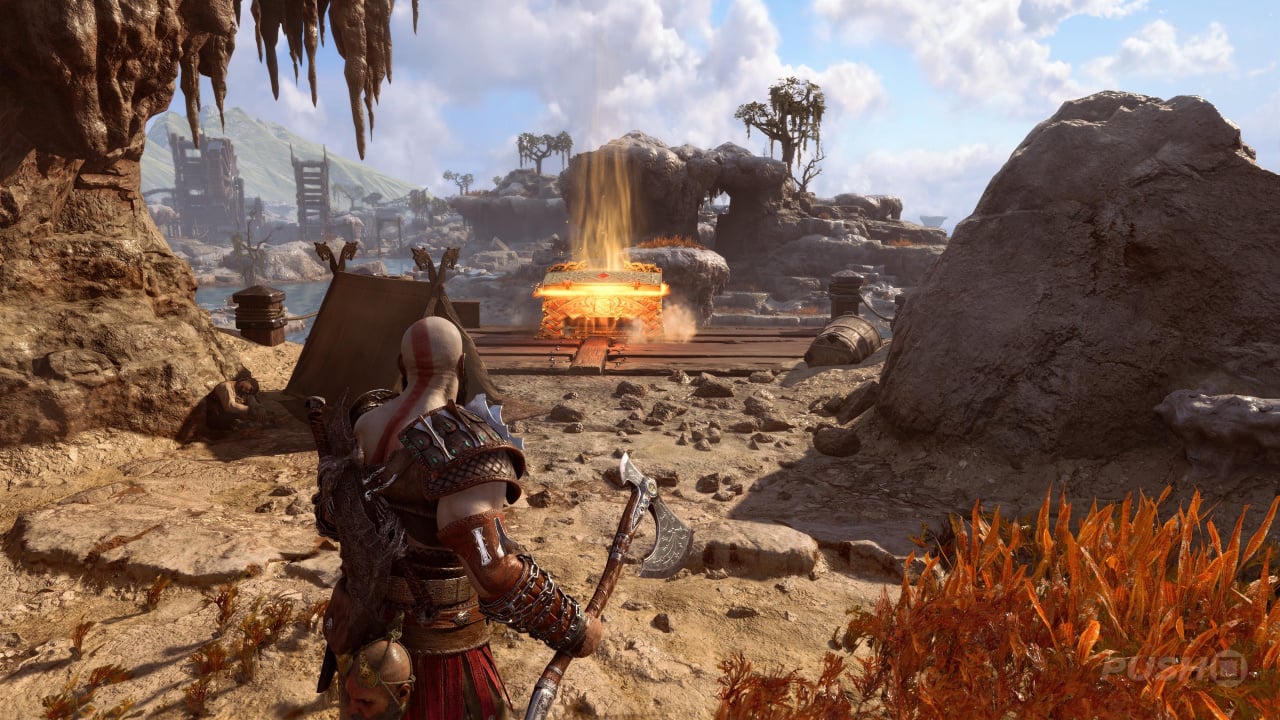
Location: The Forge
Reward: Heavy Runic Attack - Atlas Eruption
Found during Forging Destiny. You'll reach a puzzle involving geysers and water wheels to get a gate open. Once you have the gate open, this Legendary Chest is right on the main path.
All Svartalfheim Collectibles Legendary Chests Legendary Chest #10
Location: Alberich Hollow
Reward: Muspelheim Seed Half
Found after completing Forging Destiny. Alberich Hollow is accessed via Dragon Beach. You'll enter a small cave with some baddies in and the Legendary Chest off to the right. Defeat the enemies, then continue forward to find fire bombs. Pick one up and throw it at the chest to clear it of debris.
All Svartalfheim Collectibles Legendary Chests Legendary Chest #11
Location: Alberich Hollow
Reward: 5000x Hacksilver, Folkvangr Whetstone
Found after completing Forging Destiny. After clearing some debris from the main path, this Legendary Chest will be just ahead.
All Svartalfheim Collectibles Legendary Chests Legendary Chest #12
Location: Alberich Island
Reward: 30x Whispering Slab, 45,000x Hacksilver, Jewel of Yggdrasil
Found after completing Forging Destiny. Use the spear to break down a rock. Grab the chain and pull it down, then use a sigil arrow and your axe to keep the gear frozen. Next, grapple back over to the deck, and use the axe to freeze the geyser to bring the lift down. Go over and recall the axe to rise up, then use grapple points to reach the Legendary Chest.
All Svartalfheim Collectibles Legendary Chests Legendary Chest #13
Location: Nidavellir
Reward: Blades Attachment - Luminous Recovery Handles
Found after completing Forging Destiny. Return to Nidavellir. From the Mystic Gateway, travel southeast and go through the pub. On the other side, cross the bridge and turn left. Follow the road all the way up to find a spear embed point. Use this to climb onto the higher ledge, where this Legendary Chest sits.
All Svartalfheim Collectibles Lore
Here's where to find all the Lore items in Svartalfheim.
All Svartalfheim Collectibles Lore Lore Markers
Lore Markers are the tall stone tablets with runic writings.
All Svartalfheim Collectibles Lore Lore Markers Lore Marker #1: Unsafe Roads
Location: Aurvangar Wetlands
Found during The Quest for Tyr. After lowering the metal barrier in the water, sail forward and stick to the left-hand side. Pass through the narrow tunnel and moor up on the beach. On the left, grapple up and then head to the right. Drop down to find the Lore Marker.
All Svartalfheim Collectibles Lore Lore Markers Lore Marker #2: Warning
Location: Modvitnir's Rig
Found during The Quest for Tyr. From the location of Legendary Chest #2, you can attack the enemy across the way. Use the crane to grapple across the gap, then head down to where the enemy was to find this Lore Marker.
All Svartalfheim Collectibles Lore Lore Markers Lore Marker #3: Regarding the Removal of Resources
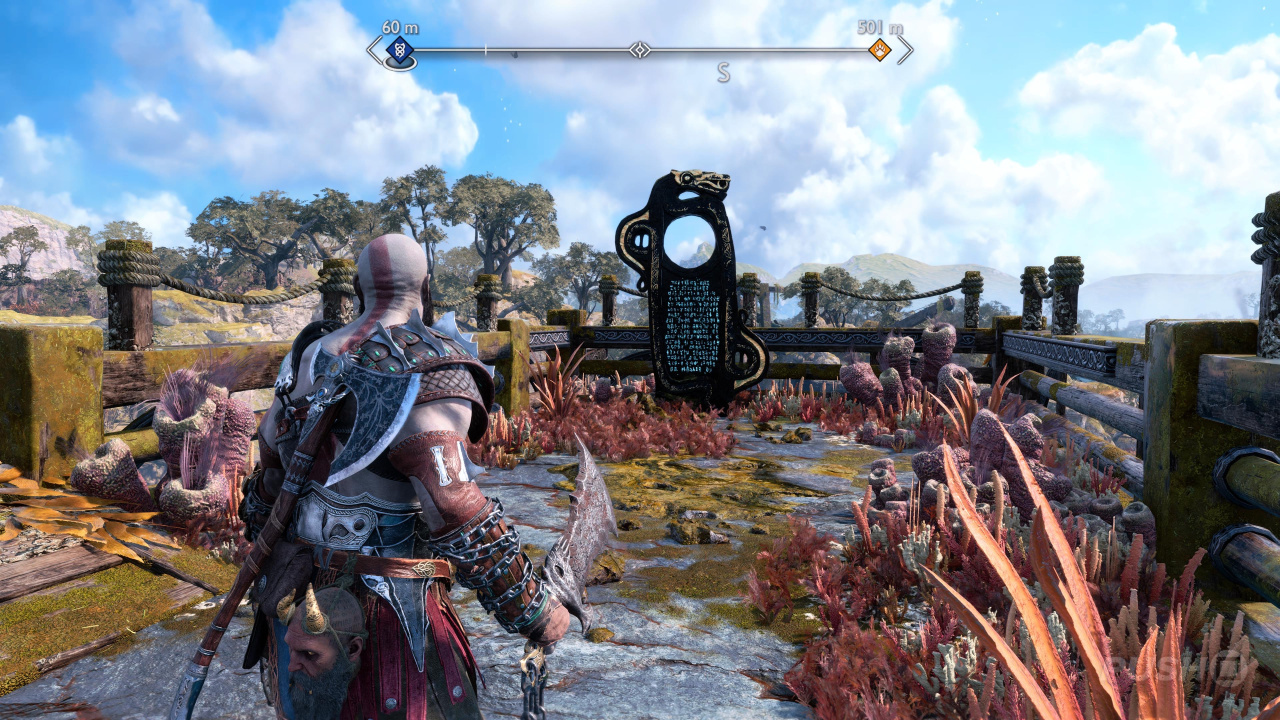
Location: Lyngbakr Island
Found during The Quest for Tyr. As you head towards the second of the Lyngbakr's bindings, you will climb a chain after defeating a few enemies. At the top, immediately to your right is this Lore Marker.
All Svartalfheim Collectibles Lore Lore Markers Lore Marker #4: Cooperation
Location: The Applecore
Found during The Quest for Tyr. After crawling through a tunnel, you'll jump over a waterway and be faced by two Draugr. After this, head to the right and break down the wooden boards to reveal this Lore Marker.
All Svartalfheim Collectibles Lore Rune Reads
Glowing blue etchings found on walls.
All Svartalfheim Collectibles Lore Rune Reads Rune Read #1: Don't Breathe
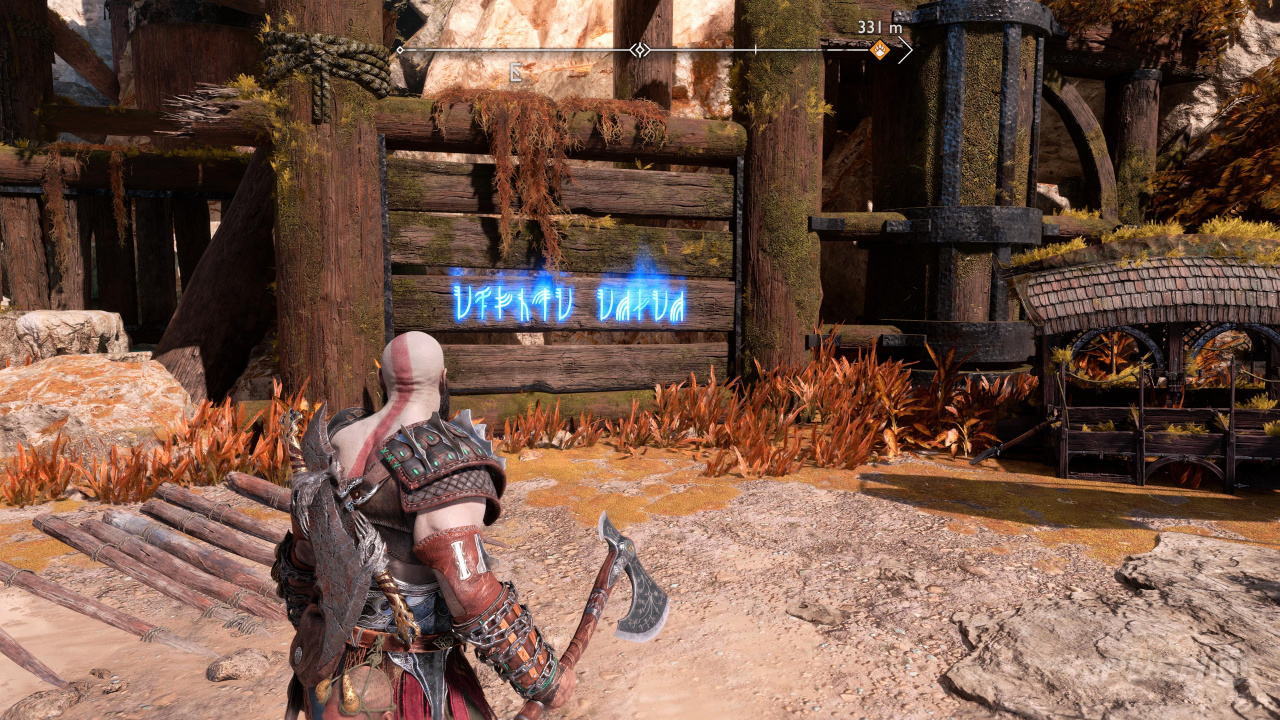
Location: Dragon Beach
Found during The Quest for Tyr. This Rune Read is found to the left of the dragon statue on a wooden panel.
All Svartalfheim Collectibles Lore Rune Reads Rune Read #2: The Squasher
Location: Althjof's Rig
Found during The Quest for Tyr. As you progress through Althjof's Rig, you'll need to smash through a weak part of the floor. Down below are some enemies. Kill them, and then find this Rune Read on the left-hand wall, past some crates and barrels.
All Svartalfheim Collectibles Lore Rune Reads Rune Read #3: The Forge
Location: The Forge
Found during The Quest for Tyr. After defeating Dreki, squeeze through the gap and head to the right. At the end of the path, grapple up to the higher ledge. You'll see a locked gate, and to its right, this Rune Read on the wall.
All Svartalfheim Collectibles Lore Rune Reads Rune Read #4: The Pit-Mine
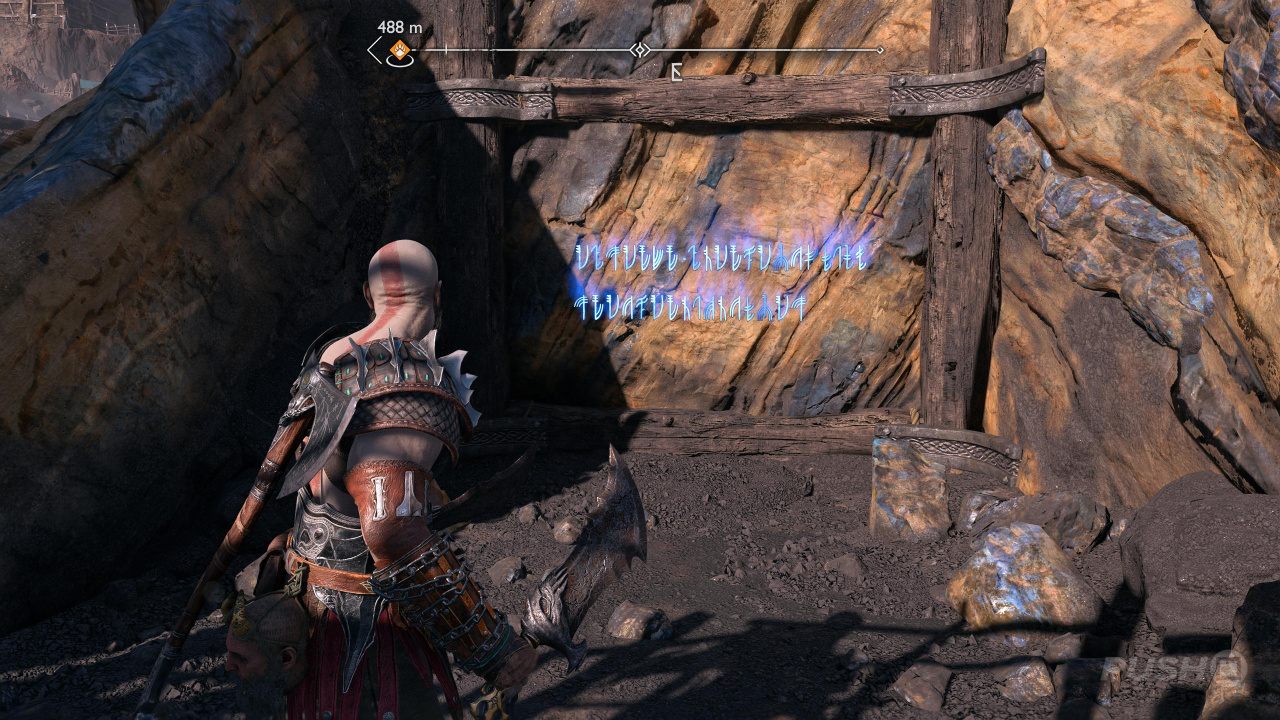
Location: Jarnsmida Pitmines
Found during The Quest for Tyr. After grappling over the large cargo container, you'll see a Nornir Chest ahead. Go left and down, and recall your axe if you haven't. You will spot a grapple point — go across to find this on the left.
All Svartalfheim Collectibles Lore Rune Reads Rune Read #5: The Vault
Location: The Applecore
Found during The Quest for Tyr. Follow the short path up from Sindri's workshop. Ahead is a door that can be destroyed by a sonic arrow. Do this to reveal the Rune Read.
All Svartalfheim Collectibles Lore Scrolls
Scrolls are small collectibles that offer some background on the world and its inhabitants.
All Svartalfheim Collectibles Lore Scrolls Scroll #1: Shopping List
Location: Nidavellir
Found during The Quest for Tyr. After docking your boat, head up to the statue of Odin. Go around to the back of the statue to find this Scroll on the ground.
All Svartalfheim Collectibles Lore Scrolls Scroll #2: Climbing the Ladder
Location: Radsvinn's Rig
Found during The Quest for Tyr. Behind the chimney stack in the centre, you can find an explosive pot next to some barrels. Blow it up, and you'll find this Scroll inside.
All Svartalfheim Collectibles Lore Scrolls Scroll #3: Passion
Location: Althjof's Rig
Found during The Quest for Tyr. After reaching the chimney stack, use a sonic arrow to clear some barrels to the right. Here, you can shimmy around a corner to use a chain and get back down. Use the mechanism to move the grapple point all the way to the top. Next, climb back up the chain, turn to the left. Grapple, then in mid-air, grapple again to smash through the wall opposite. Just inside on the right you'll find this Scroll.
All Svartalfheim Collectibles Lore Scrolls Scroll #4: Dear Overseer
Location: The Forge
Found during The Quest for Tyr. After defeating Dreki, you'll squeeze through a gap. On the other side, follow the path to the right and climb up the engraved stone. Continue forward to find a small encampment, and this Scroll on the ground.
All Svartalfheim Collectibles Lore Treasure Maps
Treasure Maps are self-explanatory. They give you a sketch and a few lines of text as clues to the location of some treasure.
All Svartalfheim Collectibles Lore Treasure Maps Treasure Map #1: Fruits of Industry
Location: Alberich Hollow
Leads To: Buried Treasure #1
Found after completing Forging Destiny. At the very end of the main path of Alberich Hollow, you'll see a chain letting you back down to the water. Instead, head off to the right to find this Treasure Map.
All Svartalfheim Collectibles Lore Treasure Maps Treasure Map #2: Washed Ashore
Location: Alberich Island
Leads To: Buried Treasure #2
Found after completing Forging Destiny. After using the grapple point to reach the lower wooden decking, use a second grapple point to cross over to a small island. Just ahead, this Treasure Map is over to the left.
All Svartalfheim Collectibles Lore Treasure Maps Treasure Map #3: Mining Glory
Location: Nidavellir
Leads To: Buried Treasure #3
Found after completing Forging Destiny. Return to Nidavellir. From the Mystic Gateway, travel southeast and go through the pub. On the other side, cross the bridge and turn left. Follow the road all the way up to find a spear embed point. Use this to climb onto the higher ledge, and the Treasure Map is just ahead.
All Svartalfheim Collectibles Lore Treasure Maps Treasure Map #4: Demise of Dagestr
Location: The Applecore
Leads To: Buried Treasure #2 in Midgard
Found after completing Forging Destiny. Return to The Applecore via Sverd Sands, using the ferry from Aurvangar Wetlands. After descending in the big lift, follow the path down until you see a spear embed point on the right-hand side. This Treasure Map is just in front of you when you climb up.
All Svartalfheim Collectibles Nine Realms in Bloom
Nine Realms in Bloom is a Favour that tasks you with finding a unique flower from each of the nine realms.
All Svartalfheim Collectibles Nine Realms in Bloom Sparkthorn
Location: Nidavellir
Found after completing Forging Destiny. Return to Nidavellir. From the Mystic Gateway, travel southeast through the city, watching out for a spear embed point on a chimney near a bridge. Swing across and the Sparkthorn will be just ahead.
All Svartalfheim Collectibles Nornir Chests
Nornir Chests are locked by three magic runes. To unlock them, you must find the matching runes nearby in the environment. Open them to find all Idunn Apples and Horns of Blood Mead and unlock the Trophy named Full Belly.
All Svartalfheim Collectibles Nornir Chests Nornir Chest #1
Location: Aurvangar Wetlands
Found during The Quest for Tyr. After getting the boat, you'll shore up on a beach with a geyser ahead. Throw your axe at its base to freeze it and get across. To the right is the Nornir Chest. It will reward you with an Idunn Apple.
The first rune can be seen just beyond the chest on a small island in the water. The second run is found just to the right of the chest. For the third rune, jump back towards the geysers. Freeze the one on your left and grapple up to the higher ledge. The rune is on the left next to a tree.
All Svartalfheim Collectibles Nornir Chests Nornir Chest #2
Location: Aurvangar Wetlands
Found during The Quest for Tyr. After lowering the metal barrier, sail forward down the river, hugging the left side. You'll find a small tunnel through which you can pass. Ahead you can leave the boat, and in this area you'll see the Nornir Chest. It will reward you with a Horn of Blood Mead.
The first rune spinner is accessed through an arch to the left of the chest. Be warned, there are enemies around here! The next is over to the right of the chest — you'll need to freeze a geyser to check you have selected the right rune. On the far left from the chest, you can grapple up to a higher area. Do this and immediately on the right is the third rune spinner.
All Svartalfheim Collectibles Nornir Chests Nornir Chest #3
Location: Dragon Beach
Found during The Quest for Tyr. Once you exit the boat on the shore, this Nornir Chest is straight ahead up the beach. It will reward you with an Idunn Apple.
The first rune is obscured by a geyser just behind the Nornir Chest. Another is located behind the large dragon statue. The final rune is hidden behind another geyser, this time opposite the dragon statue.
All Svartalfheim Collectibles Nornir Chests Nornir Chest #4
Location: Radsvinn's Rig
Found during The Quest for Tyr. After docking at The Watchtower, head left up to Radsvinn's Rig. After fighting the enemies off, the Nornir Chest is on the left-hand side. You need to ignite three runes using the Blades of Chaos. This chest will reward you with an Idunn Apple.
The first rune is just to the left of the Nornir Chest. The second can be found towards the back of the area behind some barrels — use a Sonic Arrow from Atreus to destroy them. The third rune is opposite the Nornir Chest behind a grate; to light it, get up high and hit the explosive pot above it.
All Svartalfheim Collectibles Nornir Chests Nornir Chest #5
Location: Alberich Island
Found during The Quest for Tyr. After getting off the boat, the Nornir Chest is just ahead on the right. You need to strike all three runes within a short window of time. It will reward you with a Horn of Blood Mead.
The first rune is just behind the Nornir Chest to its right. The second rune is located opposite the chest. In order to hit it, you need to first strike the crane with a sonic arrow (the portion glowing green). The third rune is located further up the beach to the left. To hit it, first throw your axe at the spinner to its left.
All Svartalfheim Collectibles Nornir Chests Nornir Chest #6
Location: Jarnsmida Pitmines
Found during The Quest for Tyr. You'll see this chest immediately after grappling over the cargo container. You need to light the braziers bearing the three runes. This chest rewards you with a Horn of Blood Mead.
The first rune is immediately to the left of the Nornir Chest. Drop down to the left for the next one. Recall your axe if you haven't already to reveal a grapple point. You'll see the rune dead ahead. For the third, grapple back over and stop the water supply with your axe so you can light the brazier.
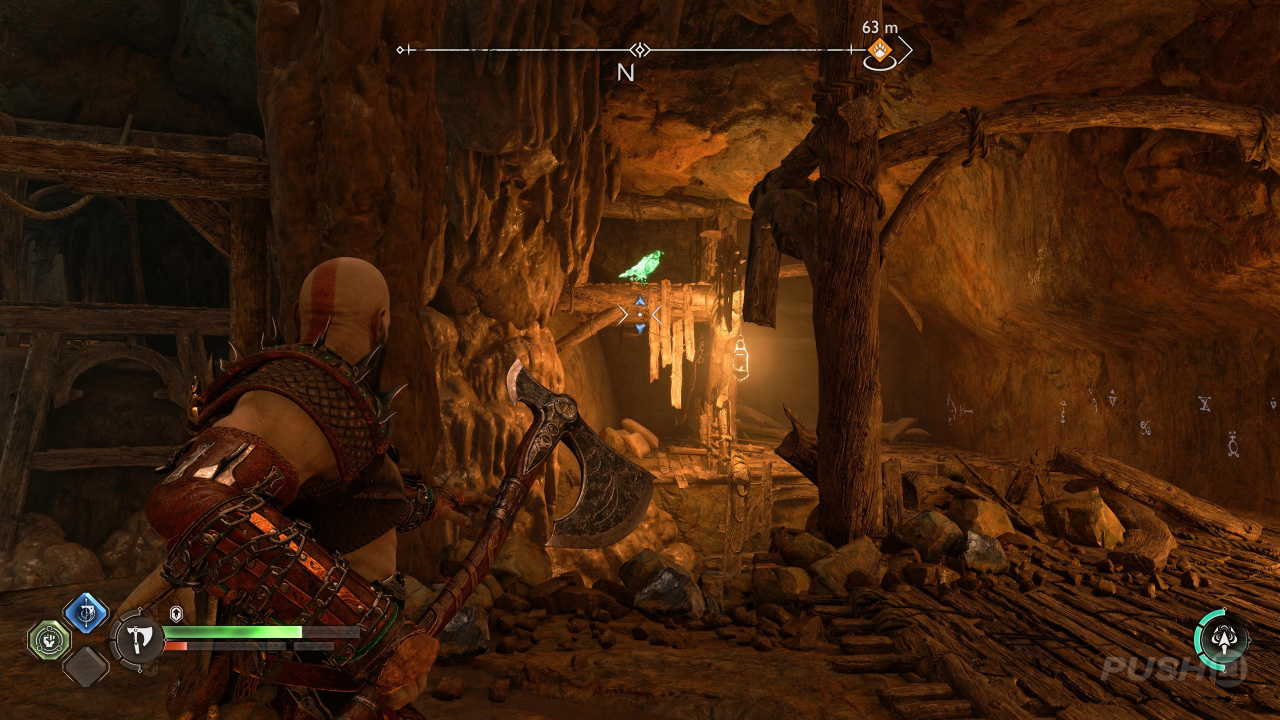
All Svartalfheim Collectibles Nornir Chests Nornir Chest #7
Location: Myrkr Tunnels
Found during Forging Destiny. After crawling through a low passage, this Nornir Chest will be dead ahead of you. It rewards you with an Idunn Apple.
The first brazier is just opposite the Nornir Chest. The second brazier is just to the left of the Nornir Chest. Throw your axe at the barrel next to it, then light the oil using a runic arrow to light the brazier. The third is back down the hall a little, on the left, hidden behind some crates.
All Svartalfheim Collectibles Nornir Chests Nornir Chest #8
Location: The Forge
Note: You cannot complete this Nornir Chest until after completing Forging Destiny.
After meeting back up with Freya, you will loop back around to the earlier portion of The Forge. The chest is next to a rock with a green love heart. It rewards you with a Horn of Blood Mead.
The first rune is actually back out the way you came. Go back out and around to the left to find it sitting on some rocks. Return to the Nornir Chest location for the other two. One is on the rockface opposite the chest, on the right-hand side. The other is across on another cliff opposite some wooden posts. Hit all three with a spear before detonating them all.
All Svartalfheim Collectibles Nornir Chests Nornir Chest #9
Location: The Applecore
Found after completing Forging Destiny. This Nornir Chest is located in the same area as Yggdrasil Rift #7, over to the right. It rewards you with an Idunn Apple.
Off to the right of the chest, the first rune is hidden behind some falling water. Use the axe to stop the flow and allow you to throw a spear at the rune. The second is left of the chest, opposite the Mystic Gateway. The third is further left behind some debris, which you can break using an exploding pot.
All Svartalfheim Collectibles Nornir Chests Nornir Chest #10
Location: The Applecore
Found after completing Forging Destiny. Return to the Applecore via Sverd Sands, using the ferry from Aurvangar Wetlands. After using the big lift, continue down the path until you see a spear embed point on the right. Climb up and continue up this way to find the chest. It rewards you with a Horn of Blood Mead.
The first two runes can be seen off to the left of the Nornir Chest. To the right of the chest are two ledges to climb. Do this, and turn to the right to find the third rune.
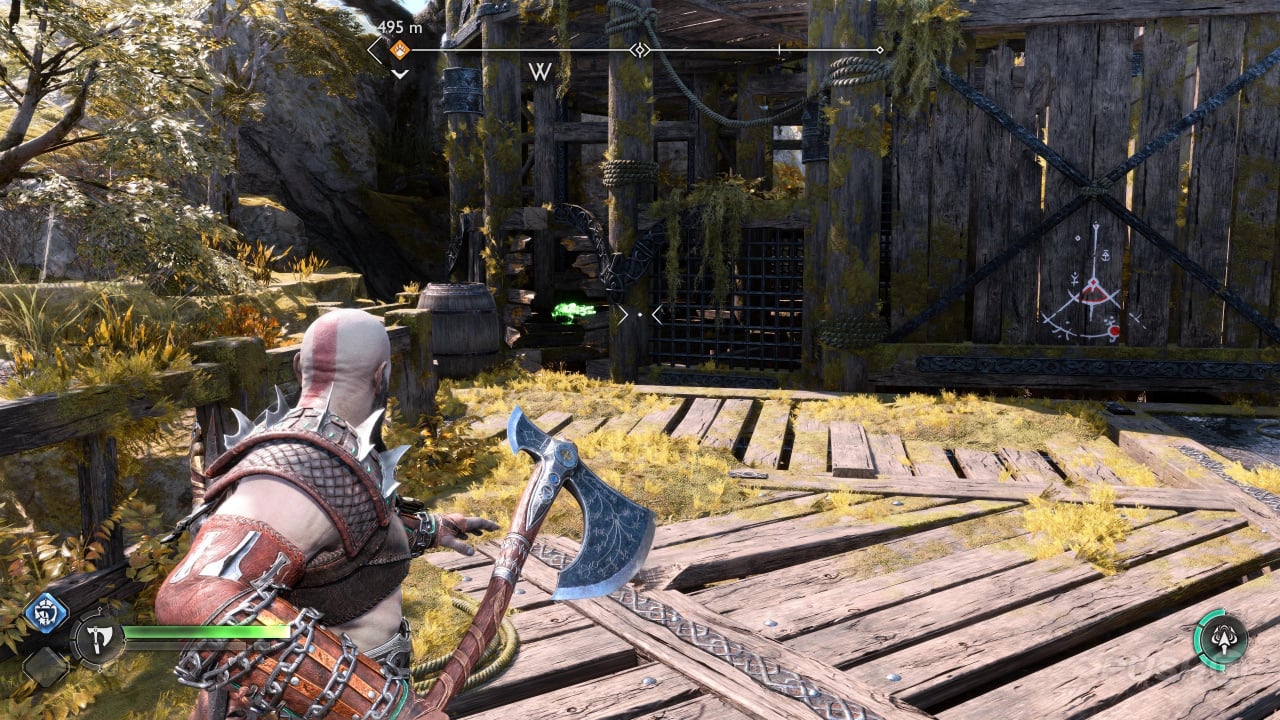
All Svartalfheim Collectibles Odin's Ravens
Odin's Ravens are green, shining birds dotted around the game. They normally stand out, but they will also make shimmering sounds when you're nearby. Throw your axe at them to "collect" them. Find and kill all Odin's Ravens to complete the Favour named The Eyes of Odin.
All Svartalfheim Collectibles Odin's Ravens Odin's Raven #1
Location: Aurvangar Wetlands
Found during The Quest for Tyr. When you first enter Aurvangar Wetlands at the beginning of The Quest for Tyr, head forwards a little and you will find this Odin's Raven perched on a tall rock to the left.
All Svartalfheim Collectibles Odin's Ravens Odin's Raven #2
Location: Nidavellir
Found during The Quest for Tyr. Dock the boat and head up into the town. As you venture up towards the statue of Odin, you'll spot this Odin's Raven perched on a building to the left.
All Svartalfheim Collectibles Odin's Ravens Odin's Raven #3
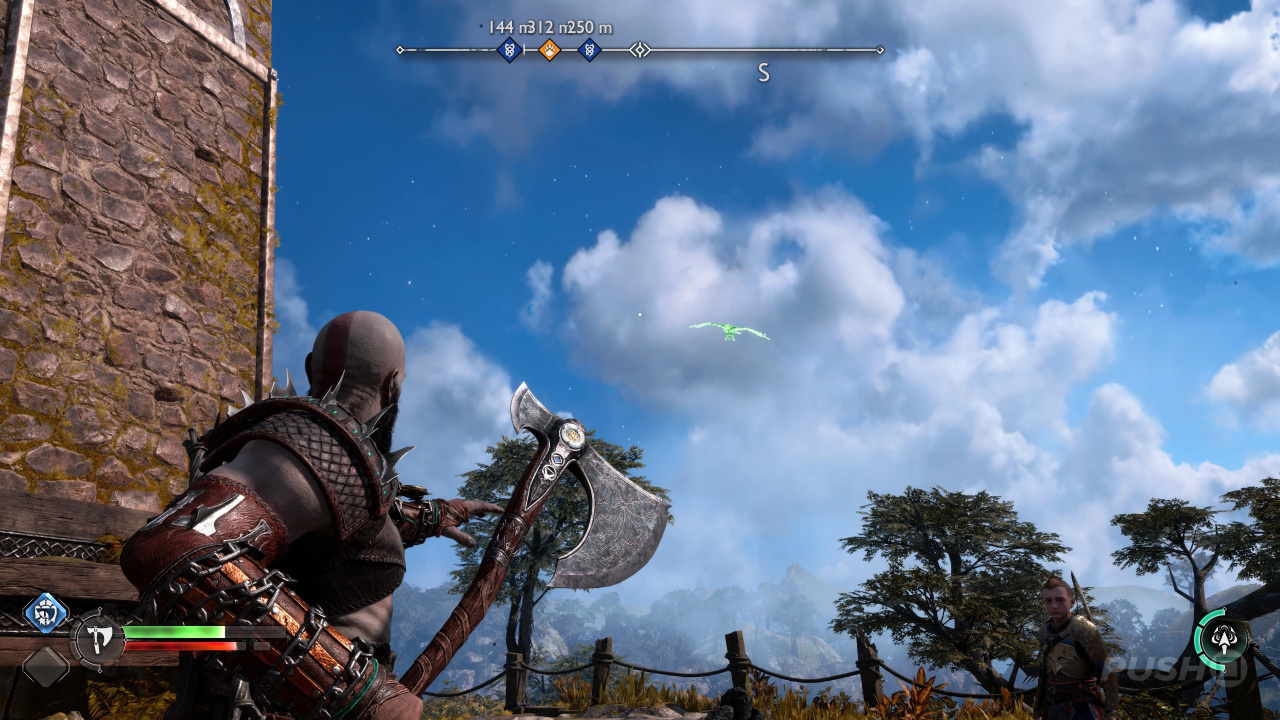
Location: The Watchtower
Found during The Quest for Tyr. After defeating The Hateful and closing the Draugr Hole, you can concentrate on catching this Odin's Raven, which is flying around the area.
All Svartalfheim Collectibles Odin's Ravens Odin's Raven #4
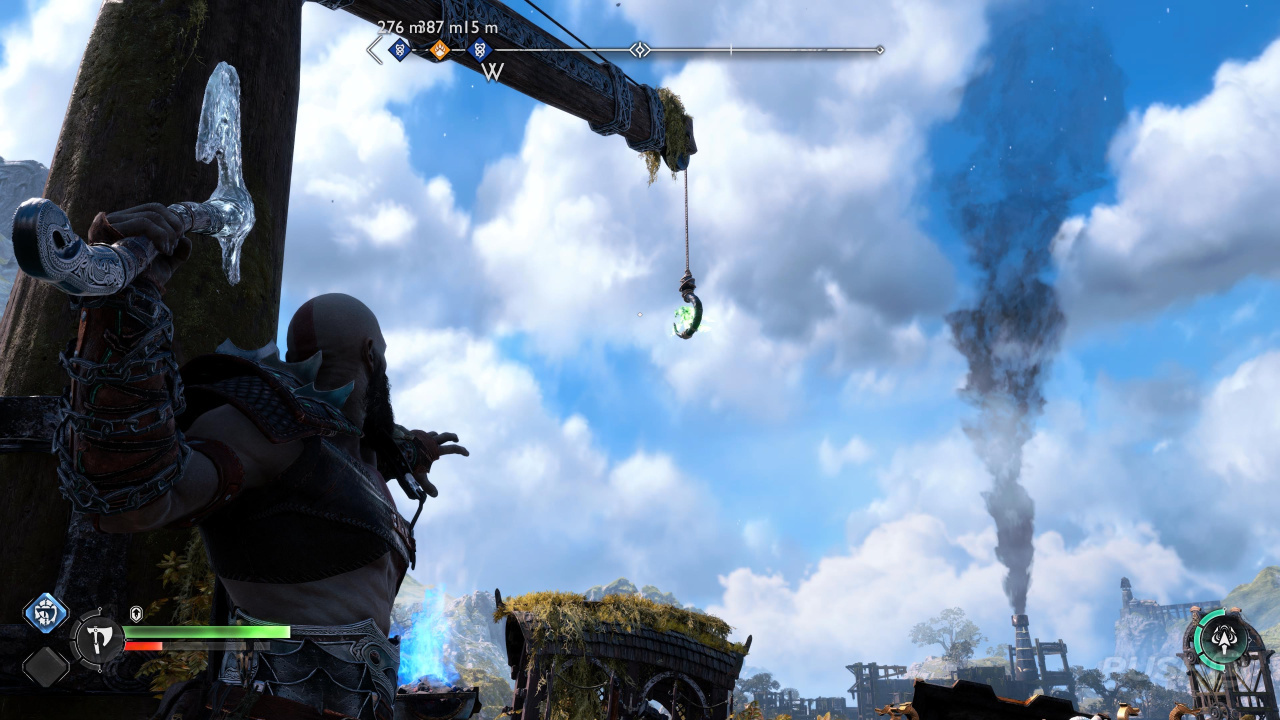
Location: Radsvinn's Rig
Found during The Quest for Tyr. At the rig, to the left is a crane. The Odin's Raven is perching on the hook.
All Svartalfheim Collectibles Odin's Ravens Odin's Raven #5
Location: Althjof's Rig
Found during The Quest for Tyr. After docking at Althjof's Rig, climb the chain and this Odin's Raven is just ahead to the left.
All Svartalfheim Collectibles Odin's Ravens Odin's Raven #6
Location: Lyngbakr Island
Found during The Quest for Tyr. After destroying the second binding, you'll be attacked by a nest of baddies. Destroy the nest and you'll discover fire bombs. Open the gate on the left, then take a bomb through. Run back around to the right to find large golden deposits. Throw the bomb at them to destroy them, then grapple across. On the right is a small tunnel. Go through, and on the left is the Odin's Raven.
All Svartalfheim Collectibles Odin's Ravens Odin's Raven #7
Location: The Forge
Found during The Quest for Tyr. The first Odin's Raven in this region can be found immediately as you arrive. You will see it flying in a circle in front of you.
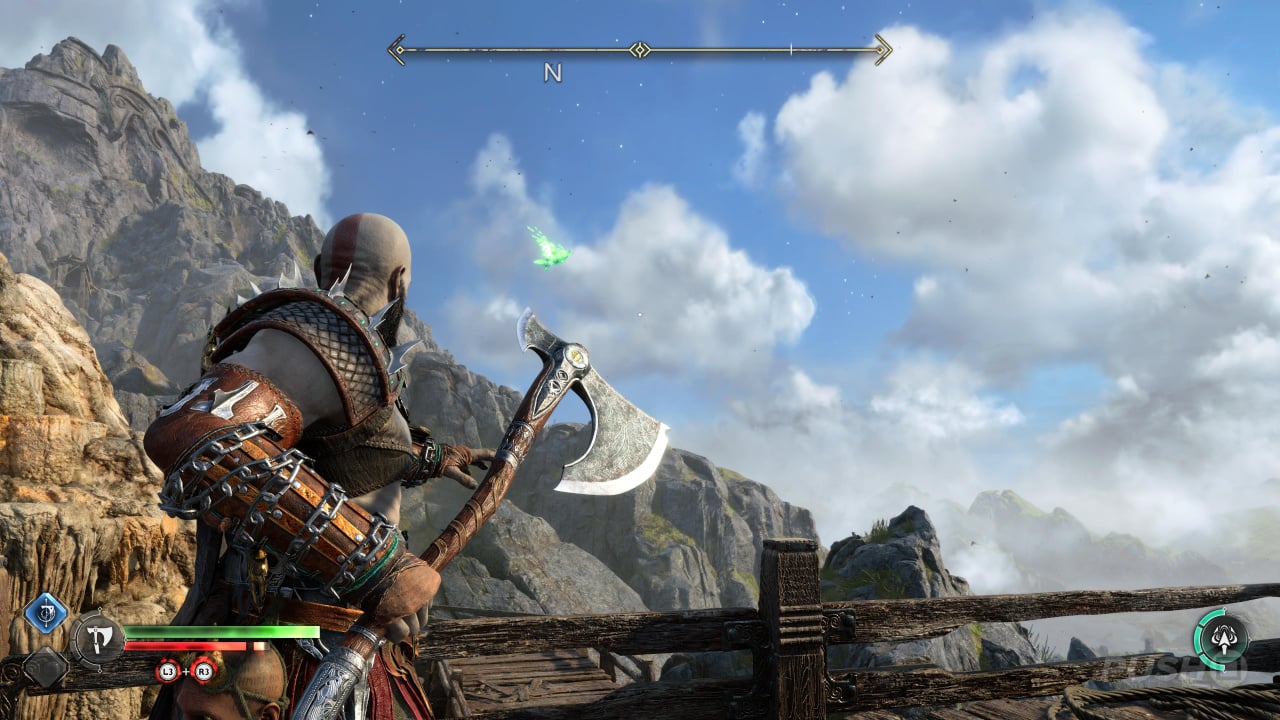
All Svartalfheim Collectibles Odin's Ravens Odin's Raven #8
Location: The Forge
Found during Forging Destiny. After you ride the lift up the mountain with Brok, you'll go through a short tunnel. Out on the other side, you'll see this Odin's Raven ahead on a nearby ledge.
All Svartalfheim Collectibles Odin's Ravens Odin's Raven #9
Location: Jarnsmida Pitmines
Found during The Quest for Tyr. After taking the second train down towards the mine, fend off the enemies. Lower down in this area is a chain that leads down to the water. You should spot the Odin's Raven circling in the sky, but it gets very close to this lower platform, making it easy to pick off.
All Svartalfheim Collectibles Odin's Ravens Odin's Raven #10
Location: The Applecore
Found during The Quest for Tyr. After solving a puzzle involving water wheels, you'll come to a large wooden door. Before you go inside, turn to the left to see this Odin's Raven hanging out across the way.
All Svartalfheim Collectibles Odin's Ravens Odin's Raven #11
Location: Alberich Hollow
Found after completing Forging Destiny. Alberich Hollow is accessed via Dragon Beach. The path will be blocked by gold debris. Use the nearby fire bombs to clear it, then this Odin's Raven will be visible on the left-hand side.
All Svartalfheim Collectibles Odin's Ravens Odin's Raven #12
Location: Alberich Island
Found after completing Forging Destiny. Use a spear to climb up to a higher area. Follow the path to the right, and on the left is some debris you can clear with a sonic arrow. The Odin's Raven is flying just beyond this point.
All Svartalfheim Collectibles Odin's Ravens Odin's Raven #13
Location: Alberich Island
Found after completing Forging Destiny. After using the grapple point to reach the lower wooden decking, use a second grapple point to cross over to a small island. Just ahead, climb the ledge, and you can spot this Odin's Raven through a hole in the rocks.
All Svartalfheim Collectibles Remnants of Asgard
Remnants of Asgard are post-game arena battles found dotted across most of the realms. They appear in the game after completing The Realms at War.
All Svartalfheim Collectibles Remnants of Asgard Remnant of Asgard #1
Location: Aurvangar Wetlands
Travel to the Mystic Gateway at Aurvangar Wetlands. Take the boat and row up the river. About half-way towards Nidavellir, you can pass through a small passageway on the left. Do this, and on the other side you'll find the Remnant of Asgard.
All Svartalfheim Collectibles Remnants of Asgard Remnant of Asgard #2
Location: Jarnsmida Pitmines
Travel to the Mystic Gateway at Jarnsmida Pitmines. Immediately on your right will be a chain up to a higher level. As soon as you ascend the chain, you'll be in the Remnant of Asgard.
All Svartalfheim Collectibles Remnants of Asgard Remnant of Asgard #3
Location: Alberich Hollow
Travel to the Mystic Gateway at The Watchtower. Get aboard the south-facing boat and sail it east to Dragon Beach. Go up the chain to the left and follow the path up and around towards Alberich Hollow, where you'll run into this Remnant of Asgard.
All Svartalfheim Collectibles Yggdrasil Rifts
These hovering rifts glow blue, and when you approach them, they may send out some high-level enemies for you to tackle. Once conquered, interact with it again for a reward.
All Svartalfheim Collectibles Yggdrasil Rifts Yggdrasil Rift #1
Location: Myrkr Tunnels
Found during Forging Destiny. You will see this Yggdrasil Rift straight ahead of you after opening the second gate, near the end of the area. This one does not contain a combat trial.
All Svartalfheim Collectibles Yggdrasil Rifts Yggdrasil Rift #2
Location: The Forge
Found during Forging Destiny. After obtaining the Draupnir Spear, you'll learn about embed points. Before you climb the first one, look up to the left of it. There's another embed point higher up, so throw another spear into it. Climb the first spear, then swing over the second one to reach this Yggdrasil Rift. It contains one of the Lindwyrms required for the Favour, The Lost Lindwyrms.
All Svartalfheim Collectibles Yggdrasil Rifts Yggdrasil Rift #3
Location: The Forge
Found shortly after completing Forging Destiny. Once you reunite with Freya, continue back down until you come to a gap between the rocks you can squeeze through. On the other side, you'll find this Yggdrasil Rift.
All Svartalfheim Collectibles Yggdrasil Rifts Yggdrasil Rift #4
Location: Dragon Beach
Found after completing Forging Destiny. Return to Dragon Beach and climb the chain on the left-hand side. Use a spear to climb up to the higher platform, then to your left will be a grapple point. Across the other side, duck under the beam to your right to find this Yggdrasil Rift.
All Svartalfheim Collectibles Yggdrasil Rifts Yggdrasil Rift #5
Location: Alberich Hollow
Found after completing Forging Destiny. After defeating Ormstunga, continue forward until you see a climbable ledge on the left. This Yggdrasil Rift is up here. Inside is one of the Lindwyrms needed for the Favour, The Lost Lindwyrms.
All Svartalfheim Collectibles Yggdrasil Rifts Yggdrasil Rift #6
Location: Alberich Island
Found after completing Forging Destiny. At the location of Odin's Raven #12, look down to the right to see a rock you can blow up with a spear. Do this, and the water will make a grapple point raise up. Use the grapple point to reach this Yggdrasil Rift. It contains one of the Lindwyrms required for the Favour, The Lost Lindwyrms.
All Svartalfheim Collectibles Yggdrasil Rifts Yggdrasil Rift #7
Location: The Applecore
Found after completing Forging Destiny. After finding Althjof's Statue, up to the right is a spear embed point. Use this to jump to a new area. The Yggdrasil Rift is to your left. It contains one of the Lindwyrms required for the Favour, The Lost Lindwyrms.
Have you found all Svartalfheim collectibles in God of War Ragnarok? Tell us in the comments section below, and check out our God of War Ragnarok guide for lots more.


Comments 0
Wow, no comments yet... why not be the first?
Leave A Comment
Hold on there, you need to login to post a comment...