Raccoon City is the third location you'll visit in Resident Evil Requiem, or Resident Evil 9. In this Resident Evil Requiem guide, we provide a Raccoon City walkthrough, documenting where to find all Collectibles in the area.
Subscribe to Push Square on YouTube171k
Resident Evil Requiem: Raccoon City Walkthrough - All Collectibles: Files, Mr. Raccoons, BSAA Containers
There are 18 Files, 13 Mr. Raccoons, and 3 BSAA Containers to find in Raccoon City. This page is structured to list the Collectibles in the order you would find them, in accordance with progression through the location. As Raccoon City is split up into three sections, we've followed the names on the game's map. Below is our Raccoon City walkthrough and all Collectibles locations.
All East Raccoon City Collectibles
In the East Raccoon City section, there are 6 Files, 9 Mr. Raccoons, and 3 BSAA Containers to find. Below is our East Raccoon City walkthrough and all Collectibles locations.
File #1: Report on the Raccoon City Incident
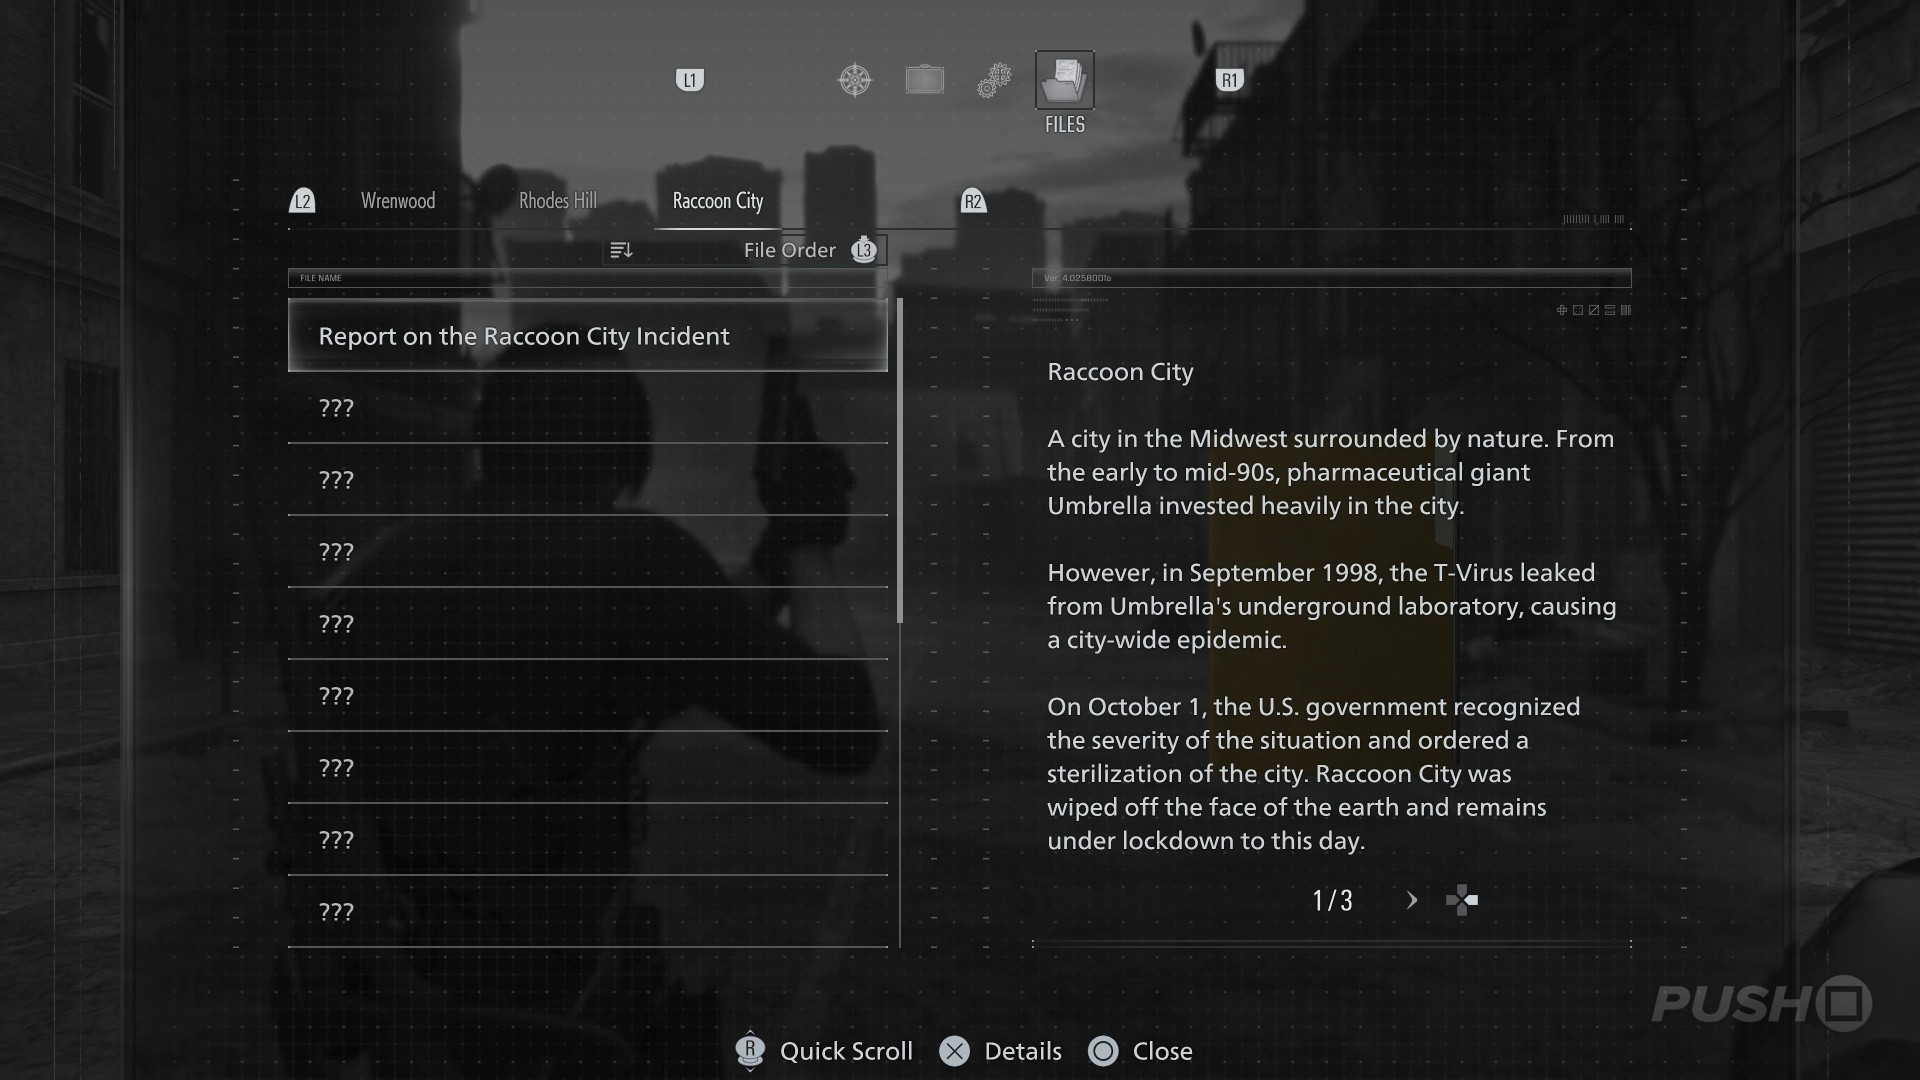
- This File is automatically added to your Files list upon gaining control of Leon
File #2: Raccoon City Incident Newspaper
- When you gain control of Leon, search the rubbish to your right to find the Raccoon City Incident Newspaper
Mr. Raccoon #1
Area: Cafe Oasis
- From your starting position in Raccoon City, go down the street and take a right
- Enter the first building on your left, which is Cafe Oasis
- The Mr. Raccoon is dancing behind the bar
File #3: Orders for the Engineer Corps
Area: Central Camp
- After the encounter with the giant spider, you'll return to street level in front of an Incomplete Bomb
- Head east to Central Camp, and this File will be in the tent
Mr. Raccoon #2
Area: Logistics Warehouse Roof
- On the rooftop of this building, you'll get the Distributor from a yellow case
- From its position, turn around and there'll be an elevator to take you back down
- Instead of going down, look across to the highway to the west
- There's a van infront of a truck directly across
- The Mr. Raccoon is placed on the roof of the van
Mr. Raccoon #3
Area: Underground Parking Garage
- Upon entering the Underground Parking Garage and rounding a corner, you'll get a prompt to perform a stealth attack on a zombie
- From its position go into the room on your left
- The Mr. Raccoon will be on top of some storage boxes on your immediate right
File #4: Battery Storage Locations
Area: Underground Parking Garage
- When in the Underground Parking Garage, follow the path through until you spot a pool of water in front of a large metal grate blocking the path
- Shoot the zombie here, then interact with the File stuck to the Battery Box
Mr. Raccoon #4
- After working your way through Cedarbrook Apartments, you'll return to the street outside and a cutscene will play
- When you regain control of Leon, go down the street to the left
- At the front of the bus nearby is the Mr. Raccoon
BSAA Container #1
Area: Central Camp
- During a main story cutscene, you'll get the BSAA Container Key
- Return to Central Camp and unlock the BSAA Container
File #5: Inventory List
- From the place where you get the BSAA Container Key in a cutscene, enter the container to your left
- The File is pinned in the back
Mr. Raccoon #5
Area: Gas Station
- Having climbed into the Gas Station, enter the building on the right and the Mr. Raccoon will be right in front on the shelving units
Mr. Raccoon #6
- Go to the crane northeast of Central Camp and lower the pilons it has to cover the big hole in the road
- Get on the path, then look towards the remains of a large pipe below you
- The Mr. Raccoon will be there
Mr. Raccoon #7
- Next to the crane is a generator you can turn on once you have Fuel
- Do so, and climb into the area it grants you access to
- On the right side, from where you enter, drop down into the hatch to reach the train tracks
- Go inside the derailed train car to find the Mr. Raccoon inside
BSAA Container #2
- From the site of Mr. Raccoon #6, continue working through Ridgewood Station until you find a way outside, back to where you first started in Raccoon City
- You can now open the BSAA Container here
BSAA Container #3
- When completing the objectives tied to the detonator parts, get onto the main street outside and go all the way east, where cars are piled up
- Follow the path through them, and double back at one point to where you can climb a ladder to get on top of them
- Drop down on the right side, and you'll find the BSAA Container
Mr. Raccoon #8
Area: Cedarbrook Apartments
- Having gotten the Rusty Crank, go back upstairs (defeat the enemy that appears) and outside to where you can use the Rusty Crank
- Climb the ladder, then take an immediate right back inside to the stairwell
- Follow the path to the left to find the Mr. Raccoon placed inside an open fridge
File #6: Engineer Corps Note
Area: Cedarbrook Apartments Roof
- Having killed all the zombies launching missiles at you, make your way to the roof top with the Signal Receiver
- This File will be in the case next to it
Mr. Raccoon #9
Area: Willis Tower
- Having used the zipline to get across, go to the top floor of Willis Tower
- You can either take a left or right at the top of the stairs, and you should go right
- Follow the path into an office space, and the Mr. Raccoon is on a shelving unit to the right
All Raccoon City Center Collectibles
In the Raccoon City Center section, there are 12 Files and 4 Mr. Raccoons to find. Below is our Raccoon City Center walkthrough and all Collectibles locations.
Mr. Raccoon #1
- When you gain control of Leon, the game will push you towards an alley off your starting position in Raccoon City Center
- Instead, go left to where the rubble of a truck is
- In the rubble to the right is the Mr. Raccoon
File #1: R.P.D. Perimeter Report
Area: R.P.D. — Main Hall
- This File is placed on top of the boxes opposite the Supply Box in the Main Hall
File #2: Top Secret Operation
Area: R.P.D. — West Hall
- Enter the West Hall off the Main Hall and read this File on Marvin Branagh's desk
File #3: Record of Events
Area: R.P.D. — Operations Room
- Interact with the blackboard to find this File pinned to it
Mr. Raccoon #2
Area: R.P.D. — Operations Room
- Look outside, where all the rubble is
- There's a window that's been boarded up, and the Mr. Raccoon is dancing behind the bottom plank
File #4: Library Card
Area: R.P.D. — S.T.A.R.S. Office
- As soon as you enter the room, turn left and go into the smaller office on the side
- Open the drawer in the desk and wait for a few seconds
- This File will appear inside
File #5: Scavenger Hunt - Clue 2
Area: R.P.D. — S.T.A.R.S. Office
- As soon as you enter the room, turn right and open the locker to find this File
File #6: Scavenger Hunt - Clue 1
Area: R.P.D. — S.T.A.R.S. Office
- Interact with the coat on the back wall of the office, in between the computers
File #7: Barry's To Do List
Area: R.P.D. — S.T.A.R.S. Office
- As you enter the office, this File is on the left-most desk
Mr. Raccoon #3
Area: R.P.D. — Library
- Face the large bookshelf that's pointing north as you look at the map
- In an open cupboard at the bottom of the bookshelf, there'll be a pile of books blocking your view inside
- The Mr. Raccoon is in here
File #8: Photograph
Area: R.P.D — Library
- Go to the second floor in the library and cross the walkway
- On the right side, there'll be a book you can interact with for the File
- This only appears if you've already interacted with the 3 Files in the S.T.A.R.S. Office
File #9: Toe Tag
Area: Crypt
- When playing as the little girl in the flashback sequence, you'll eventually reach a crypt
- Open the coffin to the right to find the File inside
File #10: Series 60 Results
Area: Research Lab
- Upon entering the Research Lab as the little girl, this File will be on the desk directly in front of you
File #11: New Researcher's Notebook
Area: Research Lab
- This File is on the other long desk in the Research Lab
File #12: Guide Pamphlet
Area: Main Hall
- After the chase sequence (you'll know the one) leads you back to the Main Hall on the second floor, turn around and head south
- The File will be on a couch at the end of the hall
Mr. Raccoon #4
Area: Gun Shop Kendo
- After the flashbacks to Kendo from Resident Evil 2, go around to the right of the shop instead of walking forward
- Look up to the large Umbrella poster, and then to its left to the window ledge
- The Mr. Raccoon is up there dancing
Have you found our Raccoon City walkthrough for Resident Evil Requiem useful? Let us know in the comments below and check out our Resident Evil Requiem guide for further help and information.


Comments 0
Wow, no comments yet... why not be the first?
Leave A Comment
Hold on there, you need to login to post a comment...