How do you install an internal PS5 SSD and expand your storage? As any long-standing PlayStation 5 owner will tell you, the 825GB SSD that the console ships with doesn't go as far as you'd imagine (See Also: PS5 SSD: How Much Storage Space Does It Have?). With the OS swallowing up a bit of space, you're ultimately left with around 667GB of storage for game installs, which quickly gets eaten up if you're a keen gamer with a large library of titles.
Thankfully, it is possible to expand the storage capacity of your PS5 using an M.2 SSD. That means you'll get the original 825GB plus whatever additional storage you add via an M.2 SSD.
 Watch on YouTube
Subscribe to Push Square on YouTube170k
In this PS5 guide, we'll explain how to open up your PS5 console for the installation and how to actually fit your shiny new M.2 SSD and expand the amount of storage space you have available for games with a PS5 SSD upgrade. If you've not yet bought a new drive, then you can find the Best PS5 SSD: Compatible M.2 SSD Storage Expansion for PS5 through the link.
Note: The following steps will only work if are running PS5 firmware 2.0-04.00.00 on your PS5. Do not attempt to install an SSD if you're running the standard retail firmware, as it simply won't work.
PS5 SSD: How to Install an Internal SSD and Expand Your Storage
Below, we're going to explain how to install and internal PS5 SSD and show you how to expand your storage.
Purchase a Compatible M.2 SSD
You'd think that the PS5 would accept any old SSD, but you'd be wrong. You need an M.2 SSD and it must have a heat sink connected. Sony recommends the SN850 from WD_Black, which comes with the personal seal of approval of PS5 system architect, Mark Cerny. That's the model we've used in this guide, and we can confirm it works perfectly. For other options, you can refer to our Best PS5 SSD: Compatible M.2 SSD Storage Expansion for PS5 guide.
You'll be able to use any M.2 SSD on your PS5 to expand your storage, but you'll need to ensure it has a read speed of 5,500MB/s or more and doesn't exceed a size of 110 x 25 x 11.25 millimetres with its heat sink attached. You can find all PS5 M.2 SSD Expansion Requirements through the link.
Just to reiterate, whichever model of SSD you end up using, make sure it has a heat sink installed – some come with them pre-fitted but you can buy heat sinks separately and fit them to the SSD.
Further reading: Best M.2 SSD for PS5 Storage Expansion
Open Up Your PS5
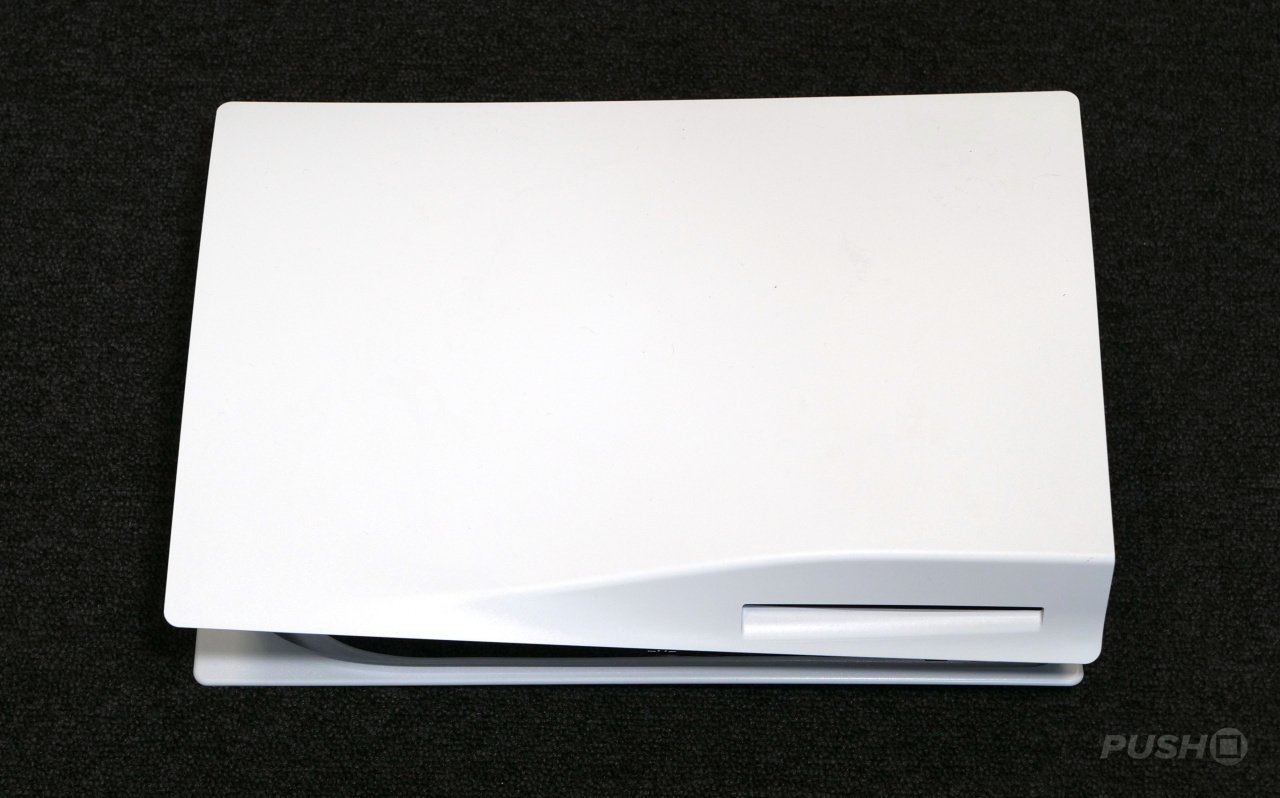
First, make sure you've unplugged your PS5 console – never try to do any install of this kind with the unit powered on.
Flip the console over, so the base of the unit is facing upwards, as shown below.
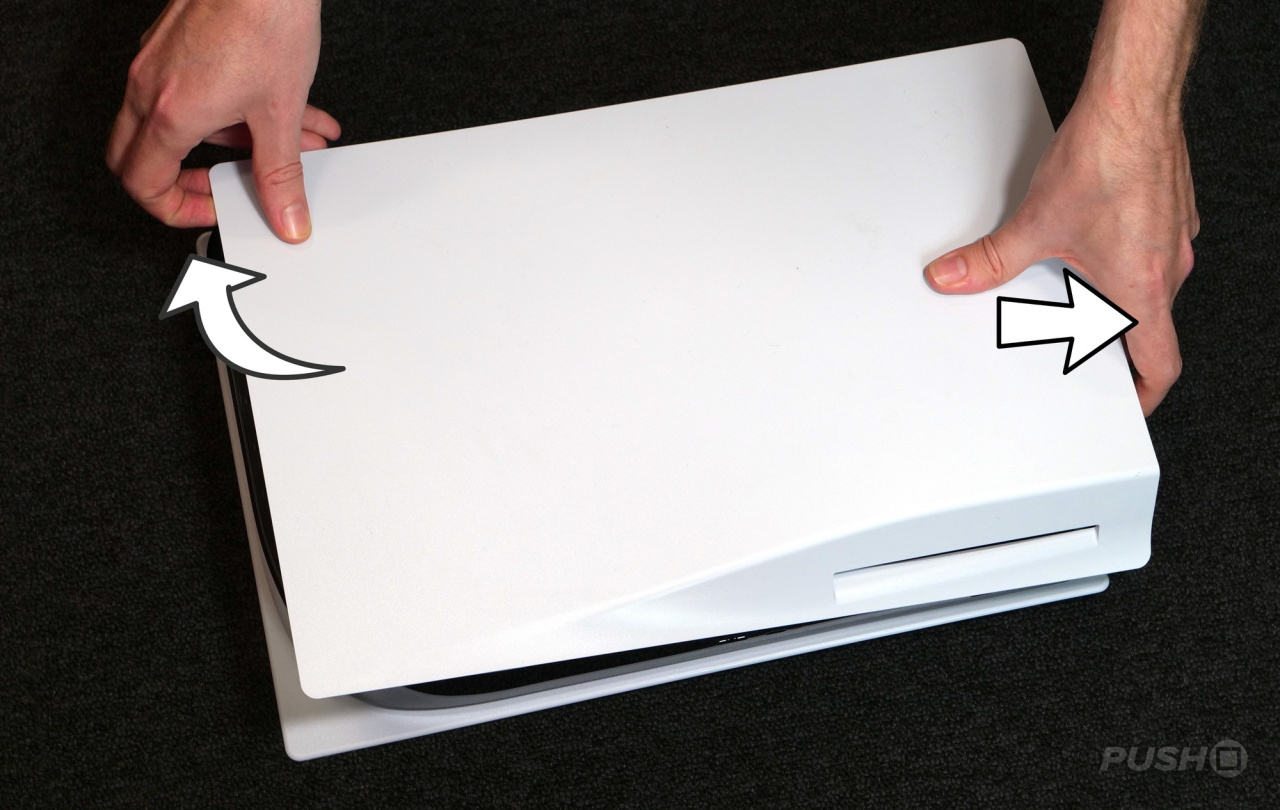
While it doesn't look like there's any obvious way of removing the bottom section of the PS5, it's actually quite a simple process when you know what you're doing. Grip both sides of the white base panel, as shown below.

With your right hand, gently lift the edge of the panel, and then, with your left hand, pull to the side in the direction shown. The panel should unclip from the main body of the console on the right-hand side, and then slide off, exposing the main bodywork of the system.
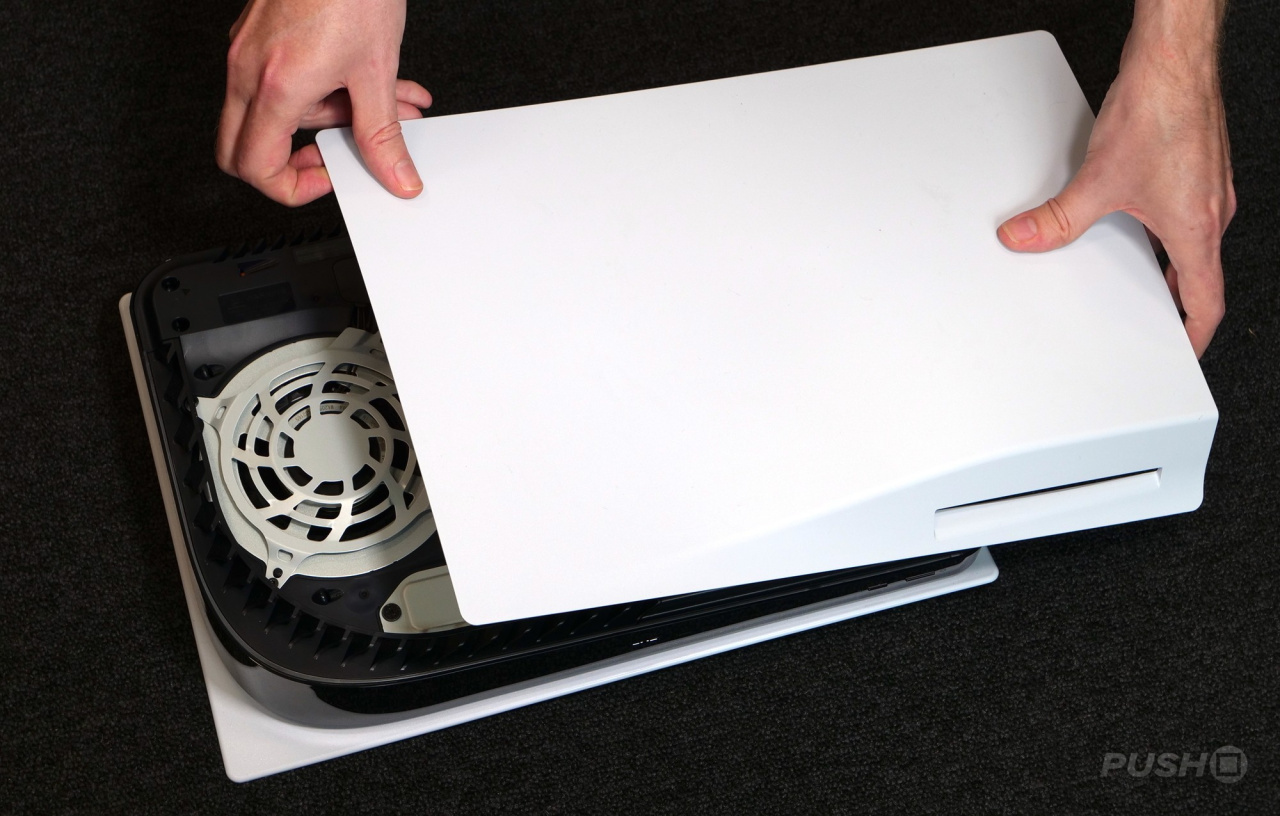
Remove the SSD Slot Cover
Right next to the PS5's fan, you'll see a metal cover held in place by a single screw, which, in a neat touch, has the PlayStation symbols engraved on it. Nice attention to detail, Sony! You can remove this screw using a standard cross-head screwdriver.
Install Your SSD
Once the slot is uncovered, you can install your M.2 SSD. In this case, we've selected the SN850 from WD_Black.
Before fitting the SSD, you'll need to make sure the heat sink is fitted. In the case of the SN850, there are two rubber bands included which you use to fit the heat sink to the SSD itself.
Once the SSD and heat sink are combined, the next job is to actually get the SSD into your console. There's a screw and a spacer at one end of the SSD slot which need to be removed and then refitted once the SSD is fitted in place (more on that in a moment, though). The size of the SSD you're fitting will determine where the screw is located on the holes shown below.
Next, place the spacer you saved earlier (just the spacer, not the screw) into the screw hole underneath the SSD and then insert the SSD into the slot as shown, making sure to align the contacts correctly. Give it a firm push and it will lock into position, which only leaves the screw (also saved from earlier) to be fitted on top to keep it 100% secure.
Reassemble the PS5
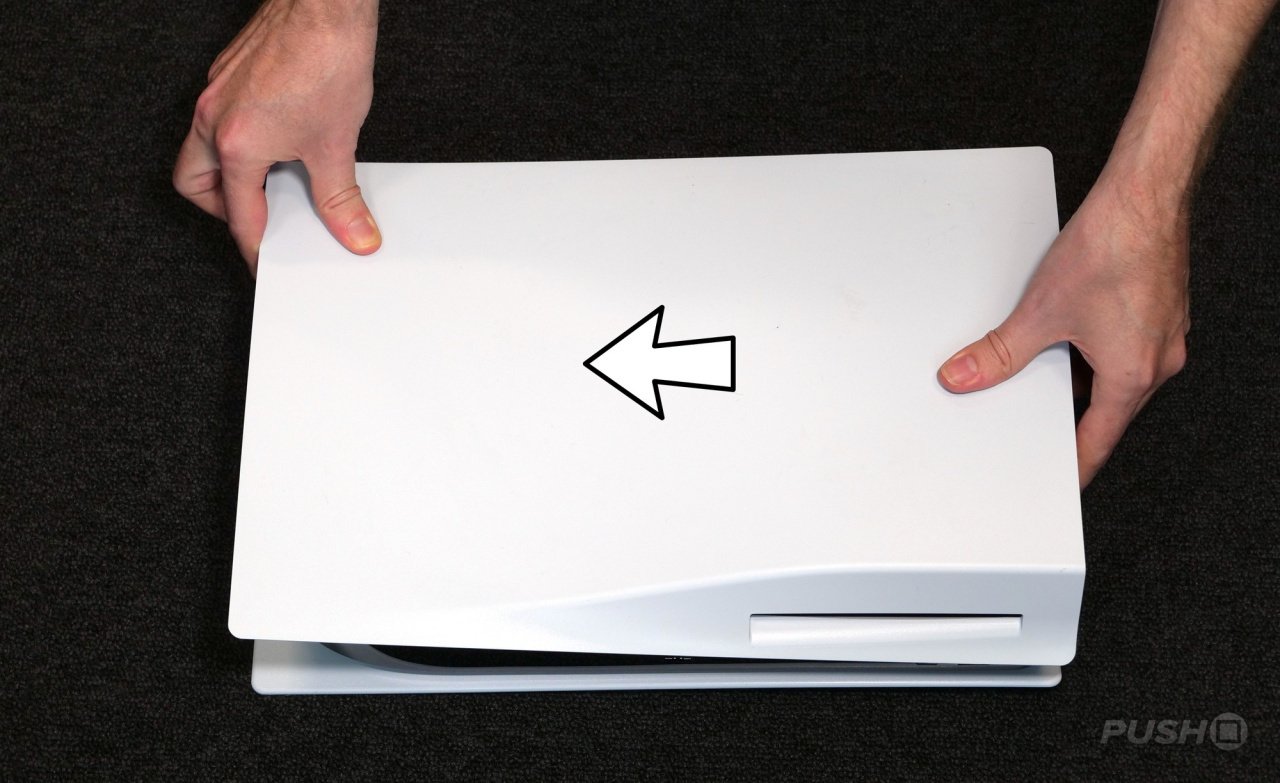
With the SSD firmly in place, refit the SSD slot cover using the screw, then refit the white bottom panel. You can do this by sliding it in the direction shown below until it clicks back into place.
Formatting the SSD for Use in Your PS5
When you first power up your PS5 after installing the SSD, you'll see the following screen:
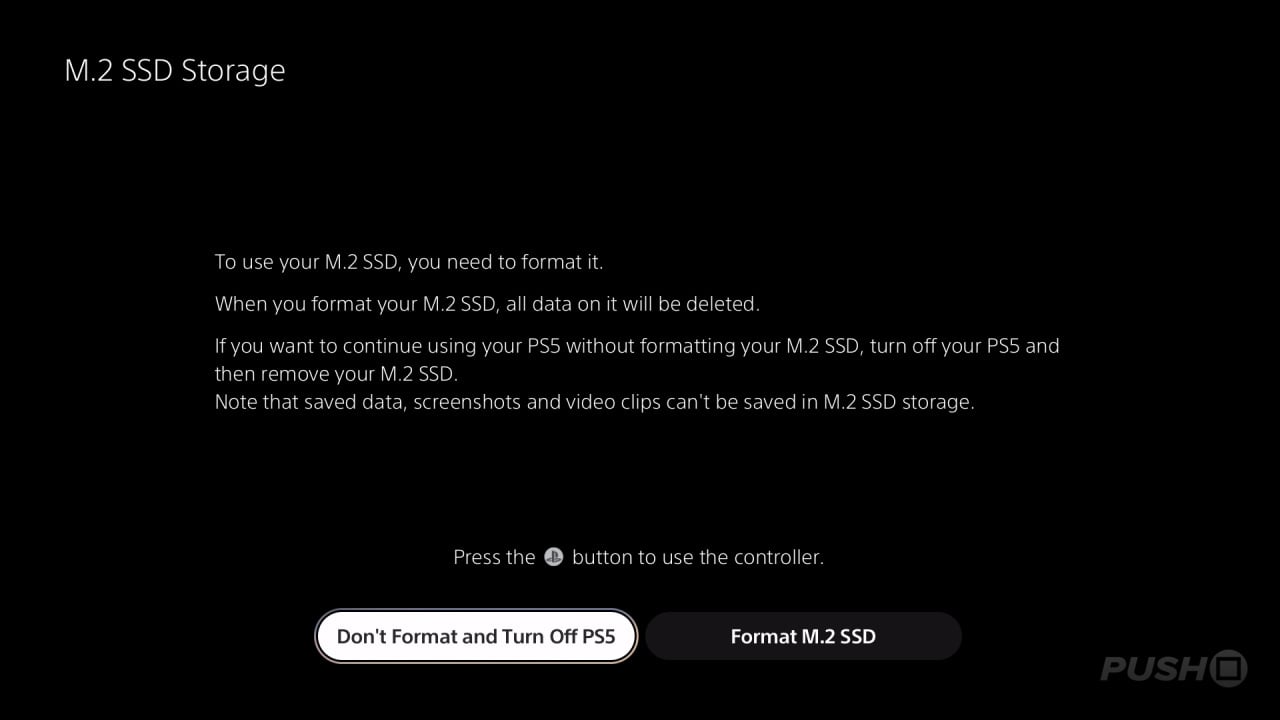
As you might expect, you need to select the Format M.2 SSD to make sure the console can use it for game storage. If you don't select this option at this stage, the PS5 will boot as normal and you won't be able to use all that lovely additional space.
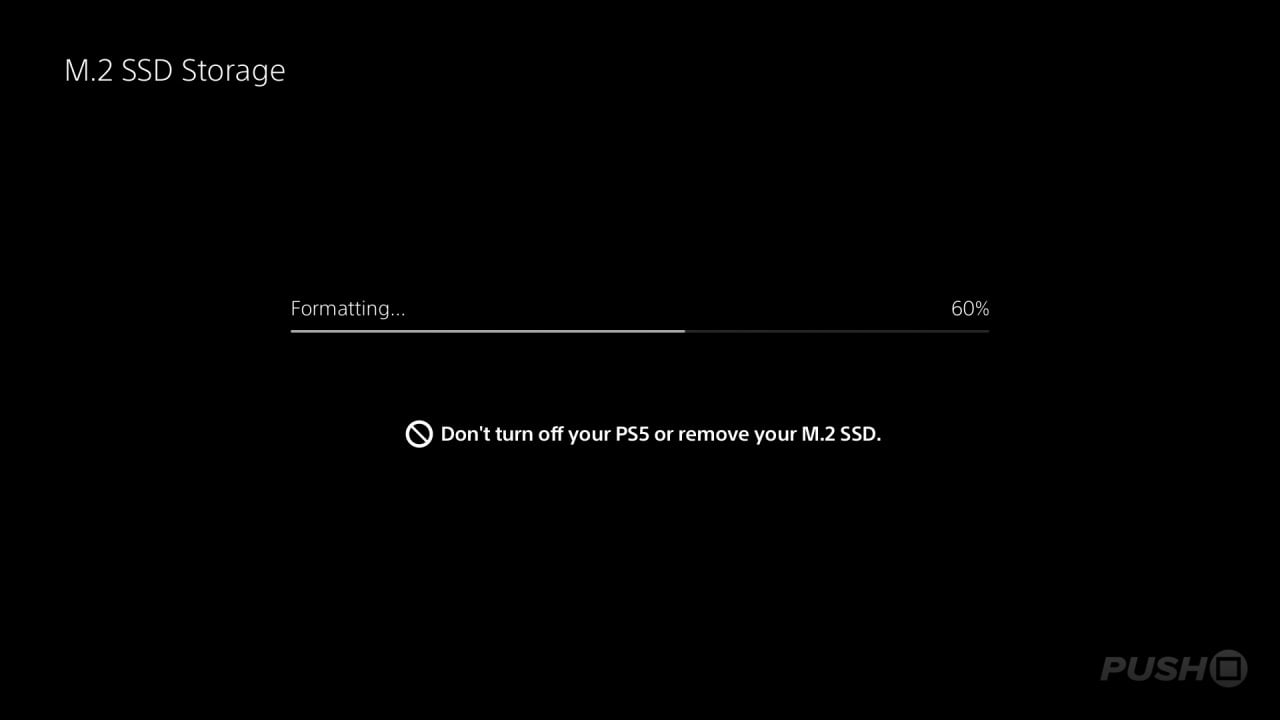
Upon selecting the formatting option, you'll see the following screen:
You'll then be told how fast your SSD can read data, which will impact how it performs when games are installed to it. As you can see from the screen below, the SN850 is well above the 5,500MB/s read speed recommended by Sony, so we're all good.
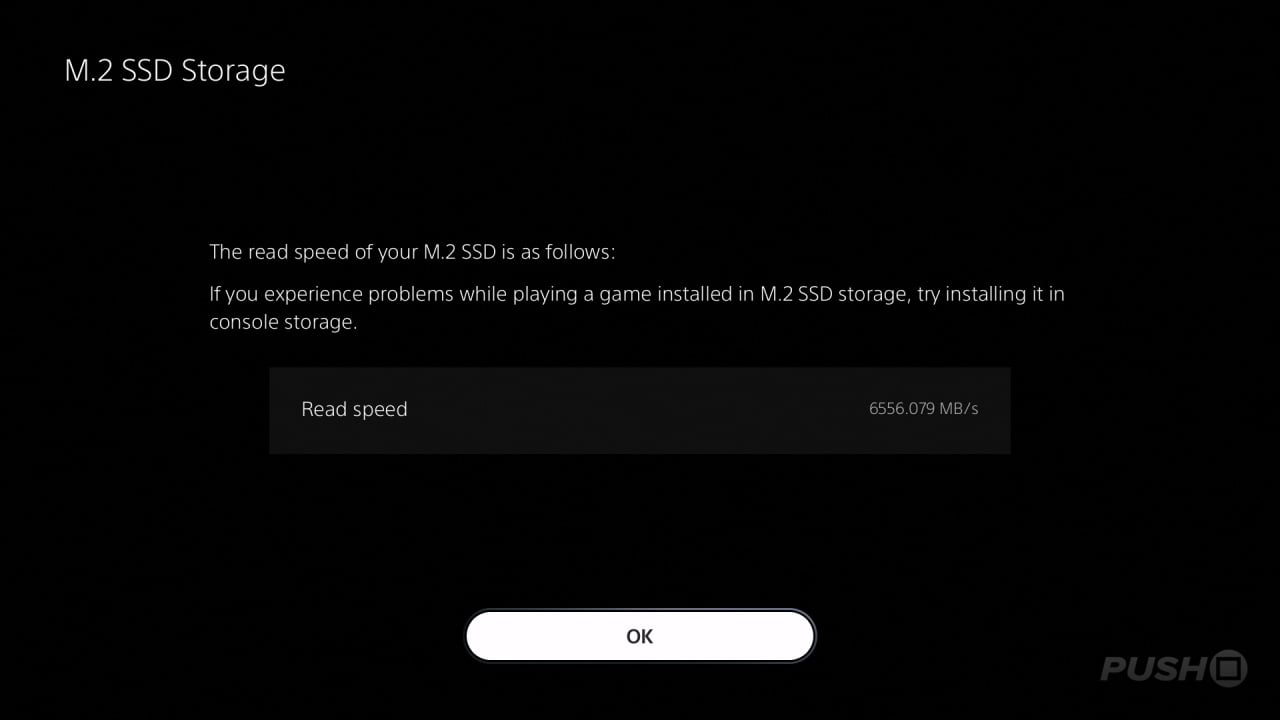
With the process successfully completed, you'll see the following confirmation screen:

PS5 SSD: How to Select the SSD as Your Primary Installation Location
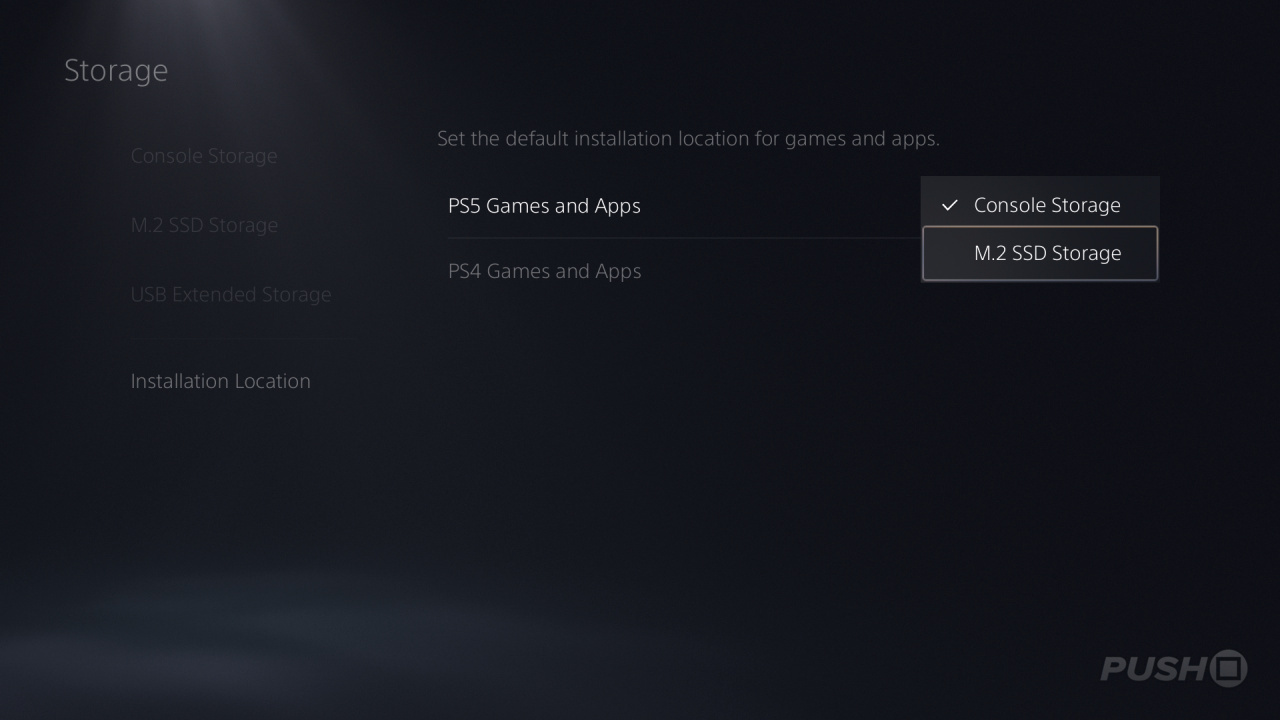
By default, your PS5 will install games to its built-in SSD, so if you want to start dumping games on your new M.2 SSD, you'll need to change a setting. Go to Settings > Storage, and you'll see the following screen:
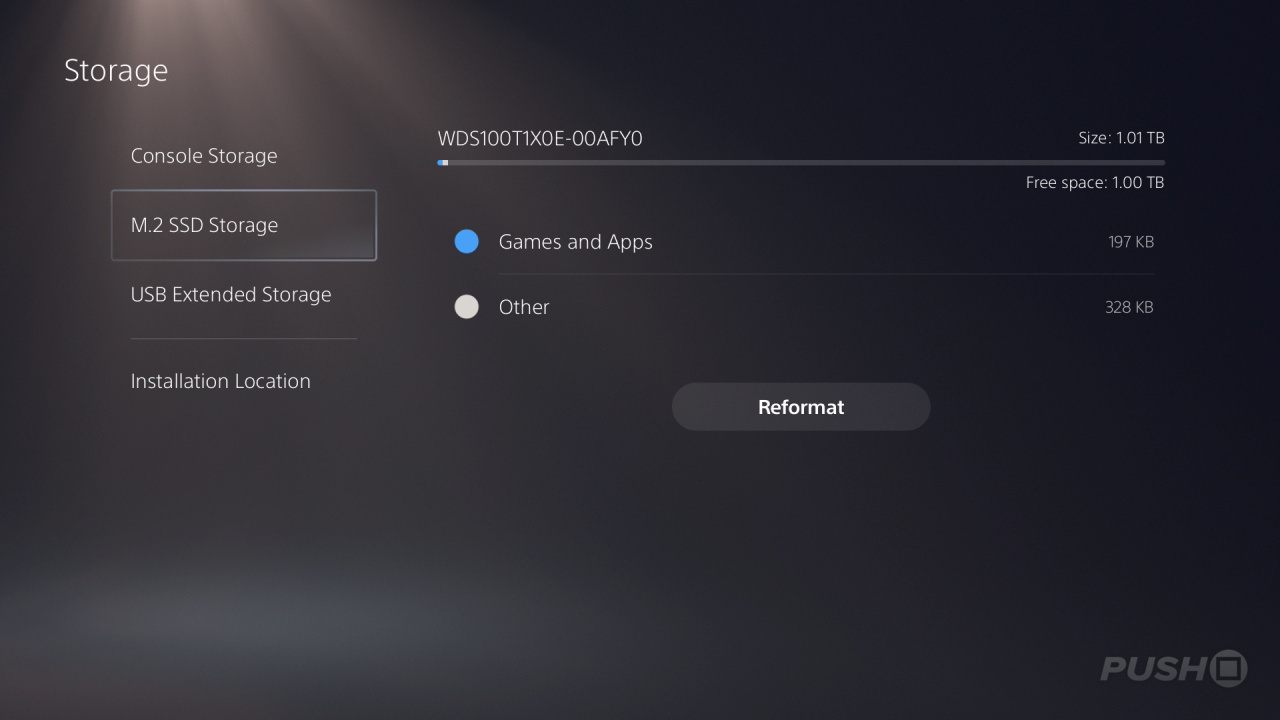
Here, you can see information about the available storage options on your PS5. You can also reformat the M.2 SSD from this screen as well, if you're having problems with it. However, what we're interested in is the option to select the M.2 SSD as the primary installation device. Navigate to Installation Location on the left-hand menu. As you can see from the screen below, you have options for both PS4 and PS5 games.
PS5 SSD: How to Move Games to the M.2 SSD
If you want to shift over some of the games you've already installed on your PS5, then you can do that with minimal effort. In the Settings > Storage menu, select Console Storage and you'll be presented with a list of all of the games and apps currently installed on your PS5's built-in SSD.

Find the item you want to move to the M.2 SSD and select it. You'll see the following sub-menu:
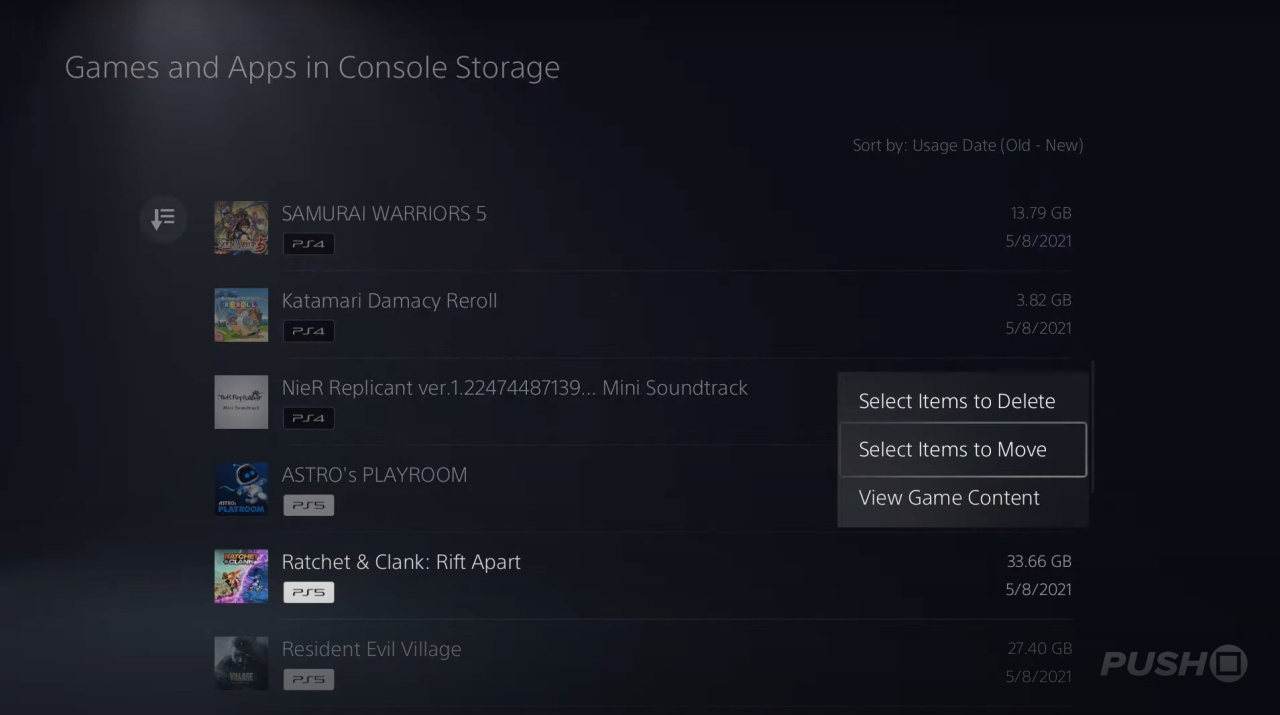
The item will then be moved over to the M.2 SSD.
Have you installed an internal PS5 SSD and expanded your storage on PS5? Check out our PS5 guide, and let us know how much space you've got in the comments section below. Remember to find our list of the Best PS5 SSDs through the link.


Comments 70
How to install SSD into PS5:
Step one: Rob a bank and buy the SSD.
Step Two: Follow the excellent guide above.
@Zeke68 Approx 200€ for 1 TB is enough for me... I think that is okay.
Just wanted to say thanks for the guide. It’s clear and well illustrated, and I’m sure it will come in handy once I get my hands on an M2SSD.
So has this update gone love yet? I haven't gotten any notifications.
Why to refit the slot cover after installing the SSD? I believe the cooling would be better without covering the slot. With the cover, hot air will be accumulating very fast...
Seems easy enough. Thanks for the guide.
Important to notice that we still talk about an system update that is currently only available for a handful of beta testers.
So don’t rush and buy a SSD now unless you find one that matches the speed and is offered for a very good price.
Otherwise wait for the final release of the system software - my guess not before September or October.
Came into this article to make a snarky comment about needing a PHD in electrical engineering to install one. But very well thought out article to clearly show how it's done.
That being said no chance I'll do this for multiple reasons. I'd fear I'd ruin my ps5 and have to wait forever until I can buy a new one. But the biggest reason is the reason I am a console gamer is the whole plug and play aspect of things. If I wanted everything to be modular and complex I'd be gaming on PC to play such graphical masterpieces like WoW, LoL, and um Minesweeper (I really don't know PC games) in 4k 120fps.
It is incredible how exaggerated the awful games media made this out to be.
Man, I really need to expand my storage, too. Hopefully, I’ll pick up at least a 1TB SSD in the next few months. Well, fingers crossed, at least.
I ordered the 2TB Firecuda one, so I guess that requires a heat sink?
They have missed one little thing in the install. There is a little silver spacer with the screw in the bay. You have to put that into the hole your going to screw into for your ssd.
I've ordered the firecuda 530 with heatsink. I reckon the update will go live at the end of this month 🤞.
Fairly simple. Especially if you're also a PC gamer.
@skaarj217 It's a shield to protect from radio interference from the wi-fi module. Radio waves or static can shift one bit around in your memory, and all your data can become corrupted. That's why also the MB is shielded. In PC, the case also acts as shielding against radio interference.
I have a better, in-depth guide for the process:
1: Sit back and do absolutely nothing with storage for another 6-12 months.
2: Wait for other rubes to follow the above guide.
3: Check back on the Push Square forums in 6-12 months and read about what drives others have used that freeze, glitch, hard reset, or brick consoles, and about how long Sony takes to repair them (or refute warranty claims due to use of unauthorized peripherals) while re-joining the scalper search.
4: 3-6 months after that check again to see which drives people used that haven't had glitches, crashes, or bricks, and purchase one.
5: Follow the guide above.
While not technically hard, this is still an absolutely insane guide for simple adding storage space to a console. Verifying measurements, which model speeds, etc. This is really a completely nutty "solution" for storage on a console. I doubt many Push Square regulars would have trouble with it, but we're not the other 9.99 million PS5 owners.....
I’ll get an SSD upgrade the moment I decide to play something other than ESO or when The Witcher 3 PS5 upgrade releases.
Totally agree it does look simple enough and all those on here and Pure Xbox should manage it easy and choosing the correct ssd with heat sink.
But I know some that will struggle and get me to do it, that are not on here or Pure Xbox.
I think the important thing is buying an ssd with heat sink already attached and Sony recommended for size wise etc.
I still believe Sony should have made this easier amd more consumer friendly for the general public that are used to slotting in usb and micro sd cards etc. Just like in PCs, laptops, camera, the list goes on.
Just on this particular thing alone, this is a consumer friendly step backwards and shouldn’t be in 2021.
And when little Jonny fills is ssd up and Sony release a 2tb PS5 one day, little Jonny will get one of them. Product life cycle is factored in with these things and storage space for future console upgrade sales.
i find it odd on the guide theres no actual picture of installing the SSD and how to do it
I guess you dont actually have the SSD
It takes less than 2 minutes and when the update goes live I’m sure a lot more practical info about the compatible SSDs.
Now it’s funny to see some ‘tech’ guys embarrassing themselves with their FUD narratives
This is probably too hard for the casuals, as I am told. Sorry, casuals, screw drivers are for HARDCORE GAMERS ONLYYYY
SCREWDRIVER NINJA APPROVED
Blimey people - slide off the top, stick the drive in, turn the screw, pop the lid back on - which part are you struggling with?
For those comparing it to the “complexity” of a pc upgrade - do you realise that upgrading a graphic card consists of “remove one screw, pull the old card out, push the new one in, retighten one screw”? None of this stuff is difficult or complicated. At all.
I am assuming that panel is quite sturdy and very low risk of clips snapping as you slid the panel off? I hope Sony will cover you for something like that if it is a bit finicky. The rest looks a doddle though.
@Palleon Funniest thing is one of the biggest Sony fanboys was saying the exact same...day later - dead PS5.
Put it this way...Sony had to put instructions on how to attach a stand. Sony can't even get their own employees to put the ps5 the correct way up. They're not a company that over estimates the intelligence of people... and yet still made this needlessly complicated (I say needlessly because write an article of how to expand Xbox storage...takes 3 words). And those that are fine with pulling their brand new expensive console apart still take the gamble on their ssd of choice not killing their ps5.
So I just have to ask, as I have a PS4 and have an 8TB external hard drive...here it is...I am one that likes to have a large retail game collection (I have over 80 for PS4) and I also download a lot on the consoles (I own over 500 downloaded games on the PS4 as well). Does this mean, that when I finally get a PS5 and do the same, that not only do I have to get an external hard drive, but I also have to get an internal too?
Hmm, I don't understand, is this for replacing your current SSD that came with the console? or is this an extra open space for another SSD to add to your HD space? As why would someone purchase a 500 GB SSD when the one currently in the PS5 is larger?
I am curious how the extra storage is handled by the OS. Can we set the new SSD as the default installation location, etc.?
@JLPick No need for worries. I had an external 8tb drive for my PS4 and all you have to do is plug the same drive into your PS5. Delete your physical games from the Hard drive and move all your download games onto it, or you can just download the games again from your PStore library (that's the worst case scenario as it'll take quite a bit of time).
@radic202 This is to add to the internal storage space, not to replace it...
From hothardware.com:
Reddit user DanCTapirson achieved results as high as 6,072 MB/sec with a 250GB Samsung Pro SSD. However, you would be well advised to heed Sony's warning regarding installing a heatsink on your SSD of choice due to high temperature readings, which were confirmed with these user tests.
DanCTapirson stated that with an ambient temperature of 25 degrees Celsius, idle temperatures for the 980 Pro hovered between 55 to 59 degrees. However, temperatures while writing (i.e., transferring games to the SSD) soared to 74 degrees. Read temperatures weren't much lower at 72 degrees while playing Returnal.
Given these results, he decided to slap on a double-sided aluminum heatsink that was within the clearance specs provided by Sony. With this modification, idle temperatures dropped to around 44 degrees, while read/write temperatures settled at 50 degrees, which is a dramatic improvement.
Performance was equivalent to the ps5 internal ssd
@BloodNinja pah to your ninja approved screw driver...i have my MCGUYVER SWIZZ ARMY KNIFE...
@Bleachedsmiles
Xbox using a less competitive but easy to plug in proprietary extension (cool if you like) does NOT make this ‘complicated’ and removing the cover and a screw does not mean ‘pulling the console apart’
😅
EDIT
Here s a video showing it if it can help 🤷🏼♂️ You don’t even need to understand the language.
https://twitter.com/hoytehablode/status/1422081955810664448?s=21
It's incredible to me that they didn't design this so that you can just slot it in more easily. I have no idea if that makes sense by the way because I have no idea how computers work except that they make spreadsheets happen or whatever.
Anyway, I'm never going to do this. Not because my pea brain is too small to be able to follow these honestly pretty simple despite all the drama instructions, but rather because I don't need to. I don't know why anybody needs to. Who needs so much storage?
I suppose if you have a data cap (are they still a thing?) for downloads maybe. Or if you're one of those infamous gamers that was really mad about Xbox One because you work on a nuclear sub. Or if you have really, really, really bad Internet. Like 56k bad.
I always just keep a few evergreen titles like Final Fantasy XIV hanging around, and then just delete and download as I go. Never had a problem.
@johncalmc Because having installed 40 games ready to play on the console is better than 5 — you can scroll through them left and right, and vice versa... and choose... what do I want to play today, right now?.. This? Or maybe this? No, this one!
In reality, however, for some users, like you or myself, this won't be needed at all. I prefer playing one, in some rare cases two games, at a time. If I'm playing Assassin's Creed Syndicate these days, I will be playing it until I finish it. I don't WANT to play another game. I want to fully immerse myself into the Victorian era of the game.
But there are many players who indeed play not even several, but MANY games at once. I know gamers who play 6 to 10 various games per day. Those gamers will play probably the same games next day, but it's again 6 to 10 games per day!
They need much storage on the console to live like that. 😅
@Profondo
Thanks so much my Friend for the info. Much appreciated.
@JJ2 lol 'less competitive'...like it's making a noticeable difference. Or will be taken advantage of in any tangible way for least the next couple of years, as Sony's focus is cross-gen.
Yeah, I'd far rather a plug and play alternative to this. Maybe we'll get a few faster seconds of loading for 'taking parts of the console away from other parts' (better?), But least with proprietary stuff you're covered incase things go wrong - which they will...which you'll hear more about over the next coming months.
@Northern_munkey lmfao!!! I love it, that was great!
@skaarj217 Well your wrong and not the PS5 designer/Engineer. QUOTE(from PS5 Sony Engineer)
Mr Otori: There are two exhaust holes for the SSD slot for expansion. Since the expansion slot is near the intake fan, it has a structure that sucks heat from the exhaust hole with negative pressure
@Bleachedsmiles
Oh I was just saying facts. I don’t have time or interest for console wars.
Hope the video helps
@TheCollector316 - No as PS5 M2 expansion storage has to is routed thru the same controller as the Sony custom SSD to get all the features like decompression etc(thats why its better to have a faster drive than the Sony one to compenstate for this)
@The_New_Butler - Thats what the real world beta testing is for. Just wait for results
Thanks for the guide, just had my invite for the beta test, let's see how this goes...
No thanks, the fact you need a heat sink on the SSD and Sony is recommending you not even install it means I'm not going to risk it.
It's not worth damaging your PS5 just incase you might want to play Knack so you need it downloaded.
Why do you need 20 games on your console anyway?
Some kind of FOMO?
When I got my PS5 last year I plugged my external hardrive in I used for my PS4 and it read it and at the same time I bought Ratchet And Clank Rift Apart and it saved on the hardrive
@LJ_314 @Enuo you literally have to download games, and what about owners of the digital only ps5?
@Connor_Pike21 but you're not playing the ps4 version on the external btw
@radic202 the current SSD is solder/soder to the mainboard
this is adding additional storage
@skaarj217 thermals, there is a vent that channels air across the ssd area, by not having the plate on it messes up the thermals coming into the system
its for cooling
Thanks for all the feedback.
I signed up for Beta but haven’t had a code sent! So frustrating @damo anyone know how long this process usually takes? I’ve got a drive ready and waiting!
@Stocksy Sorry, I don't - perhaps they've reached the limit of who they want on the beta. The final release can't be far away now. Sorry I can't be of more help!
@Damo cheers for swift reply. It’s says still open. Super annoying. My fault. I assumed (wrongly) beta was done and it was out in the wild. Hopefully it’ll come through.
Cheers have a nice weekend mate.
I bought an SSD last week without thinking about the updated firmware - moron.
Any idea when it'll be available ?
@hypnotoad firmware update coming tomorrow
@MichaelHawj Thanks mate. Just saw it on Eurogamer.
Now all I've gotta do is pluck up the courage to fit it !
I already did a trial run to see if my heatsink fit a few weeks back
It is super easy.
Excellent guide! 👏
Will be coming straight here when I’m ready to upgrade. The screenshots are extremely helpful. Thanks, ya’ll!
An excellent guide! Thank you!
Thanks for the reminder, just ordered myself a SAMSUNG 980 PRO 2TB PCIe NVMe Gen4 Internal Gaming SSD M.2 (MZ-V8P2T0B/AM).
Also a compatible heatsink.
GIGABYTE AORUS Gen4 7000s 1TB working perfectly.
I waited 9 months for this... 2 weeks ago he finally arrived....it was a difficult birth.
I did it.
I actually did it !!!
Super easy. As easy as plug and play really. Took less than five mins. Used video here. Thanks for the easy guide
Thank you for the guide!
This looks incredibly straightforward to a 'novice tech guy' so even I feel I will be able to install this no problemo.
Now I just need the Amazon delivery guy to hurry up and deliver the order tomorrow!
@ORO_ERICIUS euros? That's nowhere near ok.
@adrianthealchemist easy is subjective and pretending just because u had no problems, it magically invalidates other ppls concerns is utter hogwash. It's a pretty dumb way to get something installed considering it's basically a laptop style installation....for a console. And for all the comments here that say "I'm a noob tech I can do this", u aren't a noob tech dude. I don't think use met one before if thats the case. U do realize that half playstation owners are kids right?
"I am legally blind, have motor neuron issues and have dispraxia" are you supposed to have a point there buddy? What about kids and their electronically moronic parents? What about grandparents? There's a trillion scenarios I can think of where the person trying to install it is scared crapless if they've never done stuff like this. Xbox way to install is comically better designed. Same with some laptops.
"Well given that seagate who makes the propietory drive for MS has been caught swapping out parts for more inferior ones over the summer don't assume anything." Source on this? U seem to be insinuating that MS cards could be compromised out of pure fanboyism.
Also where did u find ps5 ssds cheaper than Xbox? Give me a link coz if that's true I'm gonna order freaking 5 ssds right now considering where I live Xbox proprietary are almost 60$ cheaper.
Does the SSD stay like balancing like a seesaw before you put the screw? It seems weird it stays that way lol
EDIT: Nevermind, saw the video! Looks very comical indeed lol
I didn't really need it but I went for a 4TB for my main ps5 and just got 2TB ones for the other 4.
I’m having trouble formatting my ssd for some reason. I installed a wd black sn 850 2tb with a heat sink. The ps5 recognizes it on startup and begins formatting it, but when it reaches 100% formatted/complete I get a message saying it cannot format the ssd/turn off the ps5 and remove the ssd. I installed the software updates and followed all the instructions. Anyone have any suggestions?
@Druxkro i suggest that if you have the opportunity to try it on a PC as well. Although I think it is likely to need to be replaced.
@spudds96 yeah I am playing PS4 games Externally
Show Comments
Leave A Comment
Hold on there, you need to login to post a comment...