Looking for a Reunion walkthrough for God of War Ragnarok? Reunion is the 12th quest in The Path, which represents Ragnarok's main storyline. As part of our God of War Ragnarok guide, we're going to share our full Reunion walkthrough, which includes puzzle solutions, combat strategies, and any other key areas of interest.
God of War Ragnarok: Reunion Walkthrough
Now that you're done Unleashing Hel, it's time for a Reunion. Head over to the Mystic Gateway and speak with Ratatoskr, and head straight back to Helheim. Once you step out of the Mystic Gateway, you'll find yourself in a new location named Helgrind. Directly ahead, on the main path forwards, is one of Odin's Ravens. Directly ahead is a crack in the wall you can detonate using your Draupnir Spear. Climb across the wall and down, and prepare yourself for a battle against Hel-Shadow Archers. Once they're defeated, climb up the back wall, when enemies were previously positioned, and collect the Lore in the form of the Rune Read named Prayer to Hraesvelgr. Turn around and face the big iceberg behind you, and throw spears at all three glowing points, detonating them simultaneously. You'll be attacked by more enemies, once you drop down, so deal with them and climb up the wall.
There's a yellow chest to the right, at the top of a staircase, with Hacksilver inside. Crawl through the gap in the wall ahead. Once you come out, you'll discover a new location named The Gleaming Bale. There's a Hel-Tear ahead, which when completed will begin a new Favour named Hel to Pay. You'll get some Essence of Hel, as well as Dust Realms for your troubles. You'll also find a new Axe Attachment named Grip of Healing Harmony. Climb across the broken bridge. On the other side, turn the wheel to raise the gate. Then in the gap to the left of the cog, instruct Atreus to shoot a few Sigil Arrows. Throw your axe at them to freeze the cog and keep the gate raised. There is a yellow chest with Hacksilver inside on the ledge just beyond the gate, so collect that if you want to before following the path onwards.
In the next area, you'll spot Garm off on the horizon. Deal with the Nightmares and Hel-Raiders that attack you. If you take the path down to the right, you can get an angle on the notch in the wall, enabling you to throw your Draupnir Spear at it to cross to the other side. There's a Legendary Chest on the other side with the Heavy Runic Attack named Tame the Beast inside. You will have to deal with some more Hel-Raiders before you can open this, however. Run to the end of the pier and drop down, then boost Atreus up the wall where all the rocks collapse. Continue climbing up to come face-to-face with a very angry Garm. Unfortunately, he runs away, and a Hel-Viken immediately attacks. Remember to use the Blades of Chaos to burn through his armour, before you bring him down. Once you're done, squeeze through the gap in the wall.
As you drop off the ledge, there's a yellow chest to the right with Hacksilver inside. Hookshot across to the other side and deal with the enemies who ambush you along the way. Then jump over to the path on the left. Be sure to collect the Shattered Runes from the corpse on the path down. You'll arrive at the Shipyard of the Fallen, where a Hel-Traveller is waiting for you. The main thing to be aware of with this enemy is when it starts to absorb power in its hand above its head, you need to throw a projectile at the orb it creates to disrupt its attack. Otherwise, it's a fairly straightforward skirmish, with the foe being generally quite slow and easy to defend against. He'll drop an Enchantment named Boon of Wrath. You'll also get a Frozen Flame to upgrade the Leviathan Axe with, as well as a bunch of Bonded Leather. Once you're done in this area, turn the big wheel to open the gate and instruct Atreus to fire Sigil Arrows at the top of it. Then, once the orb is large enough, throw your Leviathan Axe to freeze the cog, creating a safe passageway into the next area. There's a red chest just off to the left with Petrified Bone, Stonewood, and Hacksilver inside.
Continue to follow the path forwards, until you reach a group of relatively straightforward enemies. If you take the path to the right, you can lob a spear into the pole hole to allow you to traverse to the other side. On the left is an alcove with Hacksilver inside. As you make your way around this area, remember to collect the Shattered Runes from the corpse. There's another Legendary Chest directly ahead, this time with a Light Runic Attack named Thrust of a Thousand Soldiers inside. Squeeze through the wall and continue onwards. As you continue to shimmy along, a big battle will occur off in the distance. Once you drop down, more Hel-Raiders will be waiting for you, so deal with them and continue to follow the path towards Garm.
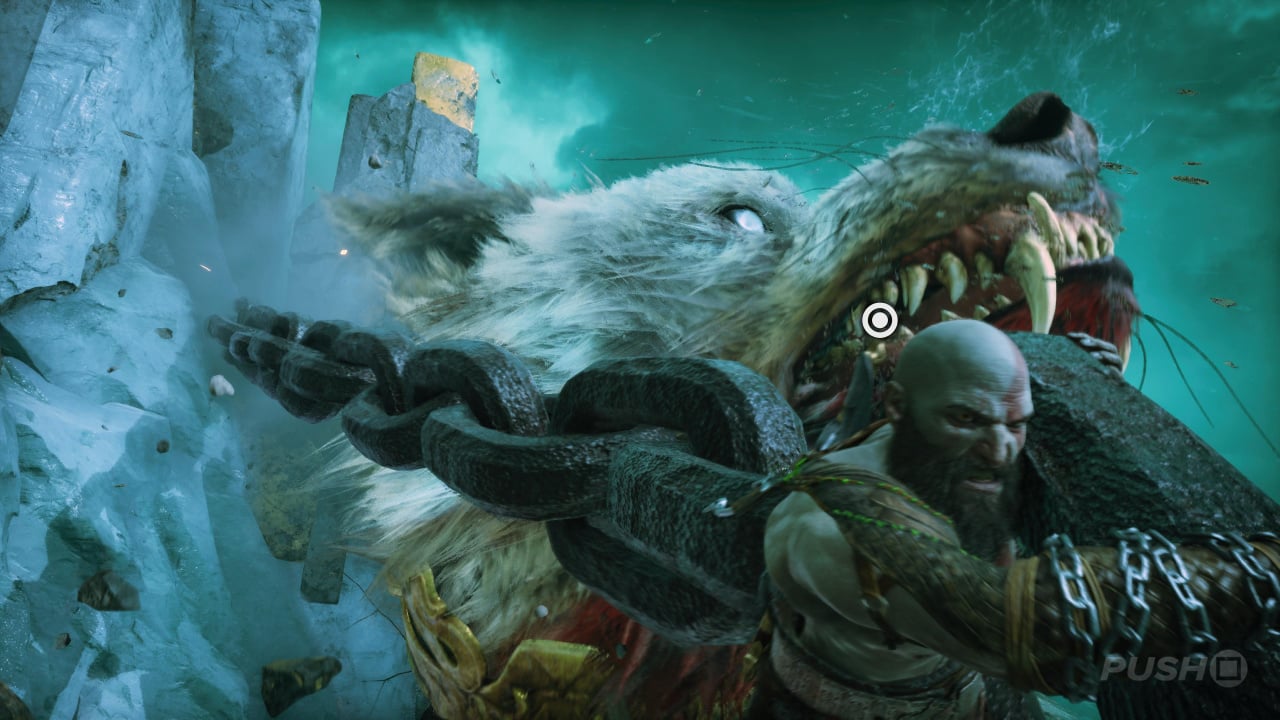
It's time to deal with Garm! Or not? Wait for Atreus to distract him, and then freeze the clasp with your Leviathan Axe. Rush over and grab the chain, but things won't be so easy at first. Garm will escape yet again, but fortunately you'll come away unscathed. Open the door and deal with the Hel-Raiders on the other side.
At the end of the path, destroy some tables and debris to get an angle on the pole hole opposite. Throw your spear at it to create a beam up to the higher ledge. There are Nightmares waiting for you at the top, so take them down swiftly, but beware of the Hel-Revenant that appears as well. Once you're done, you can knock down a bucket on the higher ledge to get some more Shattered Runes. You'll reach The Silent Clearing as you make your way forward. Jump onto the wall and navigate forwards, towards Garm once more.
Boss Fight: How to Beat Garm #1
After Atreus' plan to tame Garm didn't really work, it's time to take him on head-on. This is one of the most spectacular fights in the game, so enjoy it. Garm will swing his chain at you, so be sure to dodge roll out of the way of that, and freeze it with your axe when it get stuck in the ground. This will stun him, allowing you to really unleash some devastating damage. He'll also crash his feet into the floor, causing a ripple of frost, but this can be deflected if timed correctly. When he tries to bite at you, dodge out of the way and let rip.
As the fight matures, he'll begin spitting rocks at you. You can lob these back at him for a quick injection of damage. Once he stands on higher ground, be ready to dodge out of the way of the ice projectiles he fires your way. Then be careful when he jumps back into the arena, as he'll trigger a deadly ripple you need to roll through. With his health depleting, he'll begin to chain more attacks together. This means he'll swing the rope a few times, which you can defend, before it gets lodged in the ground. Despite the increase in moves, however, the strategy remains the same: freeze the chain when it's stuck in the ground, and then grab it.
The fight concludes with a QTE, so get ready to tap circle and square frantically until the beast is dealt with once and for all. At this point you'll unlock a Trophy named Off the Leash. You may need to take a breather after that one, so take a moment to catch your breath before carrying on.
Once you've got your breath back, head up the wall and take the only path forwards, as you look for a way to leave Helheim. Follow the path down, opening the yellow chest for Hacksilver along the way. There's a Legendary Chest immediately on the right, with a Shield named the Onslaught Shield inside it. There's another locked door ahead, but you know the solutions to these by now: turn the wheel and instruct Atreus to fire Sigil Arrows at the counter-weight. Then throw your Leviathan Axe at them to freeze the cog, and continue through the doorway. Head through the doorway and watch as a cutscene unfolds. It turns out Garm isn't dead, and you need to escape.
Run! The path is pretty obvious, so keep moving forwards, defeating any enemies that get in your way. Eventually, Garm will block your path, so equip your Draupnir Spear and throw it at his legs. This will get him to temporarily move out of your way. He'll knock you underground, so deal with the Hel-Raiders down here and break the wooden beams on your right. Then climb up the wall and continue forwards up the stairs.
Boss Fight: How to Beat Garm #2
Looks like you're going to have to beat Garm all over again. This time he has a couple of glowing points, on his neck and leg. Throw your Draupnir Spear at these while they're glowing and detonate them to do a lot of damage. Many of his attacks from the previous fight will be repurposed here, so you should already have a good idea of how to handle him. Dodge out of the way of the projectiles he fires, and when you have an opportunity to do so, lob them right back at him. Eventually you'll stun him, but he'll get straight back up again.
You're going to have to stun him for a second time, so repeat the boss fight as described above. Once he's down, hit R3 and prepare to start tapping the circle button while Atreus climbs on. Once the prompt appears, hit square to unleash a final attack.
With Garm now dead — or injured? — you're going to need to hunt him down once more. Squeeze through the gap in the wall behind you, and then follow the path to the obviously marked climbing point. Keep clambering across the wall until the cutscene triggers. All of a sudden, you have a new ally!
It's time to get back to the Mystic Gateway, so hookshot your way up the wall, and drop down to another door puzzle. Turn the wheel once more and then instruct Atreus to fire Sigil Arrows at the lower cog. Throw your Leviathan Axe to freeze the top cog and go through the door. Immediately on the other side is one of Odin's Ravens, as well as Lore in the form of a Lore Marker named Hraesvelgr. Follow the path forwards, up the stairs and over the wall, until you reach the Mystic Gateway on the other side. It's buried under debris, so clear that away when you're ready and watch the cutscene. When you're ready, head through the Mystic Gateway back to Sindri's House. Once you're out of the Mystic Gateway, head inside and watch another cutscene.
At this point, you can choose to tackle some Favours, or head straight to Vanaheim to catch up with Freya, it's up to you. Whatever you choose to do, we'd recommend stopping at the Huldra Brothers' shop to upgrade your equipment first. When you're ready to continue the main storyline, travel to Freyr's Camp at Vanaheim. Once you arrive here and get into your boat, you'll find there are blockades preventing you from taking the normal route to Freyr's Camp. Instead, head slightly left and then right on the first exit to get to a beach. There's a cave here you can go instead, and you can use your Draupnir Spear to place a couple of beams, allowing you to navigate inside. As you come out of the cave, immediately outside, be sure to collect the Lore, in the form of a Rune Reads named Vanaheim Lullaby, on the tree trunk. Interact with the food bowl next to the campfire, and watch the cutscene.
Follow Hildisvini through the gates and deeper into Vanaheim. You'll reach a point where you'll need to use your Draupnir Spear to progress. This will complete Reunion and begin Creatures of Prophecy.
God of War Ragnarok: Reunion Objectives
- Approach Ratatoskr
- Find Garm in Helheim
- Pursue Garm
- Leave Helheim
- Run
- Pursue Garm
- Return to the Mystic Gateway
God of War Ragnarok: Reunion Rewards
- Kratos
- 7,000 XP
- Atreus
- 3,500 XP
Did you find our Reunion walkthrough for God of War Ragnarok useful? Refer to our God of War Ragnarok guide for more information, and let us know in the comments section below.


Comments 0
Wow, no comments yet... why not be the first?
Leave A Comment
Hold on there, you need to login to post a comment...