Stranger of Paradise: Final Fantasy Origin is the new action RPG from Square Enix and Team Ninja, available now on PlayStation 5 and PS4. While it comes up short in some areas, we think it just about redeems itself with its fun combat, awarding the game a 6/10 in our Stranger of Paradise: Final Fantasy Origin PS5 review.
The game can be challenging at times, but we've spent forty hours with it, collecting an array of essential tips and tricks to help any would-be warriors who need a hand. This Stranger of Paradise: Final Fantasy Origin guide is here to help, from the quirks of the battle system to how to approach some of the bosses. Consider this a starter pack for those of you looking to be a little more prepared in your fight against Chaos.
Stranger of Paradise: Final Fantasy Origin Guide: Basics, Combat, and Getting Started
In this section of our Stranger of Paradise: Final Fantasy Origin guide, we'll be going through some of the basics to give you an idea of what to expect from the game.
Is Stranger of Paradise: Final Fantasy Origin a Souls Game?
Stranger of Paradise isn't a Soulslike, despite what much of the pre-release hype in some quarters would have you believe. It's a third person action role playing game that occasionally has shortcuts, and that's about where the similarities to the Souls series end. As such, you shouldn't necessarily approach this with the same caution that you would a Souls game — it can be challenging at times, but there's also hardly any punishment for death, so keep going, be aggressive, don't be afraid to experiment, and don't think you need to run back to a checkpoint to rest up if you're out of potions and health is getting low.
Basic Controls
Early in the game there's a tutorial that can be replayed if necessary that will help you understand the core mechanics of battle in Stranger of Paradise.
- Dodging is mapped to X and is an essential skill that will briefly leave you invincible as you dash to avoid an enemy attack.
- Blocking is achieved by holding L1, and it will negate most if not all incoming damage unless the attack is unblockable.
- Soul Shield allows you to capture an incoming enemy spell by holding Circle. Once you've captured a spell you can hold onto it, and use it at any time by tapping Square, but you can only capture spells that are highlighted purple while the enemy is charging them.
- Attacking is mapped to R1, and all Jobs and weapons play in pretty much the same way. You repeatedly tap R1 to attack, and as you attack, your MP gauge will fill.
- Skills require MP to use. Each Job has its own skill mapped to R2, some of which are more useful than others, but you can also tap R2 at the end of a combo to use a combo finisher — these skills do more damage, but they require MP to use.
Breaking and MP
Two key components of combat in Stranger of Paradise: Final Fantasy Origin are Breaking and MP. Below, we explain what each of these mean.
Breaking
Breaking enemies is the key to battle in Stranger of Paradise. If you reduce an enemy's break gauge to zero, they'll crumple to the ground and you can finish them off with a tap of the Circle button in an action known as Soul Burst. But breaking enemies isn't just about finishing them off more quickly than by reducing their health conventionally — if you finish an enemy with a Soul Burst, your maximum MP raises slightly, and the more MP you have, the more options you have in combat. You should always be aiming to finish enemies by Breaking them where possible.
MP
MP is your most important commodity in Stranger of Paradise. While you can bash R1 to perform attack combos all day long, it's the bigger skills mapped to R2 that will really hammer your enemies and make short work of their break gauge. These skills require MP to use, and so it stands to reason that the more MP you have, the more lethal you'll be in battle. As we've already mentioned, you should be aiming to Break your enemies to build up your MP reserves.
You will lose some MP when you die. Losing MP upon death means that boss battles in particular can get more difficult with each successive death.
Once you've found a boss, you might need an attempt or two to feel them out — the timings of their attacks, their speed, how aggressive they are, etc. But those deaths will reduce your MP down to the standard two bars, and so we found that it was helpful, where possible, to retreat from the final checkpoint to grind out a few of the cannon fodder enemies and build the MP bars back up before going back in to battle against the boss.
Loot and Equipment
When you manage to defeat a boss in Stranger of Paradise, they’ll shower the arena floor with loot. You can also find loot throughout each level in chests and when defeating regular enemies. This loot is randomised and will be at around the level of the dungeon that you’re currently in. Enemies can drop weapons, armour, or sometimes potions.
How Loot Works in Stranger of Paradise: Final Fantasy Origin
If you’ve got a level 1 Greatsword and you pick up a level 10 Greatsword, it’s essentially the same weapon but just with higher stats. Some weapons and armour unlock special skills, and some weapons come imbued with an element, meaning you can do lightning damage, for example, every time you strike. The short version, though, is that for all the loot you’ll pick up on your journey throughout each level, you’re best off just equipping all of the highest level stuff most of the time. It’s not a complicated system at all, and there’s not much room for interpretation here.
The armour also changes your appearance, so if you’re the type of player who likes their party members looking cool, then you should be aware that your highest level gear will rarely form an ensemble. If you want an outfit that goes, then you’re almost certainly going to have to sacrifice some might.
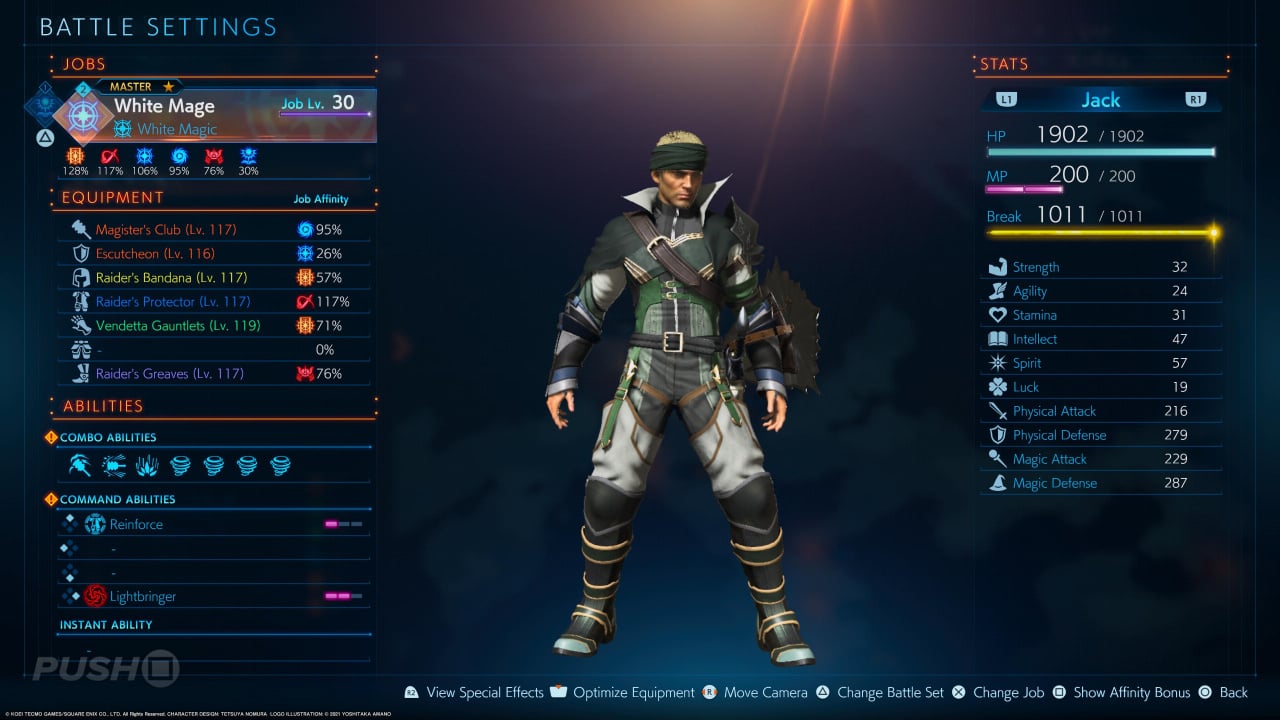
The final thing to watch out for with gear is job affinity. Often, a piece of armour will come with an affinity for a certain job. Let’s say you have a hat that’s got 20% White Mage affinity. If you’ve also got a lovely pair of trousers with 20% White Mage affinity, then overall you’ve got 40% White Mage affinity. Each job comes with bonus perks that unlock at certain affinity levels, so if you want, you could try and match up all of the gear you have with the same affinity, but we rarely found these unlocks worth the hassle, and mostly went with the highest levelled gear for the stat boosts.
Levelling Up
You have two levels to pay attention to: your job level and your gear level. Below, we'll explain what each of these means.
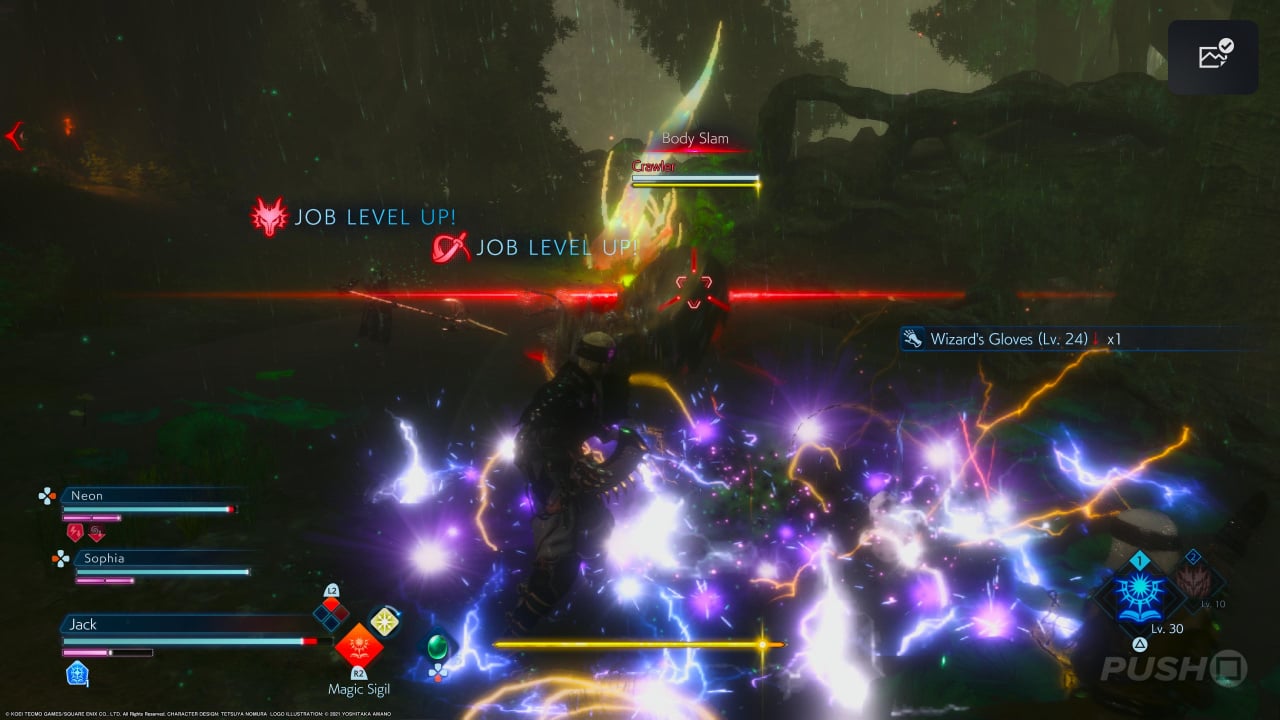
Job Level
Job level is how much you've levelled up a specific class in the game, and the higher the level, the more skills you can use and the higher the stats you'll have while you're using that job. Just being in battle will level up the job you’re using, but it will also slowly level up jobs that you’ve got affinity for through worn items.
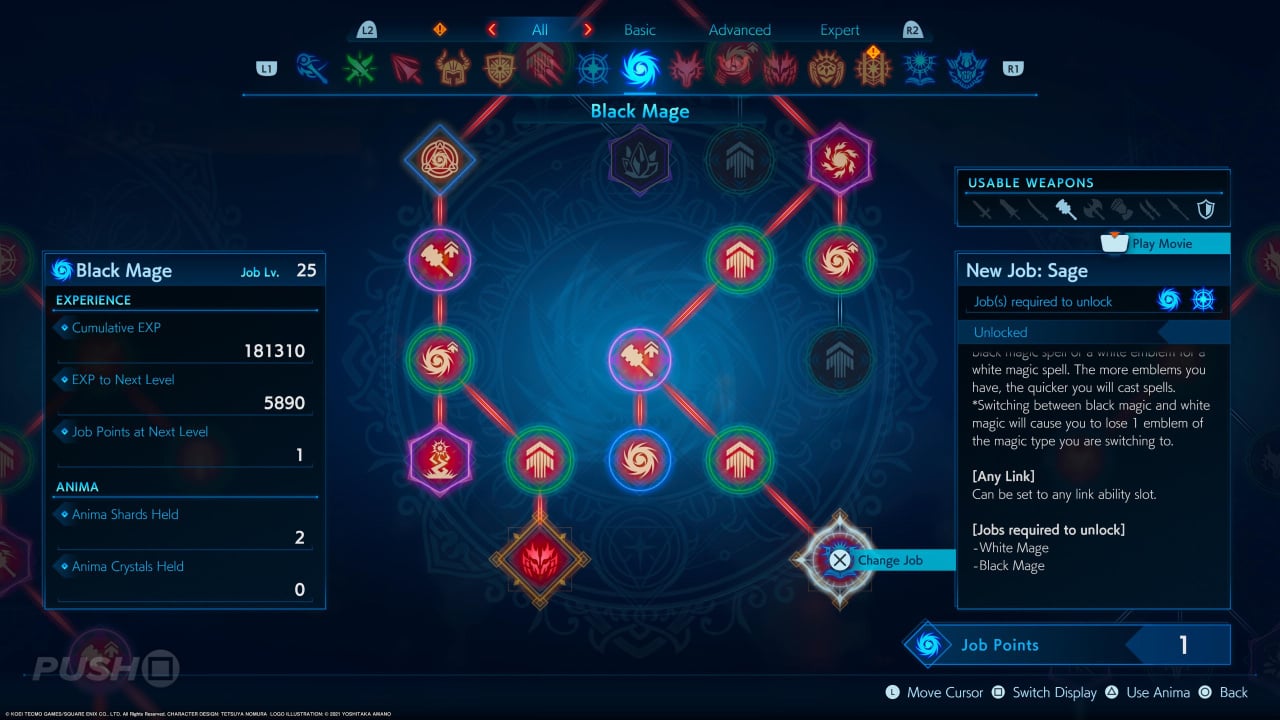
This means that you can always be levelling up multiple jobs at the same time, and you should always be aiming to do this. While you might not be interested in, say, the Mage job, you may be interested in Dark Knight, and one of the requirements for unlocking that class is to level up Mage enough to unlock Black Mage, and then level up Black Mage enough to unlock Dark Knight. You should look through the job tree at which jobs unlock which other jobs, so you know which ones you need to build up.
Jobs can level up to level 30 (until you've beaten the game and unlocked Chaos Mode) and each has its own skill tree comprising of new attacks, stat boosts, and other class unlocks. At the beginning of the game you have a handful of basic jobs at your disposal, but soon you’ll be unlocking advanced jobs and later expert ones, which can only be unlocked by putting enough time into two or three classes first, or by using a special item called an anima shard.
Job level is important to keep an eye on, and you shouldn't assume that an Advanced job is necessarily better than a Basic one without taking job level into account. For example, while Sage is the top tier magic job in the game, a level 30 White Mage will be more useful than a level 1 Sage because of the stat increases and skills you’ll have unlocked gaining those thirty levels. It's helpful to have one high level job and one that you're working on levelling up equipped at the same time — that way you can always bring in the big guns if you're struggling.
The last thing you need to know about levelling up jobs is the use of anima shards. Most missions in the game will reward you with an anima shard or two upon completion, and these items are used to instantly apply a lot of experience points to one job of your choosing. Tempting though it may be to just use them immediately to boost your current job, your best bet here is to use them on a job that you're not equipping but that you need to level up to unlock a future advanced or expert level job. Anima shards can significantly reduce, or even remove entirely the time you'll need to spend playing a job you're not interested in just to unlock one that you are.
Gear Level
Don't pay too much attention to the recommended level for missions. This refers to your gear level. This is the average level of the weapons and armour you've got equipped. For a mission's recommended gear level, you're nearly always going to be underlevelled. However, as long as you can kill a couple of enemies before dying in a mission, you'll collect enough loot to improve your gear level, and if you repeat this a few times, you'll be on par with where you should be without having to spend ages playing tedious side missions to get your gear up to snuff.
We were regularly doing missions with a recommended level eight or ten levels higher than our own without much of an issue once we'd collected a little loot to bump up our gear level. Remember, there’s little to no penalty for dying, so we say just get in there and if you’re really struggling, and unable to kill any enemies at all, then try a side mission just to raise your gear level a little before going back.
Stranger of Paradise: Final Fantasy Origin Guide: Jobs
In this section of our Stranger of Paradise: Final Fantasy Origin guide, we'll be going over the game's jobs and job system.
How the Job System Works
Stranger of Paradise’s job system allows you to tailor Jack to suit your play style, but it’s not as rigid as systems seen in most RPGs, or even most Final Fantasy games. A White Mage is traditionally a healer, for example, and while that’s the case here, and the class does come with an array of cures and buff spells, they’re still a lethal physical force, armed with a big hammer.
No job is underpowered per se, but some you'll almost certainly find less useful than others based on the stat boosts they give you, and the special skill each job has mapped to R2. And some jobs can only use certain weapons, meaning that if you have a preferred weapon type, it would make sense to gravitate towards a job that can wield it.
All Jobs in Stranger of Paradise: Final Fantasy Origin
Below we've outlined each of the game's various jobs, letting you know how to unlock them and the unique skill they each offer.
Basic Jobs
Duelist
Unlock Requirement: Find a set of Daggers
Unique Skill: Weak Spot. An attack that will always hit for critical damage
Level Up To Unlock: Thief
Overview: One of the least useful basic classes. Fast, but comparatively weak. We'd recommend using your anima shards on this one to unlock the Thief class and then leaving it well alone.
Lancer
Unlock Requirement: Find a Lance
Unique Skill: Lance Hurl. Actually pretty good. One of few reliable ways of dealing damage to flying enemies
Level Up To Unlock: Dragoon, Monk
Overview: Decent basic class. A viable option for the early missions if you like using spear weapons. Lance Hurl is one of the best basic skills.
Mage
Unlock Requirements: Find a Mace.
Unique Skill: Mage, and the other magic classes that follow, can use magic by holding R2. You then select a spell using the left stick, and then release when the spell has charged
Level Up To Unlock: Black Mage, Red Mage, White Mage
Overview: Honestly, this is one of the worst starting classes, but it unlocks some incredibly useful later classes. Damage output is not so strong, and the spells take a while to charge, which leaves you open to attack. Either level up quickly on the first couple of missions or use anima shards on this one.
Marauder
Unlock Requirements: Find an Axe.
Unique Skill: Upheaval. Jump and smash, leaving the target weakened
Level Up To Unlock: Berserker, Dragoon
Overview: Maybe it's just because we like swinging a comically oversized axe about, but for us, Marauder was one of the better basic classes, with decent damage output and HP.
Pugilist
Unlock Requirements: Find Knuckles.
Unique Skill: Explosive Fist. A pretty good one-shot attack, but nothing special
Level Up To Unlock: Monk, Thief
Overview: Another class we'd tend to avoid and use anima shards to unlock the more useful hand to hand classes later on.
Ronin
Unlock Requirements: Find a Katana.
Unique Skill: Iai-Giri. Charge up and then unleash a powerful attack
Level Up To Unlock: Samurai, Warrior
Overview: Quite powerful and pretty good at crowd control. One of the better basic jobs.
Swordfighter
Unlock Requirements: Find a Sword
Unique Skill: Interception. Adopt a counter attack stance and deal damage back to an attacking enemy
Level Up To Unlock: Knight, Red Mage
Overview: Similar to Swordsman, only a bit faster with slightly less damage output. We preferred the greatsword of Swordsman, but if speed is your thing you could do worse than this basic class.
Swordsman
Unlock Requirements: Jack's starting class.
Unique Skill: Spinning Slash. Jack spins around using his Greatsword to hit multiple enemies at once
Level Up To Unlock: Berserker, Knight, Warrior
Overview: One of the few basic jobs that's still useful even as you're unlocking Advanced jobs. Strong damage output, a decent skill, and it leads on to other strong classes. We'd stick with this one for the early going.
Advanced Jobs
Berserker
Unlock Requirements: Unlock tiles in Berserker and Swordsman job trees.
Unique Skill: Berserk. Top skill for button mashers. It makes you stronger and it makes you less susceptable to being staggered, while boosting your break damage against the enemy
Level Up To Unlock: Breaker, Dark Knight
Overview: A strong advanced job thanks to decent damage output and speed, as well as a useful unique skill. One of the best options to carry you through the mid-game.
Black Mage
Unlock Requirements: Unlock tile in Mage job tree.
Unique Skill: Black Magic. Hold R2 to charge up a black magic spell. Can be devastating against elemental creatures, and other enemies that a weakness to a certain magic type
Level Up To Unlock: Dark Knight, Sage
Overview: Strong magic class. Spells can be lethal when used effectively - Malboros are strong enemies but Firaga makes mincemeat out of them, for example - but magic does take a while to charge leaving you open to attack.
Dragoon
Unlock Requirements: Unlock tiles in Lancer and Marauder job trees.
Unique Skill: Jump. You jump. Then you fall and stab things with a big spear. It's ace.
Level Up To Unlock: Breaker, Liberator
Overview: Fun and useful unique skill, and helps lead to some strong Expert classes. If you like using a spear then this is a serviceable job to see you through the middle of the game.
Knight
Unlock Requirements: Unlock tile in Swordfighter job tree.
Unique Skill: Blessing Light. Successfully blocking an enemy attack counters with a holy pulse. Also puts what looks like a spotlight on you, so you look like a star
Level Up To Unlock: Paladin, Void Knight
Overview: Tough to get used to because to use effectively you need to time your counterattacks using Blessing Light, but it's a strong class, and a natural progression from Swordfighter if that was your jam.
Monk
Unlock Requirements: Unlock tiles in Lancer and Pugilist job trees.
Unique Skill: Focus. Heals HP and break damage. Not particularly useful, since the amount that you're healed is pretty paltry.
Level Up To Unlock: Assassin, Tyrant
Overview: For our money one of the worst Advanced jobs. Okay speed and damage output, but Focus is a pretty rubbish unique skill. We'd use anima shards on this one if you want to unlock either Assassin or Tyrant.
Red Mage
Unlock Requirements: Unlock tiles in Mage and Swordfighter job trees.
Unique Skill: Chainspell. You can cast spells multiple times, but you don't have access to many good ones
Level Up To Unlock: Tyrant, Void Knight
Overview: Two thumbs down for this one. It's got attacking options but is totally outclassed by all other melee jobs, and it's got magic but none of the good stuff. Definitely avoid this one, and use anima shards if you want to unlock Tyrant or Void Knight.
Samurai
Unlock Requirements: Unlock tile in Ronin job tree.
Unique Skill: Meikyo-Shisui. Increases the rate at which you build up MP by attacking. Can be very useful
Level Up To Unlock: Breaker, Ninja
Overview: One of the best Advanced jobs for the mid-to-late game. Strong damage, a useful unique skill, and looks cool.
Thief
Unlock Requirements: Unlock tiles in Duelist and Pugilist job trees.
Unique Skill: Steal. The twist is that you're stealing attacks from enemies rather than items, and then you can use the attacks. It's an interesting take, but because different enemies have different attacks its usefulness varies wildly
Level Up To Unlock: Assassin, Ninja
Overview: Not a strong class, and not a particularly useful Unique Skill. We wouldn't bother with this one, and would instead use anima shards if you're looking to unlock Ninja or Assassin.
Warrior
Unlock Requirements: Unlock tiles in Ronin and Swordsman job trees.
Unique Skill: War Cry. Damages nearby enemies and casts Regen on you, healing you periodically over time
Level Up To Unlock: Dark Knight, Liberator
Overview: One of the best Advanced classes. Easy to use, versatile because it can use basically any weapon, a useful unique skill, and strong damage output. We were reverting to our level 30 Warrior right up until the end of the game if we just needed a little extra oomph against a troublesome boss.
White Mage
Unlock Requirements: Unlock tile in Mage job tree.
Unique Skill: White Magic. Hold R2 to charge and the left stick to choose a magic you'd like to use - mainly buffs and heals. Hard to use in battle due to the charge time
Level Up To Unlock: Paladin, Sage
Overview: Similar to Black Mage, with access to the same attacks, but without any of the damaging black magic spells. To balance that out, the buffs and heals that White Mage has can save your skin, and an added bonus is that you can cast buffs just outside a boss room so you can enter battle as your best self.
Expert Jobs
Assassin
Unlock Requirements: Unlock tiles in Monk and Thief job trees.
Unique Skill: Assassinate. Increases damage that you do against an enemy based on the number of critical attacks that you land on them. It's not a total waste of time because the damage boost is nice, but this won't make or break a fight for you
Overview: One of the weakest Expert jobs for our money. If you like the speedier, more nimble classes then it's solid enough, but it lacks the heft of many of the other Expert jobs, and won't deal damage on an impressive scale.
Breaker
Unlock Requirements: Unlock tiles in Berserker, Dragoon, and Samurai job trees.
Unique Skill: Zantetsuken. This is a good one. Basically it's an attack and any enemy that is killed by it is Soul Burst-ed
Overview: One of the strongest classes, with an excellent unique skill. We'd recommend having this one in contention for your late game endeavours.
Dark Knight
Unlock Requirements: Unlock tiles in Berserker, Black Mage, and Warrior job trees.
Unique Skill: Soul Eater. This skill is a double-edged sword. It boosts your attack power but each attack now costs you a little HP. Personally, we found this class a little too risky, as the damage output that you gain doesn't seem to offset the damage you'll take
Overview: Of the traditional swinging-a-big-sword-about classes, Dark Knight is for our money one of the weakest. Damage output is pretty good, but Soul Eater is a risk/reward skill with much risk and not much reward.
Liberator
Unlock Requirements: Unlock tiles in Dragoon and Warrior job trees.
Unique Skill: Mighty Guard. An excellent skill that casts damage reducing buffs and Regen for a short while
Overview: A safe Expert class. It's not exceptional at anything, but it can use all weapons, and Mighty Guard means it can survive an onslaught longer than most other classes.
Ninja
Unlock Requirements: Unlock tiles in Samurai and Thief job trees.
Unique Skill: Ninjustsu. This allows the use of Tools like Shurikens. The twist is that rather than tying their use to MP like most skills, tools are their own consumable, with stocks being replenished at checkpoints
Overview: This is an excellent, versatile class, offering more attacking options than most other expert classes since there's attacks that use MP as well as those using Tools. If you're a fan of the faster classes, or samurai swords, then this is one that you can feasibly use in the late game.
Paladin
Unlock Requirements: Unlock tiles in Knight and White Mage job trees.
Unique Skill: Holy Fang. This skill heals you every time you land a hit for a short time
Overview: Paladin is like the opposite of Dark Knight. It's a more conservative, but for our money, much more useful Knight class. We used Paladin right up until the endgame as a reliable damage dealer, with the bonus HP from Holy Fang being a life saver more often than we'd care to count.
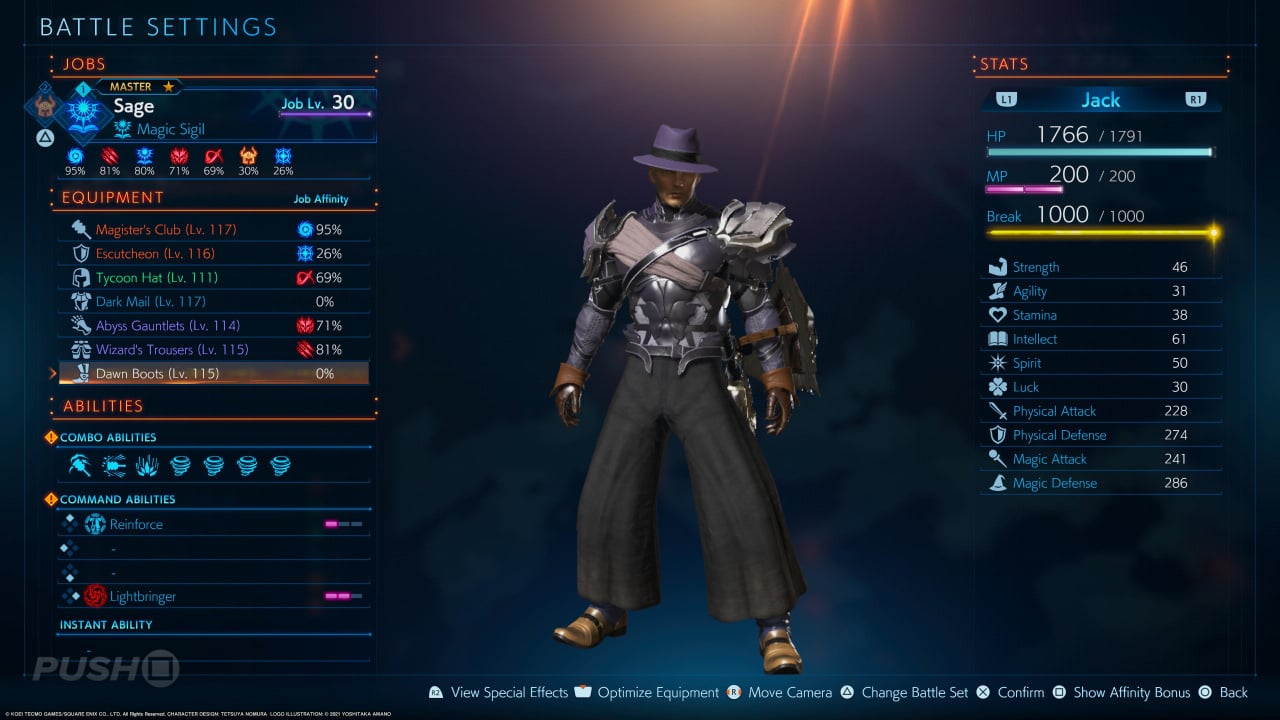
Sage
Unlock Requirements: Unlock tiles in Black Mage and White Mage job trees.
Unique Skill: Magic Sigil. You can use either black magic or white magic in the same was as with those jobs, but now every time you do you earn either a black or white magic emblem. Each emblem you've earned speeds up your casting speed. As an added bonus, once you've built up three emblems in each colour you can cast Ultima, the ultimate black magic spell, with predictably devastating consequences.
Overview: This is the best magical class by a wide margin, and one that we used frequently in the late game. The array of buffs and damaging spells at your disposal is unmatched, and even in hand to hand combat the Sage is pretty useful. It pairs perfectly with a more damage focussed melee class like Paladin or Ninja.
Tyrant
Unlock Requirements: Unlock tiles in Monk and Red Mage job trees.
Unique Skill: Enchant. You can apply an elemental effect to your weapon.
Overview: Tyrant is a class of limited value. The ability to apply elemental effects to your weapon is useful if, say, going up against a boss that is weak to one specific element, but using a Sage to cast black magic combined with another attacking class is a more well rounded and potent solution.
Void Knight
Unlock Requirements: Unlock tiles in Knight and Red Mage job trees.
Unique Skill: Runic. This skills allows you to absorb incoming magical attacks to be converted into MP, or send back at the enemy as a powerful counter.
Overview: Runic sounds a lot more useful on paper than it is in practice, in large part because it's reliant on the enemy doing what you want them to do. Against physical only enemies it's of no use at all. Aside from the special skill, Void Knight is a pretty basic Knight class option, without the perks of Paladin or even the risky offence of Dark Knight. Avoid this one.
Cyclic Warrior
Unlock Requirements: Finish the game
Unique Skill: Soul of Chaos. Can unleash four powerful elemental attacks that come at the cost of reducing your maximum MP. Personally, we like the MP more than the one off damage, but it can be useful in a pinch.
Overview: As the bonus for finishing the game you'd expect the Cyclic Warrior class to be a cut above, and you wouldn't necessarily be wrong. While the Soul of Chaos skill is perhaps a mite underwhelming, the excellent stats, access to all weapons, and fantastic damage output make Cyclic Warrior one of the best all-rounder options for cleaning up post-game.
Stranger of Paradise: Final Fantasy Origin Guide: How to Beat Each Boss Fight
Each mission in Stranger of Paradise ends with a boss fight. These battles are highlights of the game, but they're also the most challenging encounters you'll be faced with. In this part of our Stranger of Paradise: Final Fantasy Origin guide, we've put together some tips for taking them down.
Chaos Advent
Chaos Advent is the first boss in Stranger of Paradise, fought at the end of the mission Illusion at Journey's End. The mission up until this point is a cakewalk, so going up against this boss poses a significant difficulty jump, and you'll likely die a few times if you're anything like us.
Probably the most important tip we can give you for Chaos Advent is knowing when to block, when to attack, and when to get out of there entirely.
You can block most of Chaos Advent's attacks, but once they add a magical element to their sword you'll take damage even when blocking their hits.
Evade spells and area of effect attacks. Once you get Chaos Advent down to half health and use your Soul Burst, they'll start using a new move called Firey Hold. Avoid this one at all costs, because once they've grabbed you, you can't get out of it and you can kiss goodbye to most of your health bar.
If you're a melee class you shouldn't be going for full combos as Chaos Advent will almost certainly retaliate and hurt you by the time you get to the third or fourth hit. Adopt run and gun tactics, evading their attacks and then while they're recovering moving in for a couple of hits before backing off again. Try and dodge behind them for bonus damage.
If you're comfortable with the Mage class, Chaos Advent is weak to fire, particularly when they've imbued their sword with Ice. So if you see them using the Ice Sword skill, charge up a fire spell and let loose.
Don't forget you can tap left or right on the d-pad to send one of your party members into an attacking frenzy which might distract Chaos Advent enough to buy you time to heal or get behind them for a critical attack.
Captain Bikke
Pirate Captain Bikke is the second boss in Stranger of Paradise, fought at the end of the mission The Journey Begins. This boss is, for our money, much easier than the battle against Chaos Advent.
Captain Bikke will periodically call in a couple of pirates to help him in battle, and it's your #1 priority, always, to take them out. Once they're out of the way dealing with Bikke isn't too difficult at all.
Captain Bikke, grog-addled pirate that he is, takes forever to perform certain attacks and actions that are easily avoided, and once he's started the attack he can't stop. Use these long animations to your advantage by getting in there and letting loose.
Keep an eye out for his Molotov Cocktail attack which does fire damage and can hit you from a distance. It's easily dodged. Better yet, you can hold Circle to capture it using your Soul Shield, and throw it back to him or his mates.
Watch out for his grab attack Yo Ho Ho - once he's grabbed you you're locked into the animation and it does big damage.
Unlike most bosses, Captain Bikke doesn't have a second phase. There's no opportunity to Soul Burst mid-battle, and he doesn't get progressively harder as the fight goes on.
Black Knight
Black Knight is the third boss you'll face in Stranger of Paradise. The battle takes place at the end of the mission An Audience With The Dark Elf. This fight shouldn't pose too much of a problem if you've made it this far, since for our money it's the easiest boss battle so far as long as you know what you're doing.
This is a battle of two halves, with two distinct phases, and two different strategies required.
For the first half of the battle the Black Knight is riding his horse. He's incredibly fast, so try to stay in attacking range as best you can.
Attack him from either side, but try to avoid taking him on from the front or the back. He has powerful attacks that can hurt you if you're face to face or attacking from behind, but the flanks are relatively safe.
Once you've done enough damage to initiate a Soul Burst, the second phase of the battle begins and the Black Knight is now on foot.
Now he has a tornado attack that you can capture using Soul Shield, or you can avoid quite easily by dashing to the side.
Attack him from behind for bonus damage.
Eventually he'll start creating ghostly copies of himself. If you've captured the aforementioned tornado attack then now is the time to throw it back to hit multiple enemies at the same time. If you haven't done this then it's best to take out each copy one at a time, utilising distractions from your party members by tapping left or right on the d-pad.
Elemental Core / Fused Elemental
Elemental Core is fourth boss in Stranger of Paradise, transforming mid-fight into Fused Elemental. You'll fight these at the end of the mission Natural Distortion.
Again, a fight of two halves. For the first half of the fight you'll face off against the Elemental Core's two guardians - one of fire and one of water. You can capture the incoming spells from one of them using Soul Shield and then use them against the other, if you like. But both are weak and shouldn't last long against a sustained melee assault.
In the second of battle the two guardians combine into Fused Elemental, and here the boss starts using lots of close quarters area of affect attacks. Stay back until there's an opening and then quickly move in to get a few attacks in. Make sure your party members are attacking using the left and right buttons on the d-pad.
Chimera
Chimera is the fifth boss in Stranger of Paradise, fought at the end of the mission A Familiar Place.
The battle against Chimera will probably be a slow one because it has a tendency to fly around the arena making it difficult to land hits against.
You need to stand back and wait for openings while your buddies slowly whittle down its health.
Avoid the stone stare attack as it will petrify you for a few seconds leaving you totally vulnerable.
All of Chimera's flying attacks are easily dodged, and once you've avoided them it's the perfect time to get a couple of hits in, preferably from behind for bonus damage.
In the second half of the battle Chimera won't be flying any more, but it'll start using more magic-based attacks that hit hard. Fortunately, they're quite easy to dodge, so you should do that and continue to attack the beast from behind for a few hits before retreating and waiting for your next opening.
This boss fight can take quite a while because you'll spend much of it waiting for openings, but it shouldn't be too challenging as long as you maintain composure.
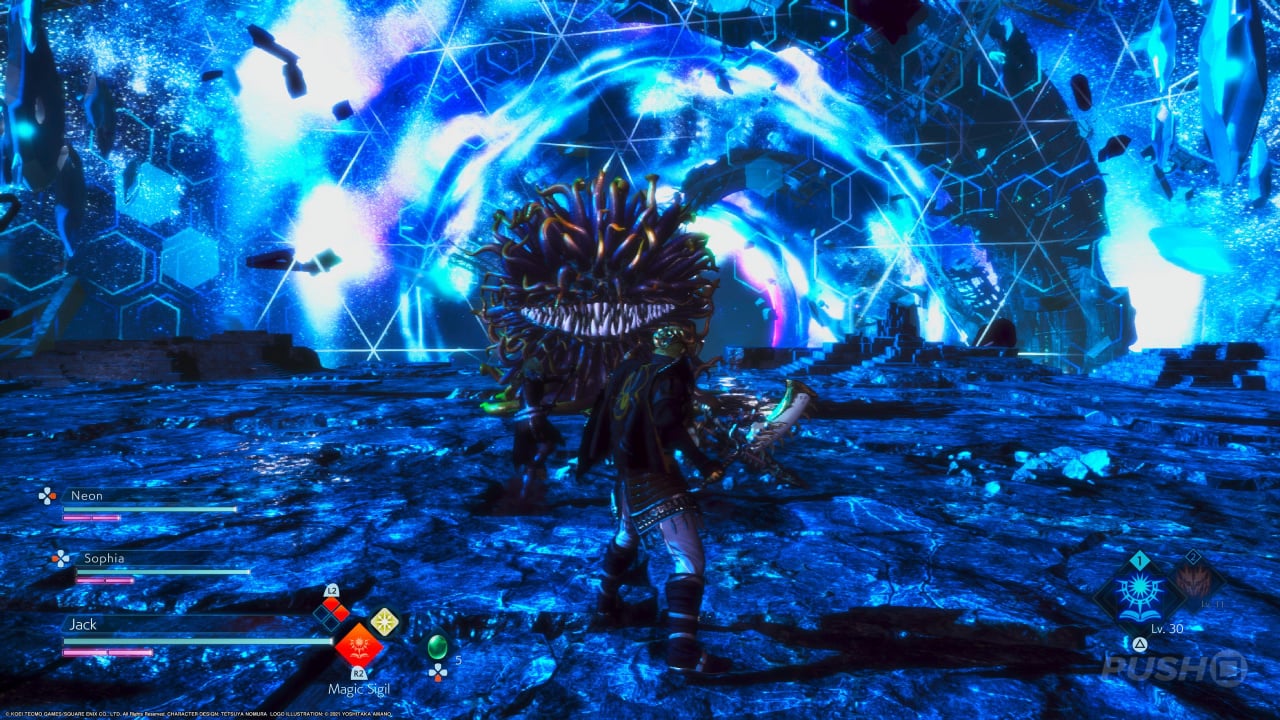
Tiamat
Tiamat is the sixth boss in Stranger of Paradise, fought at the end of the mission Memories of Wind. Eagle-eyed gamers will also notice that it's the boss you briefly tangled with in the prologue.
Tiamat is by far the toughest boss you'll have faced so far, and it's at this point that Stranger of Paradise starts ramping up, throwing more difficult foes at you en route to the finale.
Keep your distance because Tiamat hits hard. You should only go in close when you're going in for an attack, when you know you can land a few blows. If you stay far enough away Tiamat's powerful wind magic will be easy to avoid.
The necks are Tiamat's weak point, so try to attack them whenever you can. A perfect opportunity for this is when it leans forward to fire a beam at you. Sidestep this attack and get as much damage in on the necks as you can.
You should try to avoid being close, or face to face with Tiamat in the second half of the battle. It's breath attacks can probably one shot you, so you maintain a safe distance, and circle strafe constantly while locked on.
The trick to the second half of the battle is to concentrate on break damage. Tiamat will heal itself if you get its HP down to zero, but if you deal enough break damage you can Soul Burst it for the victory. Attacking the necks deals good break damage, and severing one of the heads will drastically reduce Tiamat's break gauge.
That's our Stranger of Paradise: Final Fantasy Origin guide done and dusted. How are you getting on with the game so far? Leave any more tips and advice in the comments section below.


Comments 6
Wow, tons of info there! Thanks for putting this together, John!
@get2sammyb Stephen had me at gunpoint. I just wanted to live.
@johncalmc All according to keikaku!
Is the story kept to a minimum? I feel the less cutscenes, the more likely I will enjoy this particular game.
Thanks for this guide, this will save me a lot of time figuring out what class does what and if I want to use them or not 😀
@johncalmc hey John, I just wanted you to know that someone plagiarize your guide on Amazon and selling it as an ebook for profit.
https://www.amazon.com/Stranger-Paradise-Final-Fantasy-Origin/dp/B09VWMYRD1/ref=sr_1_1?qid=1649788273&refinements=p_27%3AMagnus+S.+Berg&s=books&sr=1-1&text=Magnus+S.+Berg
Show Comments
Leave A Comment
Hold on there, you need to login to post a comment...