How do you solve Relic Ruins: Runner's Wild in Horizon Forbidden West? Where is Relic Ruins: Runner's Wild and how do you complete it? As part of our Horizon Forbidden West guide, we're going to show you how to get through Relic Ruins: Runner's Wild with step-by-step instructions. If you're looking for help with other Relic Ruins, see our guide: Horizon Forbidden West: All Relic Ruins and How to Solve Them.
Horizon Forbidden West: How to Solve Relic Ruins: Runner's Wild
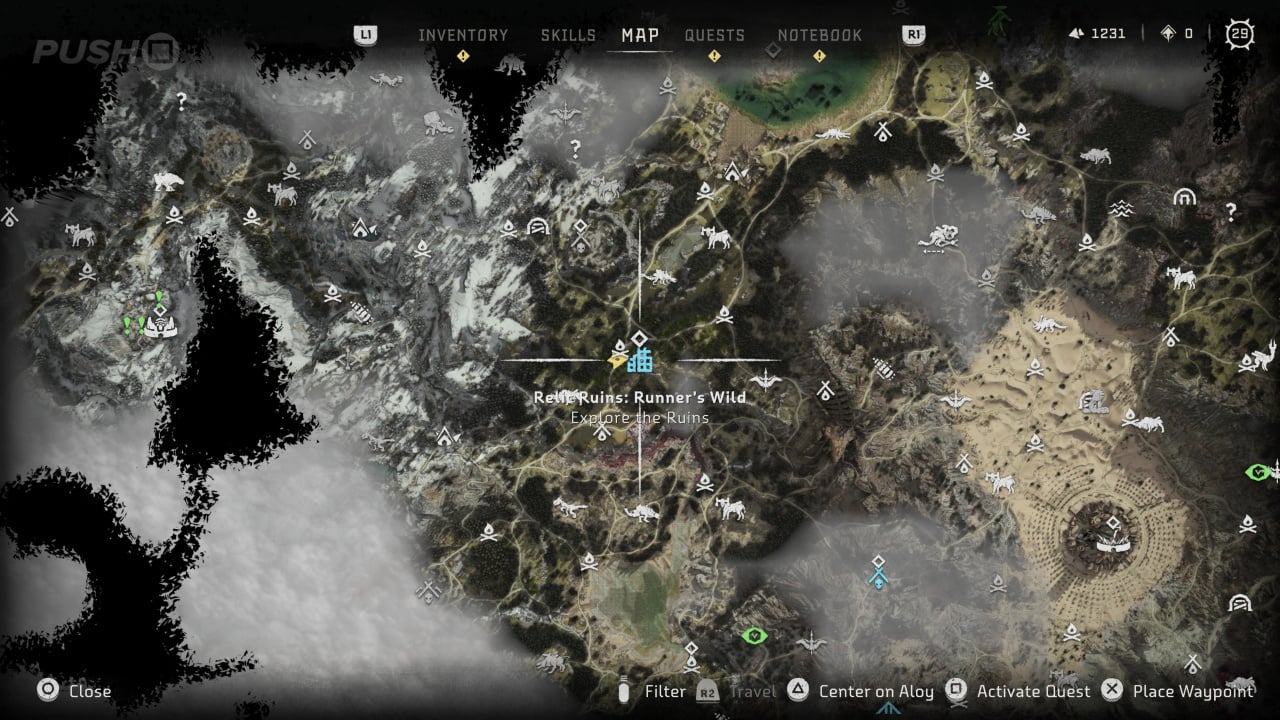
This Relic Ruin is located between a couple of smaller settlements: Sheerside Climb to the west and Salt Bite to the north. Above pictured is where it appears on the map.
How to Complete Relic Ruins: Runner's Wild
Follow these steps to complete Relic Ruins: Runner's Wild and collect Ornament #6: A Church? Really?.

Approaching the ruin from the western side, head through the centre and then climb over the broken wall. You'll find a locked door.
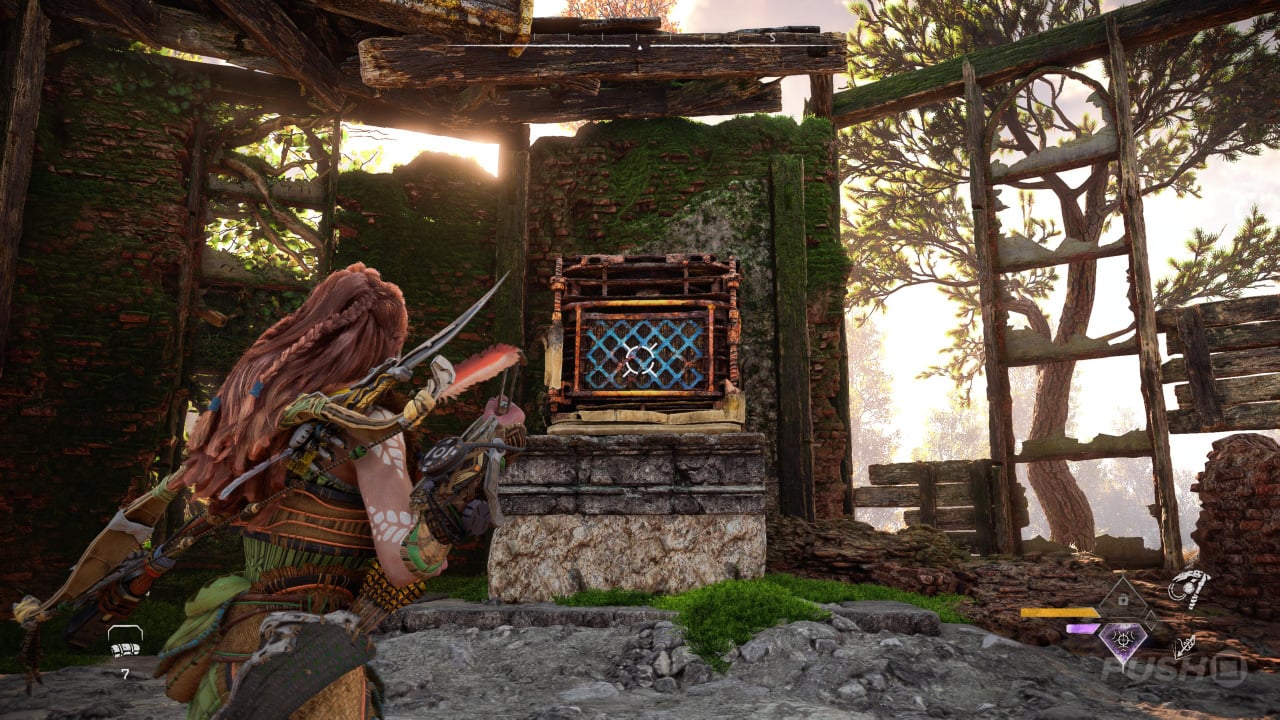
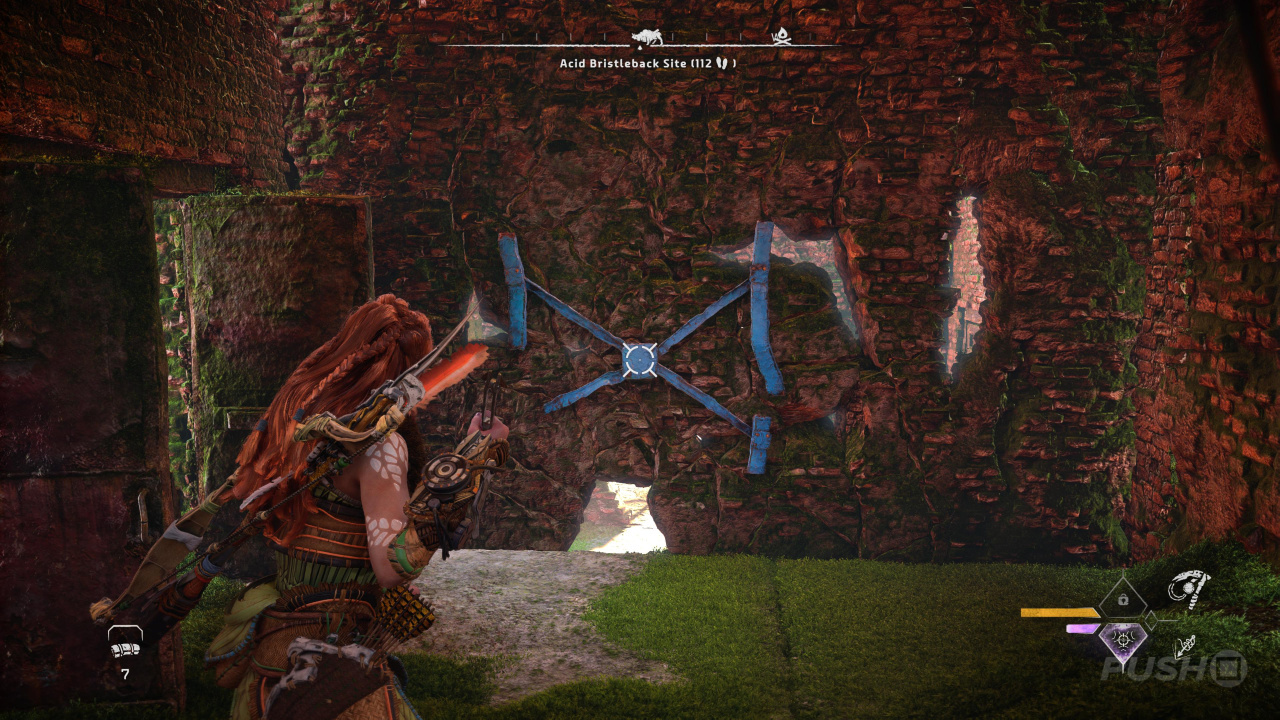
Head to the right and jump down into a room with a Firegleam and a Pullcaster wall. Ignite the Firegleam and pull down the wall.
Through the hole the Firegleam made, you'll find a crate. Pull it down off its platform with the Pullcaster.

Next, head to the opposite side of the ruin and you'll find another wall with a Pullcaster point. Pull the wall down.
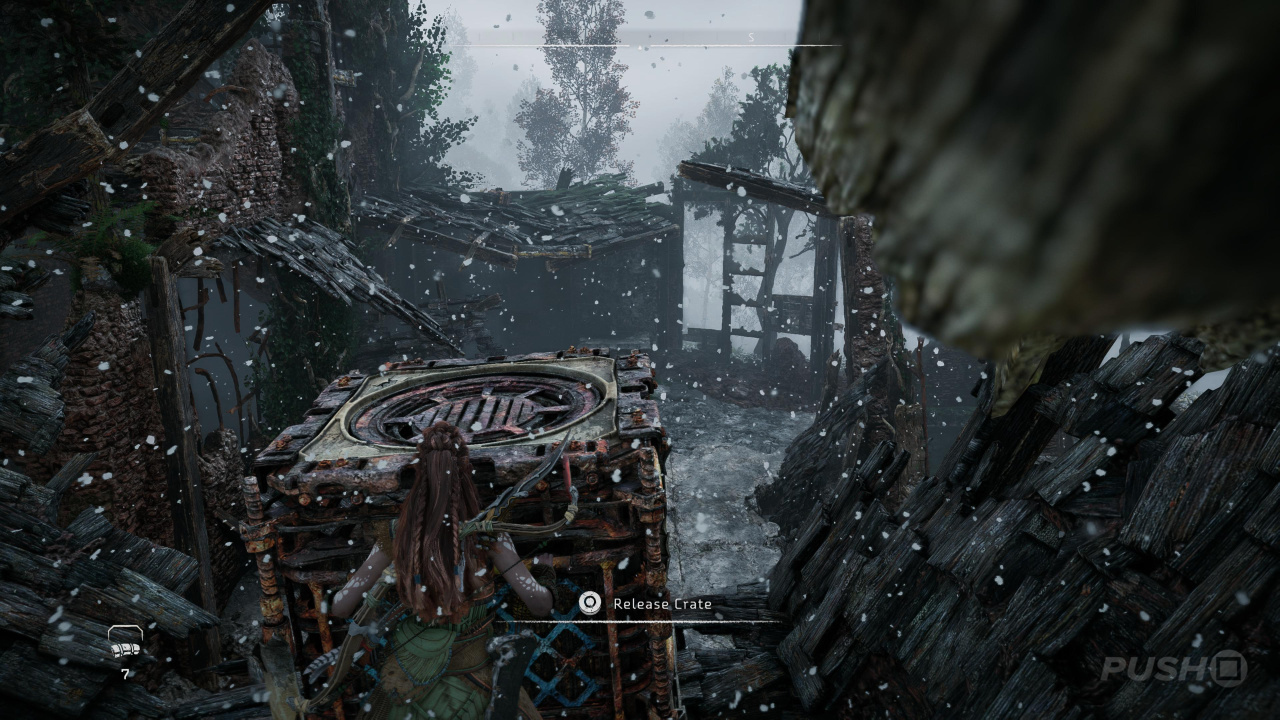
Return to the crate, move it through the Firegleam hole and then through where you brought down that first wall. From here, you can climb onto the roof.
Up here is a second crate. Push it so it falls into the main open part of the ruin. You'll need it in a minute.
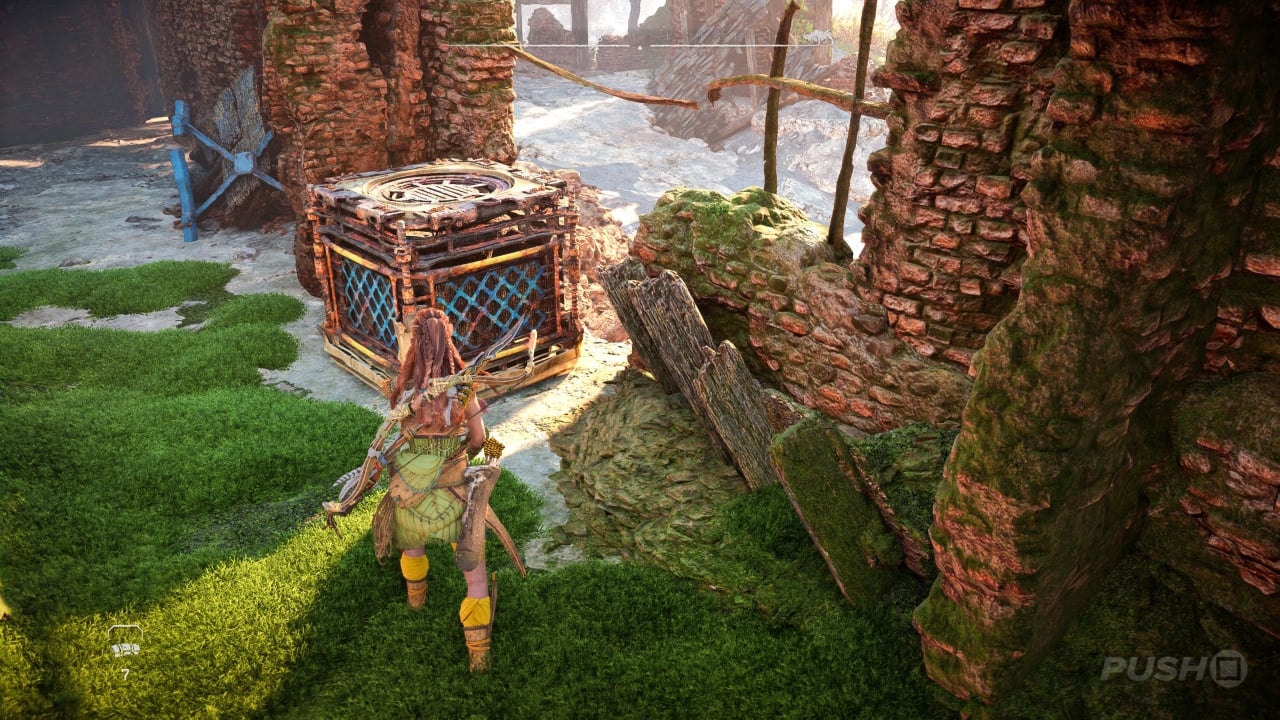
Return to the first crate. Pull it to the above pictured position.

Go to the second crate and move it to the above pictured position.
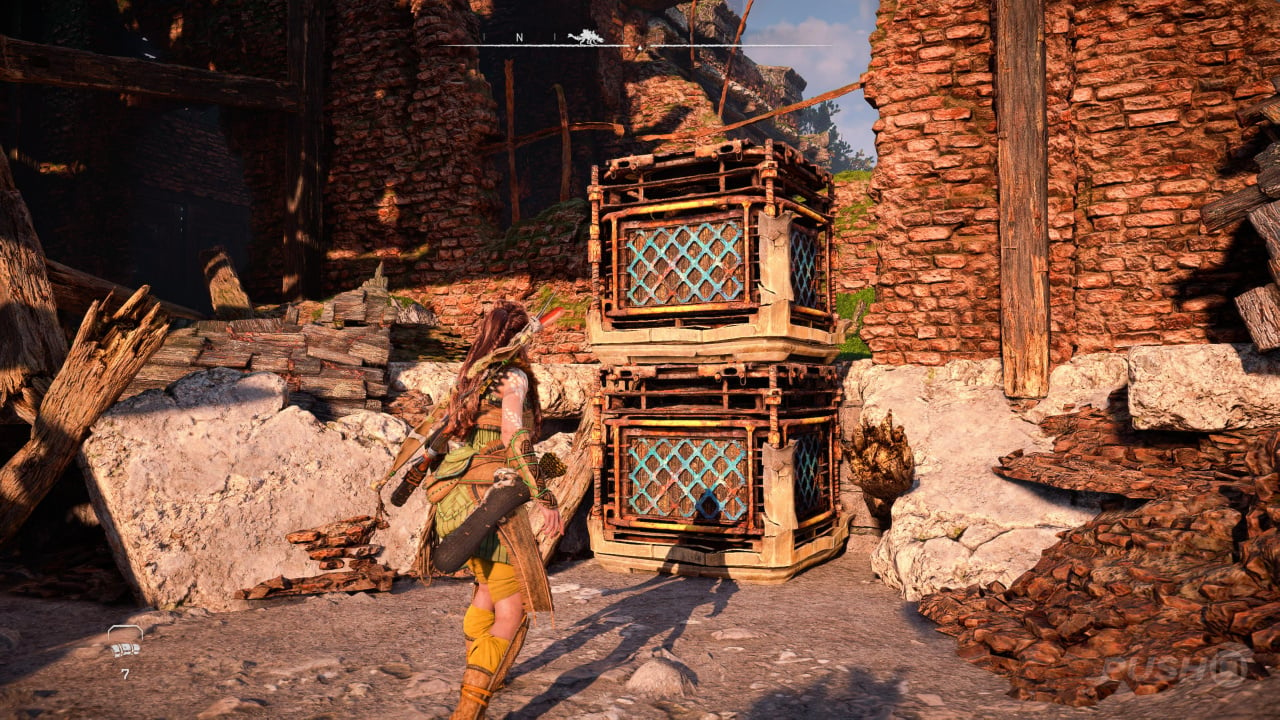
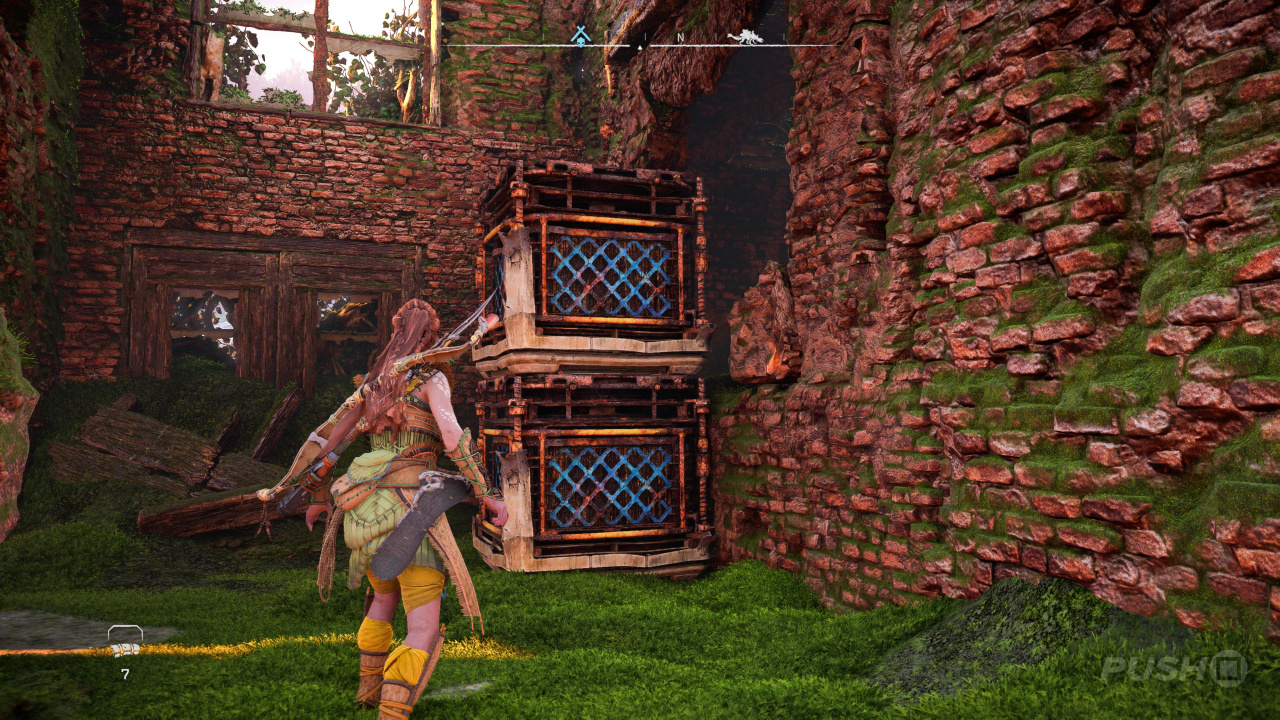
Move the first crate on top of the second crate. Now you've got a double decker crate.
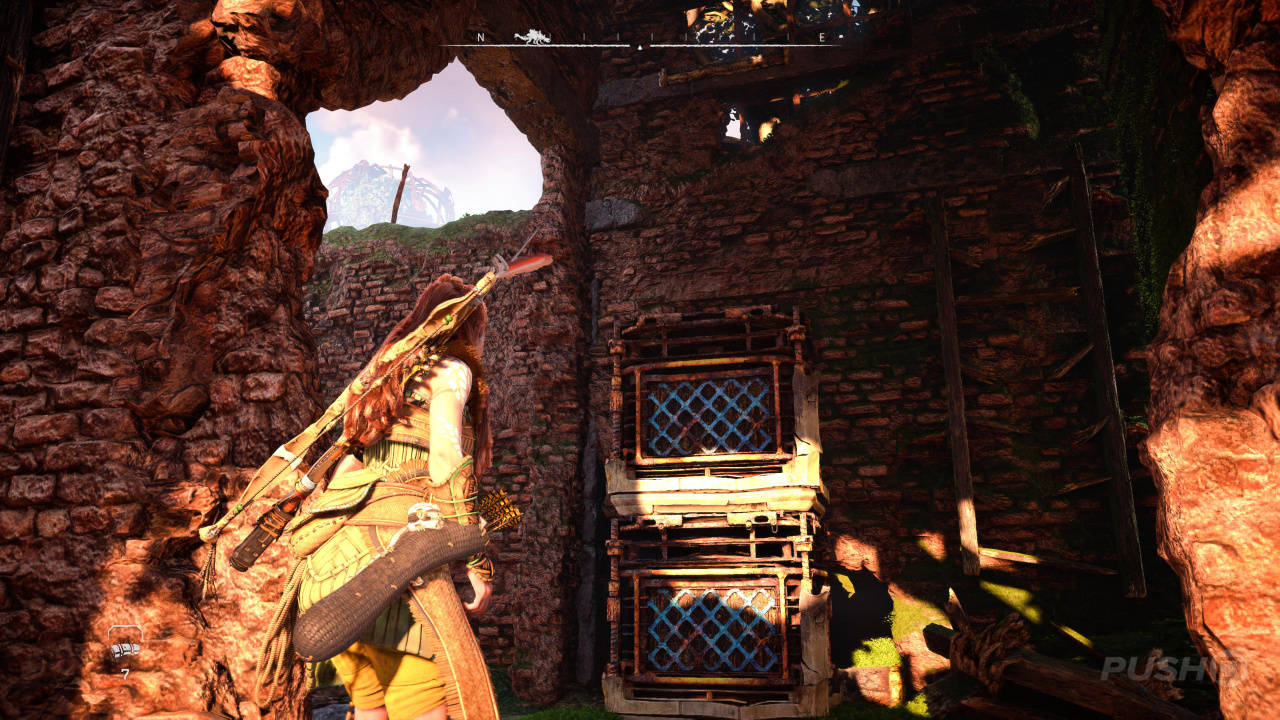
Move the double decker crate up to the right and through the hole you made with the Firegleam. Above pictured is where it needs to be. You can now climb up the inside of the ruin.
On the ledge above is a key for that locked door. Pick it up and use it to unlock the door.
Inside on the left is yet another wall for Aloy to pull down with her Pullcaster.
Grab the double decker crate and move it to the above position.
Back through the door, grab the top crate and pull it off the bottom crate. Push the crate through the door and up the slope to reach another handhold.
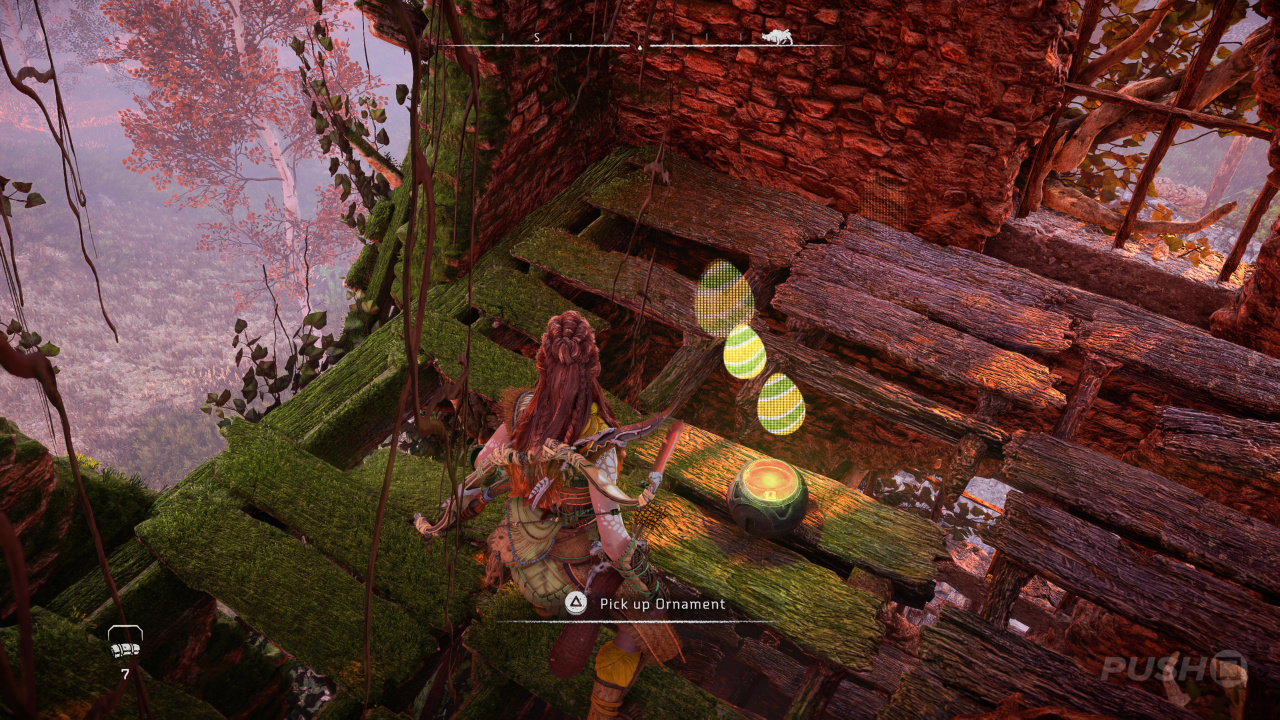
Climb up and you will be able to collect the Ornament.
That's how to solve Relic Ruins: Runner's Wild in Horizon Forbidden West. Have you finished this Relic Ruin yet? Find out how to solve all Relic Ruins through the link, and check out our Horizon Forbidden West guide for loads more help and info.


Comments 0
Wow, no comments yet... why not be the first?
Leave A Comment
Hold on there, you need to login to post a comment...