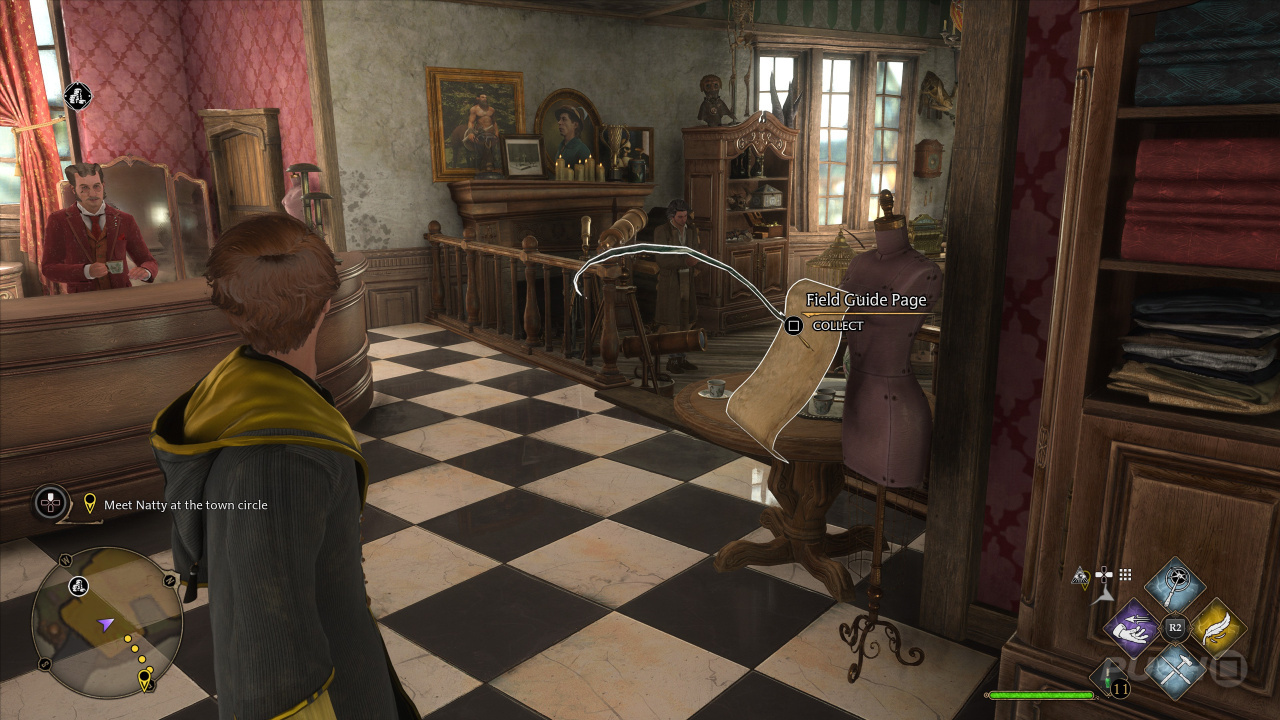
Where are all Field Guide Pages in Hogwarts Legacy? Field Guide Pages are one of the game's collectibles, scattered around the school as well as the surrounding areas. As part of our Hogwarts Legacy guide, we're going to show you where to find all Field Guide Pages in the game.
Note: This page is a work in progress. Keep checking back as we continue to update the guide with all the information you're looking for.
Subscribe to Push Square on YouTube168k
Hogwarts Legacy: All Field Guide Pages Locations
Below, you'll find a list of every Field Guide Page in Hogwarts Legacy, along with some directions on how and where to find them. There are 236 Field Guide Pages in total.
All Field Guide Pages Locations Hogwarts Grounds
There are 150 Field Guide Pages in Hogwarts Grounds.
All Field Guide Pages Locations Hogwarts Grounds Revelio Field
To find these Field Guide pages, you will need to reach their location and use the spell Revelio so you can collect them.
The game provides subtle hints when you're nearby one of these, including a faint shimmer on the Field Guide page as well as a chime sound effect.
All Field Guide Pages Locations Hogwarts Grounds Revelio Field Alchemy Class
Location: Alchemy Class
From the Bell Tower Courtyard Floo Flames, turn left, go up the first steps, then head through the door ahead. Go down the next steps and through another door. Keep descending all the stairs. When you reach the large dragon statue, go right down the corridor, and straight ahead is a locked door with loads of cauldrons outside (requires Alohomora Level 2 to unlock). Once inside, this Field Guide page is straight ahead.
All Field Guide Pages Locations Hogwarts Grounds Revelio Field Arithmancy Classroom
Location: Arithmancy Class
After opening the puzzle door Arithmancy Class #1, continue through the corridor to find the classroom in question. Immediately as you enter, you can find this Field Guide page.
All Field Guide Pages Locations Hogwarts Grounds Revelio Field Statue of Gregory the Smarmy
Location: Central Hall
From the Central Hall Floo Flames, head down into the hall and turn left at the central fountain. Go down the steps, then turn to the left to find a statue. The Field Guide page is just in front of it.
All Field Guide Pages Locations Hogwarts Grounds Revelio Field Tapestry of Barnabas the Barmy
Location: Astronomy Tower
From the Charms Classroom Floo Flames, head up the stairs just ahead. Continue ascending the stairs until you find a large tapestry on the right-hand wall, with the Field Guide page just in front of it.
All Field Guide Pages Locations Hogwarts Grounds Revelio Field Astronomy Telescope
Location: Astronomy Tower
From the Astronomy Tower Floo Flames, turn around and ascend the wooden stairs. Continue ascending the spiral staircase all the way to the top of the tower. At the top, walk to the opposite side to find this Field Guide page next to the largest telescope.
All Field Guide Pages Locations Hogwarts Grounds Revelio Field Frog Choir
Location: Bell Tower
From the Bell Tower Courtyard Floo Flames, go up the stairs on the left. Look left and follow the staircase until you reach a music room. Find this Field Guide page next to all the frogs sat on pillows.
All Field Guide Pages Locations Hogwarts Grounds Revelio Field Flattened Armour
Location: Bell Tower Courtyard
From the Bell Tower Courtyard Floo Flames, you can find this Field Guide page straight ahead to the left.
All Field Guide Pages Locations Hogwarts Grounds Revelio Field Broken Broom
Location: Bell Tower Courtyard
From the Bell Tower Courtyard Floo Flames, you can find this Field Guide page straight ahead to the right.
All Field Guide Pages Locations Hogwarts Grounds Revelio Field Three Sisters Bells
Location: Bell Tower Courtyard
From the Bell Tower Courtyard Floo Flames, head to the right to see a cabinet with three bells inside and find this Field Guide page.
All Field Guide Pages Locations Hogwarts Grounds Revelio Field Goblin Artefact
Location: Bell Tower Courtyard
From the Bell Tower Courtyard Floo Flames, go up the stairs on the left. On your right, a Field Guide page can be found in front of a display cabinet.
All Field Guide Pages Locations Hogwarts Grounds Revelio Field Scorch Marks
Location: Bell Tower Courtyard
From the Bell Tower Courtyard Floo Flames, go up the stairs on the left. Look left and go up some more stairs to find this Field Guide page in front of a scorch mark.
All Field Guide Pages Locations Hogwarts Grounds Revelio Field Wooden Cat
Location: Bell Tower Courtyard
From the Bell Tower Courtyard Floo Flames, go up the stairs on the right. In the corner is a statue of a cat, where you’ll find this Field Guide page.
All Field Guide Pages Locations Hogwarts Grounds Revelio Field Central Hall Fountain
Location: Central Hall
From the Central Hall Floo Flames, go down the stairs and walk to the side of the fountain facing the library to find this Field Guide page.
All Field Guide Pages Locations Hogwarts Grounds Revelio Field Portrait of Sir Cadogan
Location: Central Hall
From the Central Hall Floo Flames, ascend the stairs. At the top, turn right and go up some more stairs. At the top of these steps, go down the walkway to the right. You'll find this Field Guide page opposite some portraits.
All Field Guide Pages Locations Hogwarts Grounds Revelio Field Dark Tower Cell
Location: Charms Classroom
From the Charms Classroom Floo Flames, go down the steps and into the Charms classroom to the right. Immediately on the left are some stairs leading up to a locked door (requires Alohomora to unlock). Through the door, head up the spiral staircase. At the top, go through the door and look left to find another locked door (requires Alohomora Level 2 to unlock). Inside is this Field Guide page.
All Field Guide Pages Locations Hogwarts Grounds Revelio Field Clock Mechanics
Location: Clock Tower
From the Hospital Wing Floo Flames, turn right and head into the clock tower. Go down the stairs on the right, and follow the walkway around to the face of the clock. Turn to face the clock mechanism and you'll find the Field Guide page here.
All Field Guide Pages Locations Hogwarts Grounds Revelio Field The Well of Four Beasts
Location: Clock Tower Courtyard
From the Hogwarts South Exit Floo Flames, turn back and cross the bridge towards the castle. Straight ahead, you’ll see a well, where you will find this Field Guide page.
All Field Guide Pages Locations Hogwarts Grounds Revelio Field Deathday Party Room
Location: Deathday Party Room
From the Lower Grand Staircase Floo Flames, go down the stairs and turn right. Follow the corridor to the end, then turn right and go up the steps. Take the second left and you’ll see a locked metal door (requires Alohomora to unlock). Follow the corridor through to the next room. The Field Guide page can be found on the right-hand side of the room.
All Field Guide Pages Locations Hogwarts Grounds Revelio Field Headless Hunt Tapestry
Location: Deathday Party Room
From the Lower Grand Staircase Floo Flames, go down the stairs and turn right. Follow the corridor to the end, then turn right and go up the steps. Take the second left and you’ll see a locked metal door (requires Alohomora to unlock). Follow the corridor through to the next room. The Field Guide page can be found on the left-hand side of the room.
All Field Guide Pages Locations Hogwarts Grounds Revelio Field Hebridean Black Skeleton
Location: Defence Against the Dark Arts
From the Defence Against the Dark Arts Classroom Floo Flames, head into the classroom itself and go across to the small staircase. You’ll find this Field Guide page at the top.
All Field Guide Pages Locations Hogwarts Grounds Revelio Field Augurey Skeleton
Location: Defence Against the Dark Arts Tower
From the Defence Against the Dark Arts Tower Floo Flames, head down the stairs ahead and then down to the right. On the far wall is a wooden cabinet with a skeleton inside — this Field Guide page is in front of it.
All Field Guide Pages Locations Hogwarts Grounds Revelio Field Serpentine Beast Window
Location: Defence Against the Dark Arts Tower
From the Defence Against the Dark Arts Classroom Floo Flames, go down the stairs to the right. Go forward past the animal skeleton, then turn right to face the tall stained glass window. This is where you’ll find this Field Guide page.
All Field Guide Pages Locations Hogwarts Grounds Revelio Field Painting of Illyius
Location: Defence Against the Dark Arts Tower
From the Transfiguration Courtyard Floo Flames, turn right and head inside. Go right and you'll see a large portrait, with this Field Guide page in front of it.
All Field Guide Pages Locations Hogwarts Grounds Revelio Field Boggart Closet
Location: Defence Against the Dark Arts Tower
From the Transfiguration Courtyard Floo Flames, turn right and go inside. To the right of the big staircase is a locked door between two gargoyles (requires Alohomora Level 2 to open). The Field Guide page is at the back of the room by the closet.
All Field Guide Pages Locations Hogwarts Grounds Revelio Field Palmistry Model
Location: Divination Classroom
From the Divination Classroom Floo Flames, ascend the spiral staircase. At the top, climb the ladder that appears. At the top, go to the centre of the room to find this Field Guide page.
All Field Guide Pages Locations Hogwarts Grounds Revelio Field Hogwarts Crest
Location: Entrance Hall
From the Viaduct Courtyard Floo Flames, go up the stairs to the right. You will emerge in a courtyard, with the large doors into Hogwarts' main entrance to the right. Go inside and the Field Guide page is just in front of the school crest.
All Field Guide Pages Locations Hogwarts Grounds Revelio Field Portrait of Baruffio
Location: Faculty Tower
From the Faculty Tower Floo Flames, head left down the corridor. On the right, nearest the staircase, is a portrait where you can find this Field Guide page.
All Field Guide Pages Locations Hogwarts Grounds Revelio Field Jewel-Encrusted Tortoise Shell
Location: Faculty Tower (This particular area only accessible after completing the Main Quest The Caretaker’s Lunar Lament)
From the Faculty Tower Floo Flames, head down the corridor and into the “restricted” area. Ascend the stairs and at the top on the left is a tortoise shell in a cabinet, where you’ll find this Field Guide page.
All Field Guide Pages Locations Hogwarts Grounds Revelio Field Adventure Novel Set
Location: Faculty Tower (This particular area only accessible after completing the Main Quest The Caretaker’s Lunar Lament)
From the Faculty Tower Floo Flames, head down the corridor and into the “restricted” area. Ascend the stairs and look to the right to find a locked door (requires Alohomora Level 2). Inside, go right and you'll find the Field Guide page next to a bookshelf.
All Field Guide Pages Locations Hogwarts Grounds Revelio Field Boris the Bewildered
Location: Faculty Tower (This particular area only accessible after completing the Main Quest The Caretaker’s Lunar Lament)
From the Hospital Wing Floo Flames, descend the spiral staircase. Across the hall is a bronze statue with this Field Guide page in front of it.
All Field Guide Pages Locations Hogwarts Grounds Revelio Field Prefects' Bathroom
Location: Faculty Tower
From the Hospital Wing Floo Flames, go down the spiral staircase, and enter the door on the left. Head to the left of the bath and you'll find this Field Guide page beside a mermaid mural.
All Field Guide Pages Locations Hogwarts Grounds Revelio Field Bloody Meat
Location: Flying Class Lawn
From the Hogwarts North Exit Floo Flames, head back towards the school and look to the right. Go inside the stables where you will see a couple of thestrals. On the right as you enter is a locked door (requires Alohomora). Inside, the Field Guide page is beside some butchered meat.
All Field Guide Pages Locations Hogwarts Grounds Revelio Field Moving Staircase
Location: Grand Staircase
From the Ravenclaw Tower Floo Flames, head to the Grand Staircase. Ascend one flight of stairs, then look to the right to find this Field Guide page.
All Field Guide Pages Locations Hogwarts Grounds Revelio Field Headmaster's Office Gargoyle
Location: Grand Staircase
From the Trophy Room Floo Flames, follow the corridor all the way to the right and you’ll come across a locked door (requires Alohomora to unlock). Go through and follow the stairs and corridors all the way to a spiral staircase. Ascend the staircase to the top and go through the door, then go left to find a large golden statue. Here you’ll find this Field Guide page.
All Field Guide Pages Locations Hogwarts Grounds Revelio Field Quill of Acceptance and Book of Admittance
Location: Grand Staircase
To access the headmaster’s office, you’ll first need to learn the password, which you’ll do during the Main Quest named The Polyjuice Plot. After completing this quest and the next, Niamh Fitzgerald's Trial, you will be able to go into the headmaster’s office whenever you like.
From the Trophy Room Floo Flames, follow the corridor all the way around to the right to find a locked door (requires Alohomora to unlock). Go through and follow the winding corridor up some steps. You’ll come to a large spiral staircase with a door at the top. Go through and head left to find a large gargoyle guarding the headmaster’s office. Speak the password and follow the stairs up. To the left, you’ll find a locked door (requires Alohomora Level 2 to unlock). On the other side, follow the steps up to the right and you’ll find another locked door (requires Alohomora Level 3 to unlock). Follow the stairs up to the headmaster’s study, and on the right you’ll find a key you can pick up on the table.
Go back and leave the headmaster’s office. Go across the hallway to find an ornate locked door. Use the key you just found to unlock it, then follow the spiral stairs all the way to the top. This Field Guide page is just in front of the book on the pedestal in the middle of the room.
All Field Guide Pages Locations Hogwarts Grounds Revelio Field House Point Hourglasses
Location: Grand Staircase
From the Floo Flames at Grand Staircase, head east up some stairs and ahead you'll see the house point hourglasses. The Field Guide page is right in front of them.
All Field Guide Pages Locations Hogwarts Grounds Revelio Field The Hogwarts Architect
Location: Grand Staircase
As above, head towards the house point hourglasses from the Grand Staircase Floo Flames. After heading up the steps, turn immediately around to find a black statue. This Field Guide page is just in front of it.
All Field Guide Pages Locations Hogwarts Grounds Revelio Field The Great Hall Ceiling
Location: Great Hall
From the Great Hall Floo Flames, head towards the gap between the Gryffindor and Ravenclaw tables. Here you can reveal this Field Guide page.
All Field Guide Pages Locations Hogwarts Grounds Revelio Field The Yawning Gargoyle
Location: Great Hall
From the Great Hall Floo Flames, look to the right and go through the doors to an outside area. Straight ahead will be a statue with this Field Guide page beside it.
All Field Guide Pages Locations Hogwarts Grounds Revelio Field Greenhouse Tree
Location: Greenhouses
From the Greenhouses Floo Flames, go around to the opposite side of the central tree to find this Field Guide page.
All Field Guide Pages Locations Hogwarts Grounds Revelio Field Dirigible Plums
Location: Greenhouses
From the Greenhouses Floo Flames, go straight ahead through to the right-hand greenhouse. Go down the steps and you’ll find this Field Guide page in front of the planter.
All Field Guide Pages Locations Hogwarts Grounds Revelio Field Owl Lectern
Location: Great Hall
From the Great Hall Floo Flames, head down the middle of the hall and approach the lectern. The Field Guide page is just in front of it.
All Field Guide Pages Locations Hogwarts Grounds Revelio Field Fat Lady Portrait
Location: Gryffindor Common Room
From the Faculty Tower Floo Flames, head down the corridor to the southwest. When you reach the spiral staircase, go up and on the left you’ll find the entrance to the Gryffindor Common Room, which is where to find this Field Guide page.
All Field Guide Pages Locations Hogwarts Grounds Revelio Field Map of Argyllshire
Location: Gryffindor Tower
From the Clock Tower Courtyard Floo Flames, turn around and go through the door and across the walkway. Inside the next door on the left is a large map mounted on the wall, where you’ll find this Field Guide page.
All Field Guide Pages Locations Hogwarts Grounds Revelio Field Lachlan the Lanky
Location: Gryffindor Tower
From the Clock Tower Courtyard Floo Flames, turn around and go through the door and across the walkway. Inside, go down the steps ahead then U-turn to the right to find this statue, where the Field Guide page is.
All Field Guide Pages Locations Hogwarts Grounds Revelio Field Haunted Toilets
Location: Gryffindor Tower
From the Clock Tower Courtyard Floo Flames, turn around and go through the door and across the walkway. Inside, go down the steps ahead, then go around to the left. On the left-hand side, the Field Guide page can be found by the locked door to a boys' bathroom.
All Field Guide Pages Locations Hogwarts Grounds Revelio Field Sleeping Portraits
Location: The Headmaster's Office
To access the headmaster’s office, you’ll first need to learn the password, which you’ll do during the Main Quest named The Polyjuice Plot. After completing this quest and the next, Niamh Fitzgerald's Trial, you will be able to go into the headmaster’s office whenever you like.
From the Trophy Room Floo Flames, follow the corridor all the way around to the right to find a locked door (requires Alohomora to unlock). Go through and follow the winding corridor up some steps. You’ll come to a large spiral staircase with a door at the top. Go through and head left to find a large gargoyle guarding the headmaster’s office. Speak the password and follow the stairs up. At the top of the stairs, you’ll find this Field Guide page by a seat outside the office.
All Field Guide Pages Locations Hogwarts Grounds Revelio Field The Sorting Hat
Location: The Headmaster's Office
To access the headmaster’s office, you’ll first need to learn the password, which you’ll do during the Main Quest named The Polyjuice Plot. After completing this quest and the next, Niamh Fitzgerald's Trial, you will be able to go into the headmaster’s office whenever you like.
From the Trophy Room Floo Flames, follow the corridor all the way around to the right to find a locked door (requires Alohomora to unlock). Go through and follow the winding corridor up some steps. You’ll come to a large spiral staircase with a door at the top. Go through and head left to find a large gargoyle guarding the headmaster’s office. Speak the password and follow the stairs up. In the office, look to the right and you’ll find this Field Guide page in front of a cabinet containing the Sorting Hat.
All Field Guide Pages Locations Hogwarts Grounds Revelio Field Sphinx Statue
Location: Hieroglyphic Hall
From the Bell Tower Courtyard Floo Flames, go up the steps on the left and then through the door ahead. Ascend the next steps and ahead is the History of Magic classroom. Inside, head to the back and unlock the door (requires Alohomora). Inside on the right is a sphinx statue, where you'll find this Field Guide page.
All Field Guide Pages Locations Hogwarts Grounds Revelio Field History of Magic Windows
Location: History of Magic
From the Bell Tower Courtyard Floo Flames, take the steps on the left and head through the door ahead. Go up the next steps and ahead is the History of Magic classroom. Inside, head over to the stained glass windows on the right for this Field Guide page.
All Field Guide Pages Locations Hogwarts Grounds Revelio Field Hogwarts Owls
Location: Hogwarts Owlery
From the Flying Class Lawn Floo Flames, head south and you will see the owlery tower in the distance. You can either walk there or, if you’ve unlocked broom flight, fly across. Either way, go inside and ascend the stairs. At the top, you’ll find this Field Guide page next to the ladder.
All Field Guide Pages Locations Hogwarts Grounds Revelio Field Unicorn Fountain
Location: Hospital Wing (This area only accessible after completing the Main Quest The Caretaker’s Lunar Lament)
From the Hospital Wing Floo Flames, simply look to the right to find this Field Guide page, which is in front of a unicorn fountain.
All Field Guide Pages Locations Hogwarts Grounds Revelio Field House-Elf Recipe Book
Location: Hufflepuff Common Room (staircase)
This Field Guide page can be found on the spiral staircase that leads down to the Hufflepuff Common Room, opposite a cabinet half-way down.
All Field Guide Pages Locations Hogwarts Grounds Revelio Field Hufflepuff Barrels
Location: Hufflepuff Common Room
From the Grand Staircase Floo Flames, head right and descend the spiral staircase. Follow the path around to the right to find the entrance to the Hufflepuff Common Room. The Field Guide page is in front of the barrels stacked against the wall.
All Field Guide Pages Locations Hogwarts Grounds Revelio Field Pear Portrait
Location: Hufflepuff Common Room
From the Grand Staircase Floo Flames, head right and descend the spiral staircase. At the bottom, look to the left to find a large painting of a bowl of fruit, which is where you'll find the Field Guide page.
All Field Guide Pages Locations Hogwarts Grounds Revelio Field House-Elf Living Quarters
Location: Kitchens
From the Grand Staircase Floo Flames, look right and go down the spiral staircase. At the bottom, you’ll see a large painting of fruit on the left. Press Square to interact and then go through the secret door into the kitchens. This Field Guide page is at the back of the kitchens in front of a bunch of house-like barrels.
All Field Guide Pages Locations Hogwarts Grounds Revelio Field Kitchen Tables
Location: Kitchens
From the Grand Staircase Floo Flames, look right and go down the spiral staircase. At the bottom, you’ll see a large painting of fruit on the left. Press Square to interact and then go through the secret door into the kitchens. The Field Guide page can be found in the middle of the long tables.
All Field Guide Pages Locations Hogwarts Grounds Revelio Field The Old Librarian
Location: Library
From the Library Floo flames, head up the spiral staircase to your left. At the top, you’ll see a large portrait painting — this Field Guide page is just in front of it.
All Field Guide Pages Locations Hogwarts Grounds Revelio Field Book on Intermediate Transfiguration
Location: Library
You'll be asked to collect this Field Guide page during Professor Weasley's Assignment. From the Library Floo Flames, go up the spiral staircase and then over to the far corner. You'll meet a student who will quiz you on some wizarding subjects — don't worry, you don't have to get all the answers right. After the quiz, the Field Guide page will be in this area.
All Field Guide Pages Locations Hogwarts Grounds Revelio Field Enchanted Books
Location: Library — Restricted Section
From the Library Floo Flames, head over to the restricted section on the left. Go down the stairs and follow the corridors and stairs down to the lower level. Just on the left by some bookshelves, you’ll find this Field Guide page.
All Field Guide Pages Locations Hogwarts Grounds Revelio Field Gorgon Portrait
Location: Long Gallery (Requires the spell Alohomora to gain access. This spell is earned by completing the Main Quest The Caretaker’s Lunar Lament)
From the Bell Tower Courtyard Floo Flames, turn around and go through the large wooden door (will need to be unlocked if you haven’t already). Follow the directions for the Long Gallery Collection Chest. Once the puzzle door is open, go inside and you’ll find this Field Guide page beside a portrait.
All Field Guide Pages Locations Hogwarts Grounds Revelio Field Important Muggle Artefact
Location: Muggle Studies
From the Bell Tower Courtyard Floo Flames, go left up the stairs and through the door ahead. Descend the stairs and pass through another door, and keep going down — you’ll run past a large dragon statue on your left. Continue down the hallway a little and you’ll see a locked door on the left (requires Alohomora to open). The Field Guide page is opposite a cannon on the left.
All Field Guide Pages Locations Hogwarts Grounds Revelio Field Urn of Ashes
Location: North Hall
From the Bell Tower Courtyard Floo Flames, go up the steps on the left and through the door straight ahead. Descend the left-hand stairs and go through another door. Continue following the corridor down and to the left, then turn left once more to find this Field Guide page next to a dragon urn.
All Field Guide Pages Locations Hogwarts Grounds Revelio Field Sleeping Dragon Statue
Location: North Hall
From the Bell Tower Courtyard Floo Flames, go up the steps on the left and through the door ahead. Descend the left-hand stairs and follow the corridors and staircases down. Eventually you will see a large statue of a dragon, where you’ll find this Field Guide page.
All Field Guide Pages Locations Hogwarts Grounds Revelio Field Werewolf Saga Tapestries
Location: North Hall
From the Bell Tower Courtyard Floo Flames, go up the stairs to the left and through the door ahead. Go down the stairs and continue down until you come to a large tapestry. There will be a shield with a large letter 'K' on it. This is a hidden door; walk through, then walk through the next hallway to another room. Straight ahead, you’ll find this Field Guide page.
All Field Guide Pages Locations Hogwarts Grounds Revelio Field Honeydukes Passageway
Location: One-Eyed Witch Passage
From the Faculty Tower Floo Flames, turn around and walk towards the Grand Staircase. On your left will be a statue where you’ll find this Field Guide page.
All Field Guide Pages Locations Hogwarts Grounds Revelio Field Professor Sharp's Auror Badge
Location: Potions Class
From the Potions Classroom Floo Flames, head right through the door and into the potions classroom. Go straight ahead to Professor Sharp’s desk, where you’ll find this Field Guide page.
All Field Guide Pages Locations Hogwarts Grounds Revelio Field Pungent Passage
Location: Pungent Passage
From the West Tower Floo Flames, head left down some steps and you’ll find yourself in Pungent Passage. About half way along on the right, you’ll find this Field Guide page.
All Field Guide Pages Locations Hogwarts Grounds Revelio Field Ravenclaw Bust
Location: Ravenclaw Tower
From the Ravenclaw Tower Floo Flames, turn right and ascend the spiral staircase. Half-way up on the right, you’ll see a bust whose head follows your movements — you can find a Field Guide page here.
All Field Guide Pages Locations Hogwarts Grounds Revelio Field Ravenclaw Doorknocker
Location: Ravenclaw Tower
From the Ravenclaw Tower Floo Flames, head west to find a large spiral staircase. Follow it all the way up and you'll reach the entrance to the Ravenclaw common room, where you'll find this Field Guide page.
All Field Guide Pages Locations Hogwarts Grounds Revelio Field Detention Chamber
Location: Detention Chamber
From the Lower Grand Staircase Floo Flames, go down the stairs and turn right. Follow the corridor to the end, then turn right and go up the steps. Take the second left and go to the end of the corridor, where you’ll find a locked door (requires Alohomora Level 2 to unlock). Inside, the Field Guide page is just ahead.
All Field Guide Pages Locations Hogwarts Grounds Revelio Field Kelpie Statue
Location: Slytherin Dungeon
From the Lower Grand Staircase Floo Flames, head down the stairs ahead, then up another flight of stairs to the left. Up here you’ll find this Field Guide page beside a large statue.
All Field Guide Pages Locations Hogwarts Grounds Revelio Field Slytherin's Sink
Location: Slytherin Dungeon
From the Lower Grand Staircase Floo Flames, head down the stairs ahead, then go through the path to the right. Keep following it and you will see two bathrooms; head to the girls’ bathroom to the right. The Field Guide page appears in front of the sinks.
All Field Guide Pages Locations Hogwarts Grounds Revelio Field Salazar Slytherin's Scriptorium
Location: Slytherin Dungeons
You can find this Field Guide page during the Relationship Quest named In the Shadow of the Study. Once you open the door to the scriptorium, this Field Guide page is in the chamber through the door.
All Field Guide Pages Locations Hogwarts Grounds Revelio Field Partial Transfiguration
Location: Transfiguration Classroom
From the Transfiguration Classroom Floo Flames, head straight into the classroom. Inside, head down the left-hand walkway, and opposite the desks is a glass dome with a dish inside. This is where you'll find the Field Guide page.
All Field Guide Pages Locations Hogwarts Grounds Revelio Field Centaur Armour
Location: Trophy Room
From the Trophy Room Floo Flames, follow the corridor as it bends around to the right. Continue until you see a glass cabinet on the left displaying some armour. You'll find the Field Guide page in front of it.
All Field Guide Pages Locations Hogwarts Grounds Revelio Field Goblet of Fire Casket
Location: Trophy Room
From the Trophy Room Floo Flames, turn around and go into the room. Over to the right, you'll find a large, decorated tower — this is where you'll find this Field Guide page.
All Field Guide Pages Locations Hogwarts Grounds Revelio Field House-Elf Armour
Location: Trophy Room
From the Trophy Room Floo Flames, follow the corridor around to the right. Eventually you will come to a small suit of armour, where you'll find this Field Guide page.
All Field Guide Pages Locations Hogwarts Grounds Revelio Field Troll Armour
Location: Trophy Room
This Field Guide page is almost directly opposite the Trophy Room Floo Flames. The troll armour is hard to miss.
All Field Guide Pages Locations Hogwarts Grounds Revelio Field Trophy Room
Location: Trophy Room
From the Trophy Room Floo Flames, turn around and go into the room. Left of centre, you'll find a display case with a bunch of trophies on it. You'll find this Field Guide page here.
All Field Guide Pages Locations Hogwarts Grounds Revelio Field Wyvern Fountain
Location: Transfiguration Courtyard
From the Transfiguration Courtyard Floo Flames, look to the left and you'll see a statue in the middle of the square. Approach it and you'll find the Field Guide page.
All Field Guide Pages Locations Hogwarts Grounds Revelio Field Underground Harbour
Location: Underground Harbour
You'll be asked to get this one during Professor Weasley's Assignment. From the Viaduct Courtyard Floo Flames, go down and around the tree with the blue flowers. Stick to the right and you will find an elevator that can take you down to the Underground Harbour. Once down there, head over to the right-hand side of the docks to find this Field Guide page.
All Field Guide Pages Locations Hogwarts Grounds Lumos Field
To find these Field Guide pages, you must first locate specific picture frames. These are decorated with moving moths, and there is a blank space in the frame. Use Lumos to reveal an image, depicting a location where you'll find another moth. Upon finding it, use Lumos again to guide the moth back to the frame, which will then reveal the Field Guide page.
All Field Guide Pages Locations Hogwarts Grounds Lumos Field Astronomy Tower
Location: Astronomy Tower
From the Astronomy Tower Floo Flames, turn around and ascend the wooden stairs. At the top is a small room with the frame just inside on the left. To find the moth, turn around and ascend the spiral staircase all the way to the top of the tower. Walk to the middle of the deck and turn to your left to see the moth.
All Field Guide Pages Locations Hogwarts Grounds Lumos Field Like a Moth to a Frame
Location: Central Hall
This Field Guide page is rewarded upon completion of the Side Quest Like a Moth to a Frame. To begin the quest, speak to Lenora in Central Hall.
All Field Guide Pages Locations Hogwarts Grounds Lumos Field Clock Tower Courtyard
Location: Clock Tower Courtyard
From the Clock Tower Courtyard Floo Flames, go to the locked door straight ahead (requires Alohomora to unlock). Inside, the frame can be seen on the right. For the moth, go back out, turn right and go outside into the courtyard. Turn right and go through the arch, then turn right again to find the moth.
All Field Guide Pages Locations Hogwarts Grounds Lumos Field Defence Against the Dark Arts Tower
Location: Defence Against the Dark Arts Tower
From the Defence Against the Dark Arts Tower Floo Flames, head forward to find the frame. After casting Lumos on it, turn back and head through the corridor, then up the stairs one floor. Continue through the corridor and look out for the moth on one of the columns on the right. Use Lumos and return to the frame to get the Field Guide page.
All Field Guide Pages Locations Hogwarts Grounds Lumos Field Grand Staircase
Location: Grand Staircase
From the Trophy Room Floo Flames, follow the corridor all the way to the right and you’ll come across a locked door (requires Alohomora to unlock). Go through and follow the stairs and corridors all the way to a spiral staircase. Ascend the staircase to the top and go through the door, then head left to see the frame. For the moth, go back down the spiral staircase and down the next flight of stairs. The moth is perched on the wooden archway at the bottom of the stairs.
All Field Guide Pages Locations Hogwarts Grounds Lumos Field Great Hall
Location: Great Hall
From the Great Hall Floo Flames, turn around and go out of the hall. Look to the left and you'll find the frame. For the moth, go back inside the Great Hall and walk up to the other side, where the teachers sit. The moth is sat on the back wall.
All Field Guide Pages Locations Hogwarts Grounds Lumos Field Gryffindor Tower
Location: Gryffindor Tower
From the Clock Tower Courtyard Floo Flames, go across the bridge into Gryffindor Tower. Just inside the door on the left is a large map with something above it you can interact with. Cast Depulso at it, and you’ll uncover a secret room with the frame inside. To find the moth, go back out, descend the stairs on the left, then enter the girls’ bathroom around the corner. It’ll be perched on top of the towel stand.
All Field Guide Pages Locations Hogwarts Grounds Lumos Field Library
Location: Library
From the Library Floo Flames, ascend the spiral staircase to your left. At the top, turn left and walk down the length of the library. At the end, look to the right to find the frame. To find the moth, go back the way you came, and it’ll be sat on the lectern opposite the giant portrait.
All Field Guide Pages Locations Hogwarts Grounds Lumos Field Long Gallery
Location: Long Gallery (Requires the spell Alohomora to gain access. This spell is earned by completing the Main Quest The Caretaker’s Lunar Lament)
From the Bell Tower Courtyard Floo Flames, turn around and go through the large wooden door (will need to be unlocked if you haven’t already). Head down the hallway, and you’ll come to the frame on the left-hand side. To find the moth, go back, look to the right of the steps, and you’ll find it atop a cabinet containing a troll.
All Field Guide Pages Locations Hogwarts Grounds Lumos Field North Hall
Location: North Hall
From the Transfiguration Courtyard Floo Flames, turn around and go through the big doors on the left. Inside, go forward and then right, up the stairs. The frame is on the right-hand wall. For the moth, go back down the stairs and through the door straight ahead. At the back of the next room is a locked door (requires Alohomora to unlock). Once through, the moth can be found on the right.
All Field Guide Pages Locations Hogwarts Grounds Lumos Field Pungent Passage
Location: Pungent Passage
From the West Tower Floo Flames, head left down some steps and you’ll find yourself in Pungent Passage. At the other side of the corridor, the frame hangs on the left-hand side. To find the moth, go back the way you came and look to the tapestry on the left.
All Field Guide Pages Locations Hogwarts Grounds Lumos Field Ravenclaw Tower
Location: Ravenclaw Tower
From the Ravenclaw Tower Floo Flames, turn right and descend the spiral staircase. At the bottom you’ll see the frame over to the right. To find the moth, go back up the stairs and it’ll be on the wall to the right.
All Field Guide Pages Locations Hogwarts Grounds Lumos Field Slytherin Dungeon
Location: Slytherin Dungeon
From the Lower Grand Staircase Floo Flames, head down the stairs ahead, then go through the path to the right. Keep following it and you will see the frame on your right as you come out the other side. To find the moth, go around to the right and follow the hallway up some steps. Take the second left and you’ll see the moth ahead.
All Field Guide Pages Locations Hogwarts Grounds Lumos Field Viaduct Courtyard
Location: Viaduct Courtyard
From the Viaduct Courtyard Floo Flames, go down and around the tree with the blue flowers. Continue and turn right at the end to find the frame. To find the moth, head up the stairs to the left, then cross to the southwestern corner of the courtyard. The moth will be perched by a statue.
All Field Guide Pages Locations Hogwarts Grounds Accio Field
These Field Guide pages are visible, but will be flying in the air. To collect them, use Accio on them.
All Field Guide Pages Locations Hogwarts Grounds Accio Field Beasts Classroom
Location: Beasts Classroom
From the Beasts Classroom Floo Flames, look up above the hut and you'll see this Field Guide page flying above it.
All Field Guide Pages Locations Hogwarts Grounds Accio Field Bell Tower Courtyard
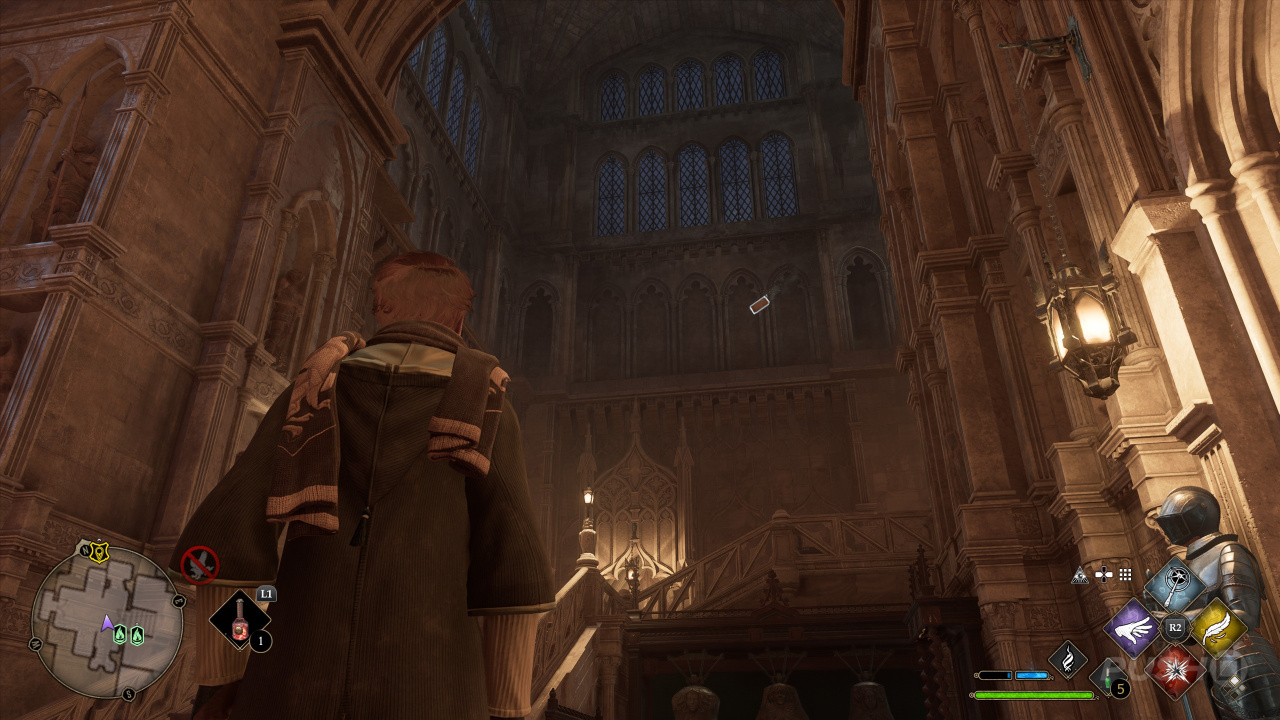
Location: Bell Tower Courtyard
From the Bell Tower Courtyard Floo Flames, look up and to the right to find this Field Guide page flying around.
All Field Guide Pages Locations Hogwarts Grounds Accio Field Central Hall #1
Location: Central Hall
This Field Guide page is flying on the northeastern side of Central Hall.
All Field Guide Pages Locations Hogwarts Grounds Accio Field Central Hall #2
Location: Central Hall
This Field Guide page is flying on the southwestern side of Central Hall.
All Field Guide Pages Locations Hogwarts Grounds Accio Field Clock Tower
Location: Clock Tower
From the Hospital Wing Floo Flames, head through to the clock tower. Descend the stairs on the right, following them as they wind down the tower. Follow the footpath along and you'll come to even more stairs. Descend them. At the bottom, turn left and descend yet more stairs. On this level, you will spot a flying Field Guide page weaving around the pendulum.
All Field Guide Pages Locations Hogwarts Grounds Accio Field Deathday Party Room
Location: Deathday Party Room
From the Lower Grand Staircase Floo Flames, go down the stairs and turn right. Follow the corridor to the end, then turn right and go up the steps. Take the second left and you’ll see a locked metal door (requires Alohomora to unlock). Follow the corridor through to the next room. You can see this flying Field Guide page circling above.
All Field Guide Pages Locations Hogwarts Grounds Accio Field Defence Against the Dark Arts Tower
Location: Defence Against the Dark Arts Tower
From the Charms Classroom Floo Flames, simply look up and you’ll see this Field Guide page flying above.
All Field Guide Pages Locations Hogwarts Grounds Accio Field Dungeons
Location: Dungeons
From the Bell Tower Courtyard Floo Flames, turn left, go up the first steps, then head through the door ahead. Go down the next steps and through another door. Keep descending all the stairs. When you reach the large dragon statue, go right down the corridor, and then right again. Through the arch, look up and to the left to see the Field Guide page flying around.
All Field Guide Pages Locations Hogwarts Grounds Accio Field Entrance Hall
Location: Entrance Hall
From the Grand Staircase Floo Flames, head towards the house point hourglasses and go through the door on the left. In this room, look up to find the Field Guide page flying above.
All Field Guide Pages Locations Hogwarts Grounds Accio Field Faculty Tower
Location: Faculty Tower (This particular area only accessible after completing the Main Quest The Caretaker’s Lunar Lament)
From the Faculty Tower Floo Flames, head down the corridor and into the “restricted” area. Ascend the stairs and you can see this flying Field Guide page half-way up.
All Field Guide Pages Locations Hogwarts Grounds Accio Field Grand Staircase
Location: Grand Staircase
From the Grand Staircase Floo Flames, turn left and head towards the Grand Staircase itself. Look up and wait for this Field Guide page to fly overhead
All Field Guide Pages Locations Hogwarts Grounds Accio Field Outside Great Hall
Location: Great Hall
From the Great Hall Floo Flames, look to the right and head through the doors to an outside area. You should spot a flying Field Guide page doing laps above.
All Field Guide Pages Locations Hogwarts Grounds Accio Field Greenhouses Exterior
Location: Greenhouses Exterior
From the Bell Tower Courtyard Floo Flames, go out the doors to the outside. Head right through an archway to find some gardens behind the greenhouses. You'll see a dragon-shaped bush — continue past it towards a fountain, where you'll see this flying Field Guide page.
All Field Guide Pages Locations Hogwarts Grounds Accio Field Library
Location: Library
From the Library Floo Flames, go up one of the spiral staircases. You will see this Field Guide page flying around this upper level.
All Field Guide Pages Locations Hogwarts Grounds Accio Field Hieroglyphic Hall
Location: Hieroglyphic Hall
From the Bell Tower Courtyard Floo Flames, go up the steps on the left and then through the door ahead. Ascend the next steps and ahead is the History of Magic classroom. Inside, head to the back and unlock the door (requires Alohomora). Inside, you'll see this Field Guide page flying between the pillars.
All Field Guide Pages Locations Hogwarts Grounds Accio Field Hospital Wing
Location: Hospital Wing
From the Hospital Wing Floo Flames, simply walk into the Hospital Wing and you can see this Field Guide page circling above.
All Field Guide Pages Locations Hogwarts Grounds Accio Field Owlery
Location: Hogwarts Owlery
From the Flying Class Lawn or Beasts Classroom Floo Flames, head south and make your way to the owlery tower. Ascend the stairs, then climb the ladder to the very top. This Field Guide page can be seen from here, circling the tower.
All Field Guide Pages Locations Hogwarts Grounds Accio Field Professor Ronen's Assignment #1
Location: Defence Against the Dark Arts Tower
You'll collect this flying Field Guide page during the course of Professor Ronen's Assignment. After speaking with him, head to the right and through the door to the Defence Against the Dark Arts Tower. The page is flying above the stairs ahead.
All Field Guide Pages Locations Hogwarts Grounds Accio Field Professor Ronen's Assignment #2

Location: Transfiguration Courtyard
You'll collect this flying Field Guide page during the course of Professor Ronen's Assignment. It's straight ahead after speaking with him.
All Field Guide Pages Locations Hogwarts Grounds Accio Field Quad Courtyard
Location: Quad Courtyard
From the Quad Courtyard Floo Flames, turn to the right and look up to see this Field Guide page circling around a tall tree.
All Field Guide Pages Locations Hogwarts Grounds Accio Field Viaduct Entrance

Location: Viaduct Entrance
From the Divination Classroom Floo Flames, turn around and go up the small wooden steps. Go along the walkway and you will see the flying Field Guide page pass over the rafters.
All Field Guide Pages Locations Hogwarts Grounds Levioso Field
Dotted around the environment, you'll find statues, with a figure holding a golden orb. Cast the spell Levioso on them to open the orb and release a Field Guide page.
All Field Guide Pages Locations Hogwarts Grounds Levioso Field Central Hall
Location: Central Hall
From the Central Hall Floo Flames, go down the stairs towards the fountain. Turn right and go down the steps, the turn right again to find a locked door (requires Alohomora to open). Inside, the statue concealing the Field Guide page is down to the left.
All Field Guide Pages Locations Hogwarts Grounds Levioso Field Clock Tower Courtyard
Location: Clock Tower Courtyard
From the Clock Tower Courtyard Floo Flames, immediately ahead of you will be a statue containing this Field Guide page.
All Field Guide Pages Locations Hogwarts Grounds Levioso Field Defence Against the Dark Arts Tower
Location: Defence Against the Dark Arts Tower
From the Charms Classroom Floo Flames, head up the stairs just ahead. At the top, this statue can be found just on the right as you pass through the doorway.
All Field Guide Pages Locations Hogwarts Grounds Levioso Field Dungeons
Location: Dungeons
From the Bell Tower Courtyard Floo Flames, turn left, go up the first steps, then head through the door ahead. Go down the next steps and through another door. Keep descending all the stairs. When you reach the large dragon statue, go right down the corridor, and then right again. Through the arch, turn left to find a locked door with a frog statue on the other side (Alohomora required to unlock the door). Interact with the frog, and on the other side, you’ll see the statue.
All Field Guide Pages Locations Hogwarts Grounds Levioso Field Entrance Hall
Location: Entrance Hall
From the Grand Staircase Floo Flames, head towards the house point hourglasses, and go through the door on the left. Descend the stairs to the right-hand side to find the statue concealing the Field Guide page.
All Field Guide Pages Locations Hogwarts Grounds Levioso Field Faculty Tower
Location: Faculty Tower (This particular area only accessible after completing the Main Quest The Caretaker’s Lunar Lament)
From the Hospital Wing Floo Flames, head down the spiral stairs. The statue concealing this Field Guide page is immediately on the right.
All Field Guide Pages Locations Hogwarts Grounds Levioso Field Hieroglyphic Hall
Location: Hieroglyphic Hall
From the Bell Tower Courtyard Floo Flames, go up the steps on the left and then through the door ahead. Ascend the next steps and ahead is the History of Magic classroom. Inside, head to the back and unlock the door (requires Alohomora). At the back of this next room, you'll find this statue with the Field Guide page.
All Field Guide Pages Locations Hogwarts Grounds Levioso Field Library — Restricted Section
Location: Library — Restricted Section
You can find this Field Guide page during the Main Quest Secrets of the Restricted Section. As you progress through the Restricted Section, you’ll come into a dark room. The statue containing this Field Guide page is along the main path — it’s hard to miss.
All Field Guide Pages Locations Hogwarts Grounds Levioso Field North Hall
Location: North Hall
From the Transfiguration Classroom Floo Flames, turn around and head down the walkway. Just past the big doors on the left is another smaller door that's locked (requires Alohomora to unlock). Go inside and up the stairs, and you'll find the statue on your right.
All Field Guide Pages Locations Hogwarts Grounds Levioso Field Owlery
Location: Hogwarts Owlery
From the Flying Class Lawn or Beasts Classroom Floo Flames, head south and make your way to the owlery tower. Ascend the stairs, then climb the ladder to the very top. Walk around to the other side to find the statue concealing this Field Guide page.
All Field Guide Pages Locations Hogwarts Grounds Levioso Field Quad Courtyard
Location: Quad Courtyard
From the Quad Courtyard Floo Flames, turn right, go past the fountain and up the stairs ahead. Follow them up three small flights and you’ll see the statue at the top.
All Field Guide Pages Locations Hogwarts Grounds Levioso Field Ravenclaw Tower
Location: Ravenclaw Tower
From the Ravenclaw Tower Floo Flames, turn left and head towards the Grand Staircase. Just before it, you’ll see the statue containing the Field Guide page on the left.
All Field Guide Pages Locations Hogwarts Grounds Levioso Field Transfiguration Courtyard
Location: Transfiguration Courtyard
From the Transfiguration Courtyard Floo Flames, head forward and over to the right to go under the shelter. At the back of this area you'll see the statue concealing this Field Guide page.
All Field Guide Pages Locations Hogwarts Grounds Levioso Field Viaduct Courtyard
Location: Viaduct Courtyard
From the Viaduct Courtyard Floo Flames, go up the stairs to the right and then cross the courtyard. Head through the arch, turn right, and then right again to find this statue.
All Field Guide Pages Locations Hogwarts Grounds Incendio Field Guide Pages
Once you have unlocked the spell Incendio, look out for braziers with a dragon around the edge. Setting these alight will reveal a Field Guide page.
All Field Guide Pages Locations Hogwarts Grounds Incendio Field Guide Pages Astronomy Tower
Location: Astronomy Tower
From the Astronomy Tower Floo Flames, go up the wooden stairs and continue ascending the tower right to the top. At the top, look to the right and you’ll see a narrow staircase down. Descend the steps and you’ll find this brazier at the back of the room.
All Field Guide Pages Locations Hogwarts Grounds Incendio Field Guide Pages Bell Tower Courtyard
Location: Bell Tower Courtyard
From the Bell Tower Courtyard Floo Flames, head up the stairs to the right. To the left will be a brazier to light for this Field Guide page.
All Field Guide Pages Locations Hogwarts Grounds Incendio Field Guide Pages Boathouse
Location: Boathouse
From the Boathouse Floo Flames, enter the boathouse and head over to the right to find the plinth concealing this Field Guide page.
All Field Guide Pages Locations Hogwarts Grounds Incendio Field Guide Pages Central Hall
Location: Central Hall
From the Central Hall Floo Flames, go down the stairs towards the fountain. Head towards the library and go up the stairs on the right. The brazier is up on this platform.
All Field Guide Pages Locations Hogwarts Grounds Incendio Field Guide Pages Faculty Tower
Location: Faculty Tower
From the Faculty Tower Floo Flames, head forward and then through to the private faculty area. Ascend the stairs two floors, and go through the door next to the bejewelled tortoise shell. Inside, go to the fireplace ahead and cast Glacius on the fire. Crawl through and ascend all the stairs to find a small hidden room. Walk across the room to find the brazier on a small balcony.
All Field Guide Pages Locations Hogwarts Grounds Incendio Field Guide Pages Great Hall
Location: Great Hall
From the Great Hall Floo Flames, turn right and go up the stairs around the corner. At the top, continue up the wooden steps to find a plinth concealing the Field Guide page.
All Field Guide Pages Locations Hogwarts Grounds Incendio Field Guide Pages Gryffindor Tower
Location: Gryffindor Tower
From the Clock Tower Courtyard Floo Flames, turn around, go through the door, and cross to the other side. Back indoors, head forward down some steps to find a brazier concealing this Field Guide page.
All Field Guide Pages Locations Hogwarts Grounds Incendio Field Guide Pages North Hall
Location: North Hall
From the Bell Tower Courtyard Floo Flames, go left up the stairs and through the door. Ascend all the stairs, and you’ll see a locked door ahead (requires Alohomora to unlock). Inside,you can find the brazier to the left.
All Field Guide Pages Locations Hogwarts Grounds Incendio Field Guide Pages Slytherin Dungeon
Location: Slytherin Dungeon
From the Lower Grand Staircase Floo Flames, go down the stairs and turn right. Follow the corridor to the end, then turn right and go up the steps. Take the second left and unlock the second metal door on the left (requires Alohomora). Inside, you’ll find a brazier to light.
All Field Guide Pages Locations Hogwarts Grounds Confringo Field Guide Pages
Incendio has a short reach, and many sconces are too far away for the spell to work. In these instances, you’ll need to use Confringo, which will light things ablaze that are at longer range.
All Field Guide Pages Locations Hogwarts Grounds Confringo Field Guide Pages Defence Against the Dark Arts Tower
Location: Defence Against the Dark Arts Tower
From the Professor Fig’s Classroom Floo Flames, head to the left and you’ll see the sconce on the right-hand wall.
All Field Guide Pages Locations Hogwarts Grounds Confringo Field Guide Pages Faculty Tower
Location: Clock Tower (This area only accessible after completing the Main Quest The Caretaker’s Lunar Lament)
From the Hospital Wing Floo Flames, head down the spiral staircase. Ahead to the right, go through the passageway to enter the clock tower. Across to the left, you’ll see the sconce on the back wall.
All Field Guide Pages Locations Hogwarts Grounds Confringo Field Guide Pages Grand Staircase
Location: Grand Staircase
From the Grand Staircase Tower Floo Flames, turn right onto the Grand Staircase. From the walkway, look up and to the right to find a sconce you can light.
All Field Guide Pages Locations Hogwarts Grounds Confringo Field Guide Pages Quad Courtyard
Location: Quad Courtyard
From the Quad Courtyard Floo Flames, just ahead you should see a sconce on the tower.
All Field Guide Pages Locations Hogsmeade
There are 55 Field Guide Pages in Hogsmeade.
All Field Guide Pages Locations Hogsmeade Revelio Field
To find these Field Guide pages, you will need to reach their location and use the spell Revelio so you can collect them.
The game provides subtle hints when you're nearby one of these, including a faint shimmer on the Field Guide page as well as a chime sound effect.
All Field Guide Pages Locations Hogsmeade Revelio Field Brood and Peck
Location: Brood and Peck
From the North Hogsmeade Floo Flames, go left up the steps and follow the path to Brood and Peck, a shop marked on your map. You can only get inside after completing the Main Quest named The Elf, the Nab-Sack, and the Loom.
Inside the shop, the Field Guide page can be found on the right by the food troughs.
All Field Guide Pages Locations Hogsmeade Revelio Field Ceridwen's Precarious Cauldrons
Location: Ceridwen's Cauldrons
From the South Hogsmeade Floo Flames, turn left onto the high street and then head south. On the left, you will come across a shop called Ceridwen's Cauldrons. Outside this shop, you will find this Field Guide page.
All Field Guide Pages Locations Hogsmeade Revelio Field Sneakoscope
Location: Dervish and Banges
Head towards Gladrags Wizardwear, one of the shops marked on your map. The shop next door is Dervish and Banges. Go inside, and immediately on the left, you'll find this Field Guide page.
All Field Guide Pages Locations Hogsmeade Revelio Field The Dogweed and Deathcap Tree
Location: Dogweed and Deathcap
From the North Hogsmeade Floo Flames, head north up to Dogweed and Deathcap, one of the shops marked on your map. Inside, this Field Guide page can be found just to the right of the counter.
All Field Guide Pages Locations Hogsmeade Revelio Field Gladrags Mannequin
Location: Gladrags Wizardwear
Go to Gladrags Wizardwear, one of the shops marked on your map. As you enter, look to the right to reveal this Field Guide page beside a mannequin.
All Field Guide Pages Locations Hogsmeade Revelio Field Gladrags Wizardwear
Location: Gladrags Wizardwear
Head to the entrance to Gladrags Wizardwear, one of the shops marked on your map. This Field Guide page is just outside the door.
All Field Guide Pages Locations Hogsmeade Revelio Field Mounted Hog's Head
Location: Hog's Head
Go inside Hog's Head, marked as a point of interest on the map in the southwest of Hogsmeade. The Field Guide page is located behind the bar.
All Field Guide Pages Locations Hogsmeade Revelio Field Magical Mail
Location: Hogsmeade Post Office
To the right of Steepley and Sons (a point of interest on the map), you'll find Hogsmeade Post Office. Go inside and this Field Guide page is ahead.
All Field Guide Pages Locations Hogsmeade Revelio Field Hogsmeade Community Garden
Location: Hog’s Head Alley
From the West Hogsmeade Floo Flames, head to the right and through the gate into the garden. The Field Guide page is opposite some plants.
All Field Guide Pages Locations Hogsmeade Revelio Field Hengist of Woodcroft
Location: Hogsmeade Square
From the North Hogsmeade Floo Flames, turn right and go to the other side of the tree to find a statue. You'll find this Field Guide page here.
All Field Guide Pages Locations Hogsmeade Revelio Field Hog's Head Docks
Location: Hog’s Head
From the West Hogsmeade Floo Flames, head to the left and go down the hill towards Hog’s Head. Go on the deck behind Hog’s Head and you’ll find the Field Guide page by some crates.
All Field Guide Pages Locations Hogsmeade Revelio Field Exploding Bonbons
Location: Honeydukes
Go to Honeydukes, a point of interest on the map. Inside, go to the back area of the shop and over to the left. This Field Guide page is just to the right of the cauldron full of gold coins.
All Field Guide Pages Locations Hogsmeade Revelio Field Fizzing Whizzbees
Location: Honeydukes
Go to Honeydukes, a point of interest on the map. Inside, head down the left-hand aisle and you'll find an advert for Fizzing Whizzbees, where this Field Guide page is located.
All Field Guide Pages Locations Hogsmeade Revelio Field Honeydukes
Location: Honeydukes
In the northeast of Hogsmeade you'll find Honeydukes, a point of interest on your map. This Field Guide page is just outside the main door.
All Field Guide Pages Locations Hogsmeade Revelio Field J. Pippin's Potions
Location: J. Pippin's Potions
Go inside J. Pippin's Potions, one of the shops marked on the map. Head to the back of the shop and the Field Guide page is found in front of a steaming cauldron.
All Field Guide Pages Locations Hogsmeade Revelio Field The Magic Neep Cart
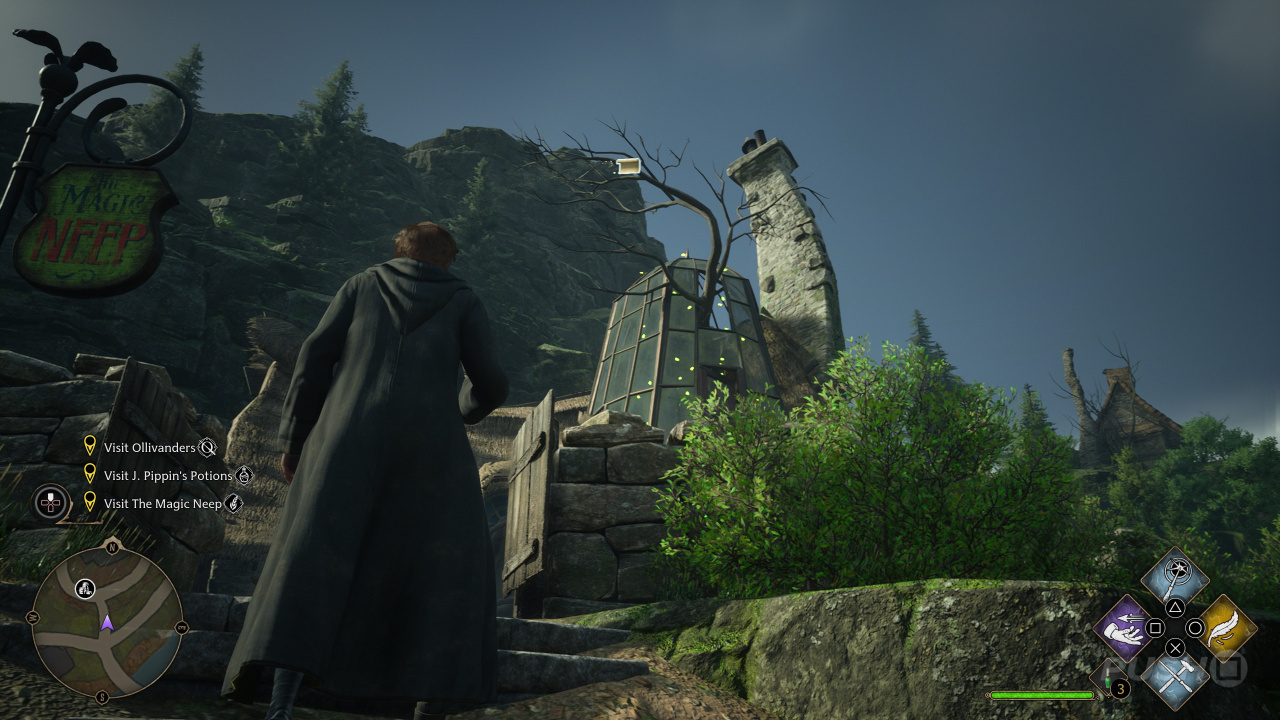
Location: The Magic Neep
To the west of Hogsmeade is The Magic Neep, one of the shops marked on the map. This Field Guide page is by the cart just behind Timothy Teasdale.
All Field Guide Pages Locations Hogsmeade Revelio Field Ollivanders Wand Shop
Location: Ollivanders
From the South Hogsmeade Floo Flames, head northwest making your way to Ollivanders, one of the shops on your map. Outside the door you’ll find this Field Guide page.
All Field Guide Pages Locations Hogsmeade Revelio Field Abandoned Shop
Location: The Old Fool
From the West Hogsmeade Floo Flames, head over the bridge to the left. On the other side, turn right and walk down the path, past The Magic Neep and the graveyard. Eventually you'll find some stone steps leading up the hill on the left. Walk up these towards the small house. The Field Guide page is outside the door.
All Field Guide Pages Locations Hogsmeade Revelio Field Scrivenshaft Cats
Location: Scrivenshaft's
In Hogsmeade Square, there's a small shop called Scrivenshaft's you can enter. Go inside, and you'll see some cats ahead. This Field Guide page is here.
All Field Guide Pages Locations Hogsmeade Revelio Field Spintwitches Sporting Needs
Location: Spintwitches Sporting Needs
From the South Hogsmeade Floo Flames, walk around to the front of Spintwiches Sporting Needs, one of the shops marked on your map. Inside on the left, you’ll find this Field Guide page by a mannequin.
All Field Guide Pages Locations Hogsmeade Revelio Field Tea Shop Decor
Location: Steepley and Sons
Go to Steepley and Sons, a point of interest on the map. Inside, go over to the left to find this Field Guide page next to Mrs. Steepley.
All Field Guide Pages Locations Hogsmeade Revelio Field The Three Broomsticks
Location: The Three Broomsticks
Go inside The Three Broomsticks, marked as a point of interest on the map. Straight ahead is a large fireplace, where you'll find this Field Guide page.
All Field Guide Pages Locations Hogsmeade Revelio Field The Three Broomsticks Private Room
Location: The Three Broomsticks
From the South Hogsmeade Floo Flames, head northwest up the road to The Three Broomsticks. Go inside and go up the stairs on the left. Follow the stairs as they wind up to a locked door (Requires Alohomora to unlock). Inside, the Field Guide page is above the small table in the middle.
All Field Guide Pages Locations Hogsmeade Revelio Field Enchanted Staircase
Location: Tomes and Scrolls
From the South Hogsmeade Floo Flames, head down the main street to Tomes and Scrolls, one of the shops marked on the map. Inside, reveal the Field Guide page on the left, opposite some shelving.
All Field Guide Pages Locations Hogsmeade Revelio Field Water Well
Location: Upper High Street
From the North Hogsmeade Floo Flames, turn right and head southwest. Go under the overpass onto the main high street, and you'll see a water well on the right. This is where you find this Field Guide page.
All Field Guide Pages Locations Hogsmeade Revelio Field Frog Spawn Soap
Location: Zonko's Joke Shop
Go inside Zonko's Joke Shop, marked as a point of interest on the map. This Field Guide page is over to the left opposite some shelves.
All Field Guide Pages Locations Hogsmeade Revelio Field Zonko's Joke Shop
Location: Zonko's Joke Shop
Head to Zonko's Joke Shop, marked as a point of interest on the map. Just outside the main entrance, you'll find this Field Guide page.
All Field Guide Pages Locations Hogsmeade Lumos Field Guide Pages
All Field Guide Pages Locations Hogsmeade Lumos Field Guide Pages Dogweed and Deathcap
Location: Dogweed and Deathcap
From the North Hogsmeade Floo Flames, head north to Dogweed and Deathcap, which is marked on the map. Inside, look to the right to find the frame leaned against the wall. For the moth, go back outside and climb the rocks to the right of the shop. At the top, you'll see the shop's chimney, where the moth is sitting.
All Field Guide Pages Locations Hogsmeade Lumos Field Guide Pages Hog's Head Alley
Location: Hog’s Head Alley
From the West Hogsmeade Floo Flames, go right down the stairs, then right again towards Hog’s Head. Go through the gap to the left of Hog’s Head and go around to the back of the building on the left to find the frame. For the moth, go back to Hog’s Head and head to the right-hand side. The moth is sat on some boxes.
All Field Guide Pages Locations Hogsmeade Lumos Field Guide Pages Spire Alley
Location: Spire Alley
From the South Hogsmeade Floo Flames, go over to the right and you’ll find the frame leaning against a building to the left. To find the moth, look opposite the frame and walk through the gap between buildings. The moth will be sat on a wall.
All Field Guide Pages Locations Hogsmeade Lumos Field Guide Pages The Old Fool
Location: The Old Fool
From the West Hogsmeade Floo Flames, head over the bridge to the left. On the other side, turn right and walk down the path, past The Magic Neep and the graveyard. Eventually you'll find some stone steps leading up the hill on the left. Walk up these towards the small house. Go inside to find the frame on the wall. To find the moth, go outside and head left to the back of the house. You'll find it sat on a crate.
All Field Guide Pages Locations Hogsmeade Lumos Field Guide Pages The Water Mill
Location: The Water Mill
From the North Hogsmeade Floo Flames, head up the steps to the left and follow the path up the hill, heading towards the water mill. Go inside the mill and inside on the left is the frame. To find the moth, go back down the path and you'll find it sitting on the lamppost.
All Field Guide Pages Locations Hogsmeade Accio Field
These Field Guide pages are visible, but will be flying in the air. To collect them, use Accio on them.
All Field Guide Pages Locations Hogsmeade Accio Field Dogweed and Deathcap
Location: Dogweed and Deathcap
From the North Hogsmeade Floo Flames, head north to Dogweed and Deathcap, the northernmost shop marked on the map. Outside the shop, look up and you'll see the flying Field Guide page circling its roof.
All Field Guide Pages Locations Hogsmeade Accio Field Hog's Head Alley #1
From where you enter Hogsmeade, turn left towards Hog's Head. When you reach a town crier, look opposite to find a gap between the buildings. There's a flying Field Guide page in this clearing.
All Field Guide Pages Locations Hogsmeade Accio Field Hog's Head Alley #2
Location: Hog’s Head Alley
From the West Hogsmeade Floo Flames, go right down the steps, then look to the left next to a wheelbarrow. The Field Guide page is flying above the garden.
All Field Guide Pages Locations Hogsmeade Accio Field Lower High Street #1
Location: Hogsmeade Entrance
As soon as you cross the bridge into Hogsmeade, turn to the left to see this page flying beside the shop Tomes and Scrolls.
All Field Guide Pages Locations Hogsmeade Accio Field Lower High Street #2
Location: Hogsmeade Entrance
As soon as you cross the bridge into Hogsmeade, turn to the right and head down the alley between the house and the cauldron shop. The Field Guide page will be flying in this area.
All Field Guide Pages Locations Hogsmeade Accio Field The Magic Neep #1
Location: The Magic Neep
As you approach The Magic Neep, you can see this flying Field Guide page doing laps around the shop's chimney.
All Field Guide Pages Locations Hogsmeade Accio Field North Hogsmeade #1
Location: North Hogsmeade
From the North Hogsmeade Floo Flames, go left towards the lake. Flying above it is this Field Guide page.
All Field Guide Pages Locations Hogsmeade Accio Field The Magic Neep #2
Location: The Magic Neep
From the West Hogsmeade Floo Flames, go across the bridge towards The Magic Neep. Over to the left are some cliffs you can climb, and you'll find this Field Guide page circling in this area.
All Field Guide Pages Locations Hogsmeade Accio Field North Hogsmeade #2
Location: North Hogsmeade
From the North Hogsmeade Floo Flames, go left and follow the path towards Brood and Peck (marked on the map). To the left of the shop, you can see a flying Field Guide page moving up and down above the alley.
All Field Guide Pages Locations Hogsmeade Accio Field North Hogsmeade #3
Location: North Hogsmeade
From the North Hogsmeade Floo Flames, turn left and walk along the path towards Brood and Peck (marked on the map). Continue past the shop and you'll see a bridge — this Field Guide page is flying around it.
All Field Guide Pages Locations Hogsmeade Accio Field North of Honeydukes
Location: North of Honeydukes
From the North Hogsmeade Floo Flames, go up the steps to the left and up the path to the northeast. On the right you'll see a small house with a lamppost outside it. Just past this, you can see this flying Field Guide page circling over the ridge.
All Field Guide Pages Locations Hogsmeade Accio Field The Old Fool
Location: The Old Fool
From the West Hogsmeade Floo Flames, head over the bridge to the left. On the other side, turn right and walk down the path, past The Magic Neep and the graveyard. Eventually you'll find some stone steps leading up the hill on the left. Walk up these towards the small house, and you'll see this Field Guide page flying outside.
All Field Guide Pages Locations Hogsmeade Accio Field Rivers Edge #1
Location: Rivers Edge
To the west of Hogsmeade is a bridge that leads to The Magic Neep. A flying Field Guide page can be seen passing underneath this bridge.
All Field Guide Pages Locations Hogsmeade Accio Field Rivers Edge #2
Location: Rivers Edge
From the Western Hogsmeade Floo Flames, go up to the right, with J. Pippin's Potions on your left. At the next house on the left, go up the steps to find this flying Field Guide page above the river.
All Field Guide Pages Locations Hogsmeade Accio Field Southeast Hogsmeade
Location: Southeast Hogsmeade
From the South Hogsmeade Floo Flames, turn right and go down the path and through the small gates. Head up some stairs to the left to find this flying Field Guide page.
All Field Guide Pages Locations Hogsmeade Accio Field Southeast of Dogweed and Deathcap
Location: Southeast of Dogweed and Deathcap
From the North Hogsmeade Floo Flames, head over the bridge towards Dogweed and Deathcap. Turn right on the path and head up the hill until you come to a bunch of Lacewing Flies on the right. Above is this flying Field Guide page.
All Field Guide Pages Locations Hogsmeade Accio Field Spire Alley
Location: Spire Alley
From the South Hogsmeade Floo Flames, head northeast. With Bingle & Blatch on your right, look over to the left to find some narrow steps, where this flying Field Guide page is circling.
All Field Guide Pages Locations Hogsmeade Accio Field Steepley and Sons
Location: Steepley and Sons
From the North Hogsmeade Floo Flames, cross the square to Steepley and Sons, one of the points of interest on the map. There is a flying Field Guide page circling the shop.
All Field Guide Pages Locations Hogsmeade Accio Field Tomes and Scrolls
Location: Tomes and Scrolls
From the South Hogsmeade Floo Flames, go down the main street to Tomes and Scrolls, one of the shops marked on the map. Inside, go over to the right and interact with the large book on the table. This will reveal a staircase. Go up the stairs and you’ll see this Field Guide page flying around the chandelier.
All Field Guide Pages Locations Hogsmeade Accio Field Upper High Street
Location: Upper High Street
From the entrance to Zonko's Joke Shop, head up the main stairs and find the water well on the left. Above, you'll spot this flying Field Guide page.
All Field Guide Pages Locations North Ford Bog
There are 2 Field Guide Pages in North Ford Bog.
All Field Guide Pages Locations North Ford Bog Antique Horn
Location: Northeast North Ford Bog
From the North Ford Bog Floo Flames, fly over to the northeastern corner of the region. At the end of the path, you'll see a small dock by the small lake, where you'll find this Field Guide page.
All Field Guide Pages Locations North Ford Bog Spider Sign
Location: Pitt-Upon-Ford
From the Pitt-Upon-Ford Floo Flames, head south into the village. At the Vendor, go over to the right to find this Field Guide page by a wooden sign.
All Field Guide Pages Locations Hogsmeade Valley
There are 4 Field Guide Pages in Hogsmeade Valley.
All Field Guide Pages Locations Hogsmeade Valley Chocolate Frogs
Location: Southeast Hogsmeade
From the South Hogsmeade Floo Flames, turn right, go down the path and through a small gate. Follow the path towards the dragon bush, then up the stairs ahead. The Field Guide page is found above a box on a bench.
All Field Guide Pages Locations Hogsmeade Valley Pumpkin Fizz
Location: Upper Hogsfield
From the Upper Hogsfield Floo Flames, head north through the village, following the path. On the left you'll see some large barrels and a small building. Go inside and you'll find this Field Guide page.
All Field Guide Pages Locations Hogsmeade Valley Runespoor Egg
Location: Falbarton Castle
From the Falbarton Castle Floo Flames, fly to the northeast over the castle wall. On the other side, continue heading northeast and go inside a ruined outbuilding. Inside, you’ll find this Field Guide page next to a table.
All Field Guide Pages Locations Hogsmeade Valley Squib Cottage
Location: East of Hogsmeade
From the East Hogsmeade Valley Floo Flames, go out and head to the south. Beyond the large tree you can find a small cottage with pumpkins outside. Around to the right, you can find this Field Guide page.
All Field Guide Pages Locations North Hogwarts Region
There is 1 Field Guide Page in North Hogwarts Region.
All Field Guide Pages Locations North Hogwarts Region Alihotsy Fudge
Location: Near Forbidden Forest
From the Forbidden Forest Floo Flames, fly northeast up the hillside until you come to a pair of benches. The Field Guide page is above some fudge.
All Field Guide Pages Locations South Hogwarts Region
There are 3 Field Guide Pages in South Hogwarts Region.
All Field Guide Pages Locations South Hogwarts Region Spider Parts
Location: Aranshire
From the Aranshire Floo Flames, go to the right towards the Vendor. Opposite the large cage, you'll find this Field Guide page.
All Field Guide Pages Locations South Hogwarts Region Groundskeeper's Tools
Location: Groundskeeper’s Hut
From the Hogwarts South Exit Floo Flames, head along the cobbled path and down the hill. You’ll see a small building on the way down. Go inside to find this Field Guide page.
All Field Guide Pages Locations South Hogwarts Region Hogsmeade Station Ticket Office
Location: Hogsmeade Station
From the Aranshire Floo Flames, head north, following the railway line to Hogsmeade Station. Right in front of the ticket office, you'll find this Field Guide page.
All Field Guide Pages Locations Hogwarts Valley
There are 8 Field Guide Pages in Hogwarts Valley.
All Field Guide Pages Locations Hogwarts Valley Beehives
Location: Keenbridge
From the Keenbridge Floo Flames, head left down the path. Look over to the left to see a garden beside the river. Next to one of the large beehives, you'll find this Field Guide page.
All Field Guide Pages Locations Hogwarts Valley Enchanted Scarecrow
Location: Brocburrow
From the Brocburrow Flood Flames, go west across the village. Next to a house is a garden, where you’ll find a scarecrow standing. This Field Guide page is here.
All Field Guide Pages Locations Hogwarts Valley Doxy Egg
Location: Southwest Hogwarts Valley
From the Northern South Sea Bog Floo Flames, head northwest until you reach a bandit camp near a forest. Take out the dark wizards there, and you'll find this Field Guide page inside one of the tents.
All Field Guide Pages Locations Hogwarts Valley Ginger Root
Location: Keenbridge
From the Keenbridge Floo Flames, look to the left and you'll see a bar on some decking. This is where you'll find this Field Guide page.
All Field Guide Pages Locations Hogwarts Valley Hebridean Black Scale
Location: Northwest Hogwarts Valley
From the Central Hogwarts Valley Floo Flames, head directly west and you'll see a forest ahead. Inside the forest you can find a dragon skeleton opposite a tent, which is where you'll find this Field Guide page.
All Field Guide Pages Locations Hogwarts Valley Murtlap Tentacles
Location: Central Hogwarts Valley
From the Central Hogwarts Valley Floo Flames, head directly west and cross the river. You'll find this Field Guide page on the other side by some rock sculptures.
All Field Guide Pages Locations Hogwarts Valley Lace Doily
Location: West of Keenbridge
From the Keenbridge Floo Flames, head to the west to find some ruins. Go around the back to find a tree with a headstone beneath it, where you’ll find this Field Guide page.
All Field Guide Pages Locations Hogwarts Valley The Tilted House
Location: Keenbridge
From the Keenbridge Floo Flames, go straight ahead to find a crooked house opposite. The Field Guide page is by the front door.
All Field Guide Pages Locations Feldcroft Region
There are 7 Field Guide Pages in Feldcroft Region.
All Field Guide Pages Locations South Sea Bog
There is 1 Field Guide Page in South Sea Bog.
All Field Guide Pages Locations South Sea Bog Abandoned Bothy
Location: South Sea Bog
From the Northern South Sea Bog Floo Flames, head out and then go due south. You should find a small building that's leaning into the swamp. You'll find this Field Guide page here.
All Field Guide Pages Locations Coastal Cavern
There is 1 Field Guide Page in Coastal Cavern.
All Field Guide Pages Locations Coastal Cavern Antique Compass
Location: North Poidsear Coast
From the North Poidsear Coast Floo Flames, simply approach the edge of the cliff to find this Field Guide page.
All Field Guide Pages Locations Cragcroftshire
There are 2 Field Guide Pages in Cragcroftshire.
All Field Guide Pages Locations Cragcroftshire Giant Shade Tree
Location: Cragcroft
From the Cragcroft Floo Flames, head into the middle of the village, where you'll see a large tree. You'll find this Field Guide page on its western-facing side.
All Field Guide Pages Locations Cragcroftshire Dragon Skeleton
Location: Southwest of Cragcroft
From the Cragcroft Floo Flames, head southwest and you'll end up on a beach. You will find a large skeleton near the water, where you can nab this Field Guide page.
All Field Guide Pages Locations Clagmar Coast
There are 2 Field Guide Pages in Clagmar Coast.
All Field Guide Pages Locations Clagmar Coast Pungous Onion Bulb
Location: Northwest of Clagmar Castle
From the Clagmar Castle Floo Flames, fly up and then northwest. You’ll see a bandit camp — go down to the ground before the camp and there will be a couple of ruined tents. You’ll find the Field Guide page in the tent to the left.
All Field Guide Pages Locations Clagmar Coast Acromantula Venom
Location: West of Cragcroft
From the Cragcroft Floo Flames, fly west and slightly south. You will come to a bandit camp atop a cliff; clear out the enemies, then you will find this Field Guide page next to a table with lots of bottles.
And that's our guide on where to find all Field Guide Pages in Hogwarts Legacy. How many have you tracked down? Tell us in the comments section below, and check out our Hogwarts Legacy guide for much more.


Leave A Comment
Comments have been disabled for this article.