What are the best character builds in Final Fantasy 7 Rebirth? In this Final Fantasy 7 Rebirth guide, we're going to cover all of the game's playable characters, explaining their key roles during combat, along with recommendations on Materia, weapon abilities, and weapon skills.
Recommended Materia for All Characters
To start things off, let's take a look at some of the game's best overall Materia. These Materia can benefit any and all playable party members, and we'd recommend equipping them regardless of that character's current role. This is especially true if you've got spare Materia slots and don't quite know what to use them for.
Prayer
The Prayer Materia lets you use an ability called Pray, which restores HP to all active party members — and since it's an ability and not a spell, it doesn't cost any MP. Needless to say, Pray can get you out of some very difficult situations, where single-target healing simply isn't enough to keep up with the damage that your party is taking. At its max level, Prayer restores a substantial amount of HP.
However, there are a couple of downsides. Firstly, Prayer Materia isn't widely available until much later in the game — so for quite some time, you'll simply need to assign it to someone who can use it well (like Aerith). Secondly, Pray takes two ATB bars, meaning that it's a bit of a commitment.
But ultimately, if you're keen to save on MP (and healing items), Prayer Materia is a must. To make the best use of Pray, it's often a good idea to keep someone's ATB bars filled, and just keep them there as your healer for when the time comes — you won't regret it.
Chakra
Another welcome way to heal your HP without having to expend MP, Chakra Materia bestows the Chakra ability, which restores a chunk of that character's HP based on the amount that's missing. In other words, it heals more HP the lower your current HP is (and it heals poison as an added bonus!).
Chakra will never be as effective as Pray or curative magic, but it only costs one ATB bar and can be used almost instantly. For frontline fighters, like Cloud, Tifa, and Red XIII, it's an especially great option to have.
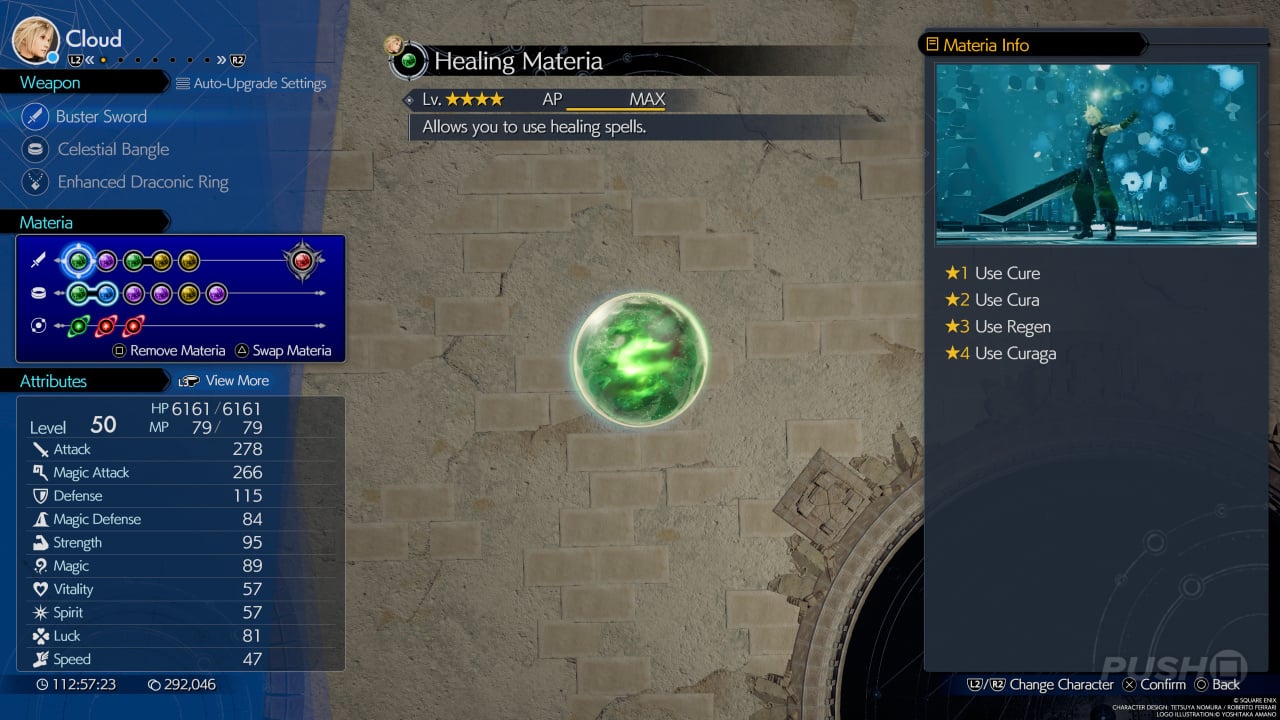
Healing
There's not much point in skimping on Healing Materia. While characters like Aerith will always make the best use of Cure spells because of high magic stats, ATB is the real driving force behind Rebirth's battle system — and your dedicated healer may not always have the necessary ATB to let off a quick Cure spell before the target runs out of HP.
As such, you should certainly consider equipping Healing Materia to multiple party members at any one time. Having easier access to curative magic can be a literal lifesaver, especially during protracted boss encounters.
Steadfast Block
Steadfast Block was an incredible Materia in Final Fantasy 7 Remake, and it's back in Rebirth. Essentially, Steadfast Block grants a passive bonus to blocking attacks — and blocking is, without a doubt, still your best form of defence. Blocking greatly reduces incoming damage and you build ATB when you take an attack. Steadfast Block increases that ATB gain rather substantially once it's maxed out, and that's a huge deal during tough fights.
Again, ATB is your most important currency. The quicker you gain ATB, the more effective your whole party will be during battle — and sometimes, you just can't help but play defensively. Boss enemies in particular can be relentless in their aggression, and so a lot of blocking becomes a requirement. This Materia adds significant value to those defensive efforts.
HP Up
You simply can't go wrong with having more HP. HP Up grants a significant percentage bonus to a character's current HP pool, which obviously only gets bigger as they level up. For characters like Barret and Red XIII, who are already blessed with large amounts of HP, this Materia provides a massive boost.
But even for less resilient party members, such as Aerith, HP Up is still highly recommended. Just having an extra 1,000 or 2,000 HP by the game's later stages can mean the difference between heavy damage and a one-hit kill.
HP Up is also a borderline necessity for some of the game's hardest encounters. Various bosses unleash unblockable, cinematic super moves at set points, and actually having enough HP to withstand the blow is crucial.
MP Up
Although not quite as essential as HP Up, MP Up is still a must for magic-wielding party members. Even if it's just an additional 10 MP, that's another two or three spells that you can work with before running dry.
Speed Up
Speed as a stat determines how quickly your ATB fills when you're just standing still or running around. As such, it's actually one of the game's most important stats, as it determines how efficient a character can be in combat. ATB is essentially the lifeblood of your party, and so having more of it is never a bad thing.
Speed Up will obviously have more of an effect on characters who are already quick, like Tifa, but even slower heroes such as Barret can benefit over the course of a battle.
Fire, Ice, Lightning, Wind
Your four main elemental Materia are always worthwhile as they let you exploit enemy weaknesses. Having full elemental coverage at all times isn't quite as essential as it was in Remake because Rebirth introduces elemental abilities that cost no MP — but you'll still want access to these key spells in most battles.
In some boss encounters, for example, the only way to deal good damage is to hit elemental weaknesses — and the aforementioned elemental abilities probably won't cut it because they're comparatively weak. With that in mind, it's usually best to have a decent spread of Fire, Ice, Lighting, and Wind Materia across your party.
Best Character Builds and Weapon Abilities
Below, we've broken down the strengths and weaknesses of all party members, highlighting their best, most efficient roles during combat. We also recommend strategies, weapon abilities, and weapon skills.
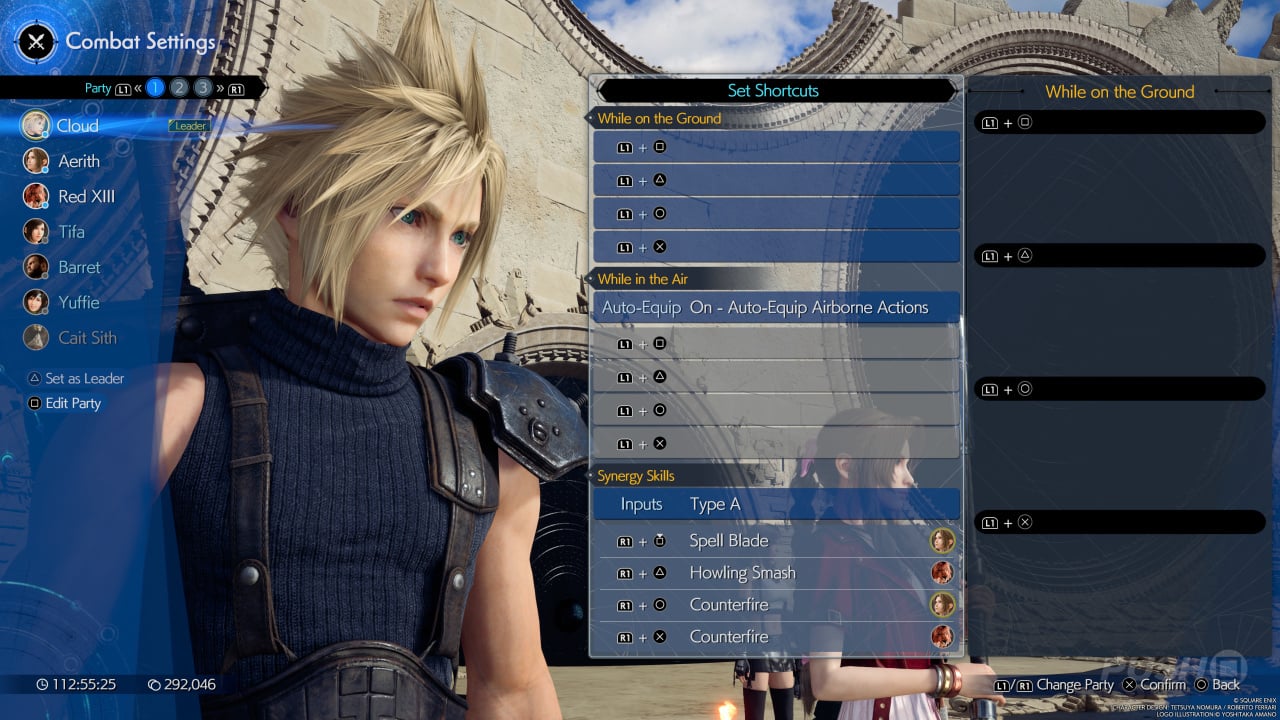
Cloud
Overview
Cloud is the party's lynchpin, able to fulfil pretty much any role that's required. While he truly excels as a frontlines fighter, he's also more than capable of being an effective magic user, covering all bases when a battle calls for adaptation. What's more, his standard attacks are typically fast and cover wide angles. Because of this, Cloud is able to generate ATB especially quickly when fighting against multiple enemies. As such, he's arguably the best crowd control character in Rebirth.
Elsewhere, Cloud's weapon abilities primarily focus on dealing big damage, and as such, support isn't really his strongest asset. That said, his unique character ability — Punisher Mode — lets him take up a counter stance that also reduces incoming damage from physical attacks. This can help alleviate pressure from other party members as he soaks up the enemy's attention.
Strengths
- The game's best all-rounder, has no real weakness
- Excels at both offence and defence
- Fast attacks, builds ATB quickly
- Normal attacks have wide range, making him great for crowd control
- High damage attacks, especially in Punisher Mode
- Punisher Mode counters all physical attacks
- Effective dodge
- High damage weapon abilities
- Has the MP and magic stats to be a great magic user if required
Weaknesses
- Lacks supportive abilities
- Punisher Mode requires enemy knowledge to be truly effective
Key Weapon Abilities for Cloud
These are the weapon abilities that we highly recommend learning in order to maximise Cloud's effectiveness in combat.
Braver
Weapon: None (already learned at the start of the game)
Braver will be Cloud's primary damage dealer for much of the game — and honestly, there isn't much that outclasses it even as you march towards the end. Braver deals huge damage to staggered foes, and so it's your go-to technique when an opponent is downed. Simple but effective.
Focused Thrust
Weapon: Buster Sword
Focused Thrust will probably end up being one of your most used weapon abilities by the time you finish the game. It's specifically designed to rack up stagger damage, especially against pressured enemies — and boy does it work well. Whether you're up against a lowly orc or a towering boss, Focus Thrust will simply never let you down. It travels a huge distance across the ground, too, meaning that Cloud will rarely miss even the most skittish of foes.
Disorder
Weapon: Rune Blade
Disorder really helps tie Cloud's core gameplay together. Upon using it, Cloud will unleash a very powerful slashing attack before switching to the mode that he's not currently using (his standard Operator Mode or his counterattacking Punisher Mode). Ideally, Disorder should be used when switching to Punisher Mode, because the extra damage it racks up — especially on a staggered enemy — is significant. What's more, a portion of Cloud's ATB gauge will be refilled once Disorder is unleashed, meaning that technically costs less than one ATB bar. A great addition to Cloud's arsenal.
Prime Mode
Weapon: Umbral Blade
Prime Mode alters Cloud's attacks when in Punisher Mode. It gives him a deadly three-hit series of downward slashes that, in succession, deal huge damage. Although you could be spending the ATB that it takes to activate Prime Mode on something like Braver, it's worth noting that the new three-hit combo actually contributes to rebuilding Cloud's ATB, and so, depending on the situation, it might actually be more efficient than simply using another ability.
Infinity's End
Weapon: Crystal Sword
Infinity's End is Cloud's most damaging weapon ability. It costs two whole ATB bars, but you can't argue with the damage, which can come close to equalling Limit Break numbers when the technique is unleashed on a staggered opponent. The only real issue is that Infinity's End has a long starting animation, so you need to time it correctly and make sure that your enemy doesn't exit its staggered state before the blow connects.
Counterstance
Weapon: Slipstream Saber
Counterstance gives Cloud another defensive option, and it's devastating when used correctly. The stance itself lasts quite a long time, so your timing doesn't have to be anywhere near perfect — but activating Counterstance closer to the enemy's attack will result in Cloud taking less damage. In any case, when the counter works, Cloud dishes out a surprisingly meaty hit. A perfect weapon ability for fights that demand a bit more patience.
Recommended Weapon Skills for Cloud
Weapon skills are passive perks that unlock as your weapon level increases. Later in the game, you can equip several of them at a time in order to bolster your style of play. Here, we're going to recommend skills for Cloud.
Buster Sword
The Buster Sword is a good all-rounder weapon for Cloud. Its skills grant buffs in a number of areas.
Recommended Skills:
- Weapon Ability Damage +5% - Increases weapon ability damage
- Enhanced Physical Guard - Reduces damage while guarding
Sleek Saber
The Sleek Saber is mostly about increasing Cloud's ATB gain, which is never a bad thing.
Recommended Skills:
- ATB Charge Rate Up - Increases ATB gain
- Weapon Ability ATB Recovery - Bonus ATB gain when using a weapon ability
Rune Blade
The Rune Blade has a number of useful skills, offering a good amount of variety.
Recommended Skills:
- Stagger Recovery - Recovers some health and MP when staggering a foe
- ATB Charge Rate Up - Increases ATB gain
Umbral Blade
The Umbral Blade is made for a more defensive style of play.
Recommended Skills:
- Enhanced Physical Guard - Reduces damage while guarding
- Formidable Counter - Increases counter damage when in Punisher Mode
- Restorative MP Saver - Reduces MP cost of healing magic
- Bloodsucker - Restores HP when defeating an enemy
- Defense +50 - Increases defense
Crystal Sword
The Crystal Sword pushes Cloud's damage output through critical hits.
Recommended Skills:
- Critical Hit Rate +5% - Increases chances of a critical hit
- Critical Hit Damage +10% - Increases critical hit damage
- Ability Critical Hit Rate Up - Increases chances of a critical hit when using weapon abilities
Igneous Saber
The Igneous Saber is another weapon that offers a good spread of skills, but it's best for buffing Cloud's Punisher Mode.
Recommended Skills:
- Stalwart Punisher - Increases defense during Punisher Mode
- Unrelenting Punisher - Adds additional attacks to Punisher Mode
- Limit Gauge Stagger - Increases limit gauge gain when staggering an enemy
Slipstream Saber
The Slipstream Saber is good for increasing Cloud's magic prowess.
Recommended Skills:
- MP Recovery Rate Up - Recover more MP over time in battle
- Magic Attack Power +20 - Increases magic attack
- Max MP +3 - Increases MP
- Stagger Recovery - Recovers some health and MP when staggering a foe
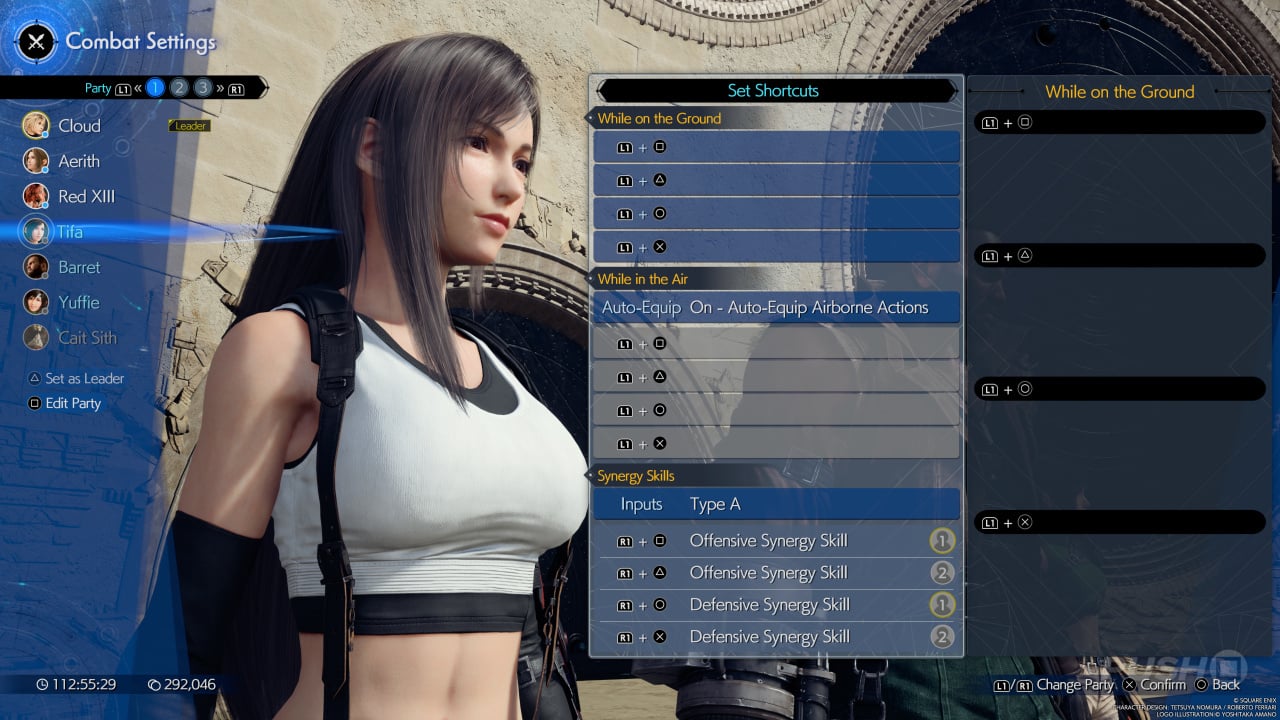
Tifa
Overview
Tifa is the party's premier damage dealer, and is undoubtedly best utilised as a frontlines fighter. Her standard attacks don't deal massive damage by themselves, but they are incredibly fast. This means that Tifa can build ATB at an impressive rate as long as she's letting her fists fly.
Her weapon abilities are where she'll start racking up some serious damage, especially when an enemy is staggered. In addition, her unique character ability, Unbridled Strength, is key to unlocking her potential. Once she's powered up — which isn't a huge ask seeing as she builds ATB so quickly — Tifa can dish out lethal techniques that don't cost any ATB, pushing her damage per second well beyond the limits of other party members.
Strengths
- Best damage dealer in the game
- Super fast physical attacks
- Builds ATB incredibly quickly
- Very fast movement speed, can reposition with ease
- Very fast dodge speed
- Excellent dodge range
- Decent MP means she can support with magic if required
Weaknesses
- A lot of her weapon abilities lack range, and can outright miss fast-moving enemies
- Lacks supportive abilities
Key Weapon Abilities for Tifa
These are the weapon abilities that we highly recommend learning in order to maximise Tifa's effectiveness in combat.
Unbridled Strength
Weapon: None (already learned at the start of the game)
The core of Tifa's offense, Unbridled Strength empowers her normal attacks and grants her access to super strong finishers. And, when Unbridled Strength is active, you can activate it again to unlock additional levels, leading to some truly monstrous damage. The best part, though? The finishers don't cost any ATB, so the trick is to alternate between them and Tifa's other weapon abilities.
Divekick
Weapon: Leather Gloves
Divekick is one of Tifa's greatest damage dealing moves. Although it has quite short range, it packs an absolute wallop — especially against staggered enemies. When in doubt and in control of Tifa, just select Divekick and watch a large chunk of your foe's health disappear.
Reverse Gale
Weapon: Sylph Gloves
Reverse Gale has Tifa spiral upwards into the air while unleashing a combo attack that's infused with wind magic. The combo damage itself isn't anything crazy, but it's an amazing move to use against enemies who are weak to wind. And guess what? A lot of the pesky flying foes that you'll come across don't like wind magic, and so this is an incredibly effective way to pull them out of the air.
Starshower
Weapon: Dragon Claws
Starshower is like Overpower in that it encourages Tifa to maintain her assault. After using it, Tifa's next weapon ability will be boosted, effectively making this move a perfect fit for combos. In particular, throwing a Starshower into the mix when pummelling a staggered foe is a great idea, because you can bolster the already huge damage of abilities like Divekick and True Strike (the latter is detailed below).
Chi Trap
Weapon: Tiger Fangs
Chi Trap doesn't offer the same kind of raw damage that many of Tifa's other weapon abilities do, but it's a good option to have at your disposal. It creates a ball of energy that can trap smaller enemies within it — rendering them immobile for a short space of time — and it deals decent tick damage on top. Best used when you've got ATB to spend on other abilities while your opponent is trapped.
Unfettered Fury
Weapon: Crystal Gloves
Unfettered Fury makes some of Tifa's deadliest moves even more potent. Yes, you need to spend an ATB bar on it, but Tifa can generate ATB so quickly that it's best to just do it and reap the benefits as soon as you can. Unfettered Fury adds non-elemental magic damage to the already super-powered finishers that Tifa unlocks through using Unbridled Strength, transforming them into attacks that can stagger lesser foes with ease. Even against bosses, these blows can really add up.
True Strike
Weapon: Jarngreipr
There's no messing about with True Strike. It's a simple ability that has Tifa smack the enemy with supreme force, and it deals massive additional damage to staggered foes. Used after something like Starshower, this is the go-to damage dealing technique for Tifa, replacing Divekick in most situations towards the end of the game.
Recommended Weapon Skills for Tifa
Weapon skills are passive perks that unlock as your weapon level increases. Later in the game, you can equip several of them at a time in order to bolster your style of play. Here, we're going to recommend skills for Tifa.
Leather Gloves
The Leather Gloves grant various bonuses to Tifa's physical attacks, particularly while Unbridled Strength is active.
Recommended Skills:
- Martial Arts Mastery - Extends duration of Unbridled Strength
- Utterly Unbridled Strength - Increases attack power during Unbridled Strength
- Weapon Ability Damage +5% - Increases weapon ability damage
- Attack Damage +5% - Increases damage of normal attacks
Sylph Gloves
The Sylph Gloves increase Tifa's effectiveness as a supportive magic user.
Recommended Skills:
- MP Recovery Rate Up - Recover more MP over time in battle
- Restorative MP Saver - Reduces MP cost of healing magic
- Max MP +3 - Increases MP
Kaiser Knuckles
The Kaiser Knuckles buff Tifa's ability to be an offensive magic user.
Recommended Skills:
- Magic Attack Power +20 - Increases magic attack
- Max MP +3 - Increases MP
Dragon Claws
The Dragon Claws bolster Tifa's physical damage, specifically when making frequent use of weapon abilities.
Recommended Skills:
- Enhanced Techniques - Increases damage of weapon abilities
- Weapon Ability Damage +5% - Increases weapon ability damage
- ATB Charge Rate Up - Increases ATB gain
Tiger Fangs
The Tiger Fangs offer a variety of weapon skills for Tifa.
Recommended Skills:
- Utterly Unbridled Strength - Increases attack power during Unbridled Strength
- MP Recovery Rate Up - Recover more MP over time in battle
- Enhanced Physical Guard - Reduces damage while guarding
Crystal Gloves
The Crystal Gloves are effective at increasing Tifa's damage output regardless of your playstyle.
Recommended Skills:
- Enhanced Techniques - Increases damage of weapon abilities
- Attack Power +20 - Increases attack
- Limit Break Damage +10% - Increases damage of limit breaks
Jarngreipr
The Jarngreipr is all about boosting Tifa's critical hits. A devastating weapon if you've got the luck for it.
Recommended Skills:
- Utterly Unbridled Strength - Increases attack power during Unbridled Strength
- Critical Hit Rate +5% - Increases chances of a critical hit
- Critical Hit Damage +10% - Increases critical hit damage
- Weapon Ability Damage +5% - Increases weapon ability damage
Barret
Overview
Barret is best utilised as the party's tank, shrugging off damage with his large HP pool and defensive stats. But his strengths don't end there. Because almost all of his main attacks are ranged, Barret is able to sit back, away from the frontlines and support his allies when required. With the right Materia loadout and clever use of his ATB, he can help keep more active party members ticking along with abilities like Pray and curative magic.
Most of the time, though, Barret should be considered your last line of defence. His Folio skill tree gives him passive HP Regen and several defensive buffs, making him incredibly hard to kill. In difficult fights, he'll often still be standing tall while everyone else is in the red. Again, properly pace his ATB usage, and Barret is an asset to any team.
Strengths
- Makes a fantastic tank, huge HP pool
- Super safe to play, can fight at a distance at all times
- Can make effective use of support abilities
- Great for dealing consistent damage against flying enemies
- Builds ATB at a decent rate
Weaknesses
- Low MP means his usefulness as a magic user is limited
- Lacks access to immediate, high damage abilities
- Slow, ineffective dodge
Key Weapon Abilities for Barret
These are the weapon abilities that we highly recommend learning in order to maximise Barret's effectiveness in combat.
Maximum Fury
Weapon: None (already learned at the start of the game)
Maximum Fury is pretty much Barret's main damage dealing ability. It has him unload a hail of bullets in the direction of a single target, racking up a lot of damage over a short period of time. Especially effective against staggered foes, pop this one off before switching characters and unleashing their own high damage abilities.
Focused Shot
Weapon: Gatling Gun
A go-to move when you want to deal big stagger damage to a pressured enemy, Focused Shot was a Barret mainstay in Remake, and the same is true in Rebirth. It takes a little while to activate, but there are few better weapon abilities for adding to the stagger bar.
Bonus Round
Weapon: Hi-Caliber Rifle
If you've got ATB to burn with Barret, Bonus Round is a great choice. It powers up Barret's normal gun attacks, and increases the stagger damage on every single shot. It may not look like it makes a huge difference at first, but during longer fights, you'll definitely notice the way all of that extra damage adds up.
Lifesaver
Weapon: Barrage Blaster
Lifesaver ties directly into Barret's role as the party's main tank. When activated, Barret will absorb damage that other party members take, basically sacrificing his own HP for theirs. And given the fact that Barret has a huge HP pool, it's an incredible ability to have in your back pocket for when things get rough. It even grants a temporary increase to Barret's own total HP so that he can tank as much damage as possible. Perfect for when less resilient characters like Aerith are taking a beating.
Turbulent Spirit
Weapon: Battle Cry
Turbulent Spirit enhances Barret's ATB charge rate, which is already decent to begin with. You can gain ATB at a seriously impressive pace with the correct timing of this ability, and then you can spend it on other supportive abilities like Pray (which requires two ATB bars), or dump it all into dealing as much damage as possible with the likes of Maximum Fury.
Recommended Weapon Skills for Barret
Weapon skills are passive perks that unlock as your weapon level increases. Later in the game, you can equip several of them at a time in order to bolster your style of play. Here, we're going to recommend skills for Barret.
Gatling Gun
The Gatling Gun greatly enhances Barret's Overcharge character ability.
Recommended Skills:
- Enhanced Overcharge - Increases Overcharge damage
- ATB Charge Rate Up - Increases ATB Gain
- Massive Recharge - Overcharge recharges faster
- Overcharge Protection - Automatically casts Protect on Barret after using Overcharge
Hi-Caliber Rifle
The Hi-Caliber Rifle can enhance Barret's magic.
Recommended Skills:
- Magic Attack Power +20 - Increases magic attack
- Opening ATB Bonus - Fills a portion of the ATB bar at the start of combat
Barrage Blaster
The Barrage Blaster focuses on Barret's role as a defensive character.
Recommended Skills:
- Enhanced Physical Guard - Reduces damage while guarding
- Selfish Recovery +25% - Increases HP restoration when being healed
- Limit Gauge Guard - Increases limit break gain when guarding
Vulcan Cannon
The Vulcan Cannon increases Barret's damage output through both weapon abilities and magic spells.
Recommended Skills:
- Enhanced Overcharge - Increases Overcharge damage
- Weapon Ability ATB Recovery - Restores some ATB after using a weapon ability
- Attack Damage +5% - Increases damage of normal attacks
- Offensive MP Saver - Reduces MP cost of magic attacks
Fafnir Rifle
The Fafnir Rifle is an all-round weapon for Barret, offering a variety of skills.
Recommended Skills:
- Enhanced Overcharge - Increases Overcharge damage
- Enhanced Magic Guard - Reduces magic damage while guarding
Calamitous Bazooka
The Calamitous Bazooka grants Barret better critical hits.
Recommended Skills:
- Critical Hit Rate +5% - Increases chances of a critical hit
- Critical Hit Damage +10% - Increases critical hit damage
- Ability Critical Hit Rate Up - Increases chances of a critical hit with weapon abilities
Battle Cry
The Battle Cry is great for increasing Barret's ATB gain.
Recommended Skills:
- Weapon Ability ATB Recovery - Restores some ATB after using a weapon ability
- ATB Charge Rate Up - Increases ATB gain
- Opening ATB Bonus - Fills a portion of the ATB bar at the start of combat
Aerith
Overview
Aerith is the party's out-and-out magic user. Her high MP and magic stats let her excel as both an offensive and supportive mage, without ever really having to choose between one or the other. Ideally, Aerith will almost always fight at a distance, steadily building ATB and then spending it on devastating elemental spells that strike at an enemy's weakness.
But Aerith's true value is established when she's standing within one of her Wards. These weapon abilities grant powerful bonuses, and clever use of them can transform Aerith into something of a powerhouse. With all of this in mind, mastering Aerith's potential requires additional tactical thinking, especially when compared to other party members.
Strengths
- The party's best magic user
- Can make full and effective use of both offensive and supportive magic
- Capable of dealing massive damage through elemental magic weaknesses
- Huge MP pool
- Ward abilities can turn her into a monster
Weaknesses
- Relatively low HP
- Ineffective dodge
- Normal attacks are slow, ATB can take a while to charge
- Needs to spend ATB on Wards in order to be fully effective
Key Weapon Abilities for Aerith
These are the weapon abilities that we highly recommend learning in order to maximise Aerith's effectiveness in combat.
Soul Drain
Weapon: None (already unlocked at the start of the game)
Soul Drain allows Aerith to siphon MP from the enemy, but in truth, it isn't quite as effective as you would probably like it to be — at least for most of the game. Generally speaking, you'll only be getting a few MP back at the expense of a whole ATB bar, but, you need to remember that low level magic only takes a small amount of MP to cast. As such, Soul Drain can still be very useful in clutch situations — especially if your stash of ethers has dried up.
Sorcerous Storm
Weapon: None (already unlocked at the start of the game)
Sorcerous Storm is Aerith's primary means of dealing good damage to close enemies — especially when you don't have time to cast magic. It's a 360-degree blast that can push lesser foes away, allowing the caster to retreat to a safer distance. Not a bad option to use on a staggered foe, either, assuming you want to save on MP.
Arcane Ward
Weapon: Guard Stick
A must to get the most from Aerith's magic, Arcane Ward doubles her attack spells when she's standing inside of its boundaries. Essentially, you're doubling Aerith's damage, and that's huge when you're already hitting a foe's elemental weakness. This ability alone is reason enough for Aerith to be considered Rebirth's best magic user.
Chrono Aegis
Weapon: Timeless Rod
Chrono Aegis is one of Aerith's best defensive abilities, inflicting temporary stop and a quick burst of damage on any foe that gets too close. Probably a better option than Sorcerous Storm, although the associated damage isn't anywhere near as potent.
Radiant Ward
Weapon: Empress's Scepter
Ever felt like Aerith's normal attacks don't have enough 'oomph' to them? Well, Radiant Ward is the ability for you. When standing within this ward, Aerith's projectiles transform into more powerful rays of energy, dealing much more damage. What's more, Aerith can't be hurt when casting magic while standing in the ward, making this the perfect option for when you're playing aggressively.
ATB Ward
Weapon: Ceremonial Staff
ATB Ward makes it so whenever Aerith fills her ATB gauge while standing in it, her allies get an ATB boost as well. This is a great support ability to use during longer battles, as the additional ATB gain really adds up as long as you're pelting your enemies with Aerith's projectiles. Admittedly, there are more efficient ways of increasing ATB, but this a great fit if you want Aerith to be more of a supportive party member.
Ray of Judgement
Weapon: Plumose Rod
Ray of Judgement is a near perfect way for Aerith to deal good damage without having to spend MP. It's a fairly simple ranged attack that hits staggered enemies especially hard. The only downside is that the attack itself takes several seconds to complete, so you'll need to make sure Aerith is out of harm's way before activating it.
Recommended Weapon Skills for Aerith
Weapon skills are passive perks that unlock as your weapon level increases. Later in the game, you can equip several of them at a time in order to bolster your style of play. Here, we're going to recommend skills for Aerith.
Guard Stick
The Guard Stick bolsters Aerith's abilities as an offensive magic user, specifically with wind magic.
Recommended Skills:
- Wind Damage Up - Increases wind damage
- Enhanced Tempest - Increases Tempest damage
- Spiritual Harvest - Absorb more MP through Soul Drain
- Enduring Ward - Increases ward duration
- Max MP +3 - Increases MP
Timeless Rod
The Timeless Rod increases Aerith's magic effectiveness with numerous spells.
Recommended Skills:
- Fire Damage Up - Increases fire damage
- Enduring Ward - Increases ward duration
- Altruisitic Recovery +10% - Increases the effectiveness of Aerith's healing magic
- MP Recovery Rate Up - Recover more MP over time in battle
- Ice Damage Up - Increases ice damage
Empress's Scepter
The Empress's Scepter buffs Aerith's effectiveness with certain spells while also upping her ATB gain.
Recommended Skills:
- Lightning Damage Up - Increases lightning damage
- Enduring Ward - Increases ward duration
- Spiritual Harvest - Absorb more MP through Soul Drain
- Max MP +3 - Increases MP
- MP Recovery Rate Up - Recover more MP over time in battle
- ATB Charge Rate Up - Increases ATB gain
- Ice Damage Up - Increases ice damage
Wizard's Rod
The Wizard's Rod enhances Aerith's critical hits as well as her normal attack potency.
Recommended Skills:
- Not-So-Fleeting Familiar - Increases duration of Aerith's familiar
- Enhanced Tempest - Increases Tempest damage
- Critical Hit Rate +5% - Increases chances of a critical hit
- Critical Hit Damage +10% - Increases critical hit damage
- MP Recovery Rate Up - Recover more MP over time in battle
Ceremonial Staff
The Ceremonial Staff offers straightforward buffs to Aerith's magic.
Recommended Skills:
- Fire Damage Up - Increases fire damage
- Enduring Ward - Increases ward duration
- Spiritual Harvest - Absorb more MP through Soul Drain
- Magic Attack Power +20 - Increases magic attack
- Max MP +3 - Increases MP
- Lightning Damage Up - Increases lightning damage
Plumose Rod
The Plumose Rod enhances Aerith's passive battle abilities and her wards.
Recommended Skills:
- Not-So-Fleeting Familiar - Increases duration of Aerith's familiar
- Enhanced Tempest - Increases Tempest damage
- Enduring Ward - Increases ward duration
Gambanteinn
The Gambanteinn is a weapon that enhances Aerith's normal attacks and her magic spells.
Recommended Skills:
- Not-So-Fleeting Familiar - Increases duration of Aerith's familiar
- Spiritual Harvest - Absorb more MP through Soul Drain
- Attack Damage +5% - Increases damage of normal attacks
- ATB Charge Rate Up - Increases ATB gain
Red XIII
Overview
Red XIII is a lot like Cloud in that he can fulfil almost any kind of role on the battlefield. However, one of his greatest assets is his ability to tank. Red boasts a huge HP pool, and although his defensive stats aren't as pronounced as Barret's, he's able to restore his own health through the use of Vengeance attacks. Naturally, this makes him difficult to kill — especially if he's being properly supported through healing abilities and magic.
Or you can have Red himself support the rest of the party. With a good amount of MP and solid magic stats, he's perfectly capable of being an effective magic user. What's more, Red unlocks a wide variety of weapon abilities — many of which offer direct support to his allies. Red is incredibly hard to fault overall, and can easily slot into any strategy.
Strengths
- Brilliantly versatile
- Makes a fantastic tank
- Weapon abilities cover all kinds of scenarios
- Normal combo enders have a wide range, making them good for crowd control
- Great MP and magic stats let him be an effective magic user
- Good dodge
- Fairly fast movement speed
Weaknesses
- Outclassed by other characters if you're looking for a much more specialised role
- Struggles to hit aerial enemies at times
- Normal attacks build ATB a little slowly
Key Weapon Abilities for Red XIII
These are the weapon abilities that we highly recommend learning in order to maximise Red XIII's effectiveness in combat.
Sidewinder
Weapon: None (already learned at the start of the game)
Sidewinder is Red's basic damage dealer; a spinning attack that smashes foes to good effect. A solid option whenever you just want to dish out some pain.
Stardust Ray
Weapon: Mythril Collar
Stardust Ray is a huge, high damage ability that can destroy groups of enemies if they're all bundled together. It also manifests in the air, so it's amazing at catching flying foes. The only downside is that it costs two ATB bars — but it's easy to argue that it's worth the price of admission. Even against bosses, the damage is nothing to be sniffed at, as long as they don't move away from the area of effect.
Crescent Claw
Weapon: Renegade's Collar
Crescent Claw is a great way to deal damage while Red's Vengeance Mode is active. This abilities damage and range is enhanced during that time, letting you catch multiple enemies with its slashing attacks. Perfect for when you're inclined to utilise Vengeance Mode to deal damage, as opposed to powering support abilities (more on those below).
Supernal Fervor
Weapon: Amethyst Collar
Supernal Fervor is a fantastic support ability — but it does cost two ATB and it can only be used when Red is in Vengeance Mode. It grants the entire party haste, greatly increasing the rate at which characters build ATB. Haste is arguably the best positive status effect in the game, and so being able to apply it without spending any MP is a big deal.
Watcher's Respite
Weapon: Golden Collar
Watcher's Respite is one of Red's best abilities. While it does deplete his Vengeance gauge completely, it is effectively a full party heal — like Pray — that only costs one ATB bar. This ability is particularly useful later in the game, when Red is able to build his Vengeance gauge with ease. Using up the whole gauge on Watcher's Respite dramatically increases the healing effect, and so Red can quite easily become your most clutch healer.
Recommended Weapon Skills for Red XIII
Weapon skills are passive perks that unlock as your weapon level increases. Later in the game, you can equip several of them at a time in order to bolster your style of play. Here, we're going to recommend skills for Red XIII.
Mythril Collar
The Mythril Collar primarily enhances Red's Vengeance Mode.
Recommended Skills:
- Invigorated Vengeance - Restores some HP when activating Vengeance Mode
- Enhanced Counterspin - Increases Counterspin damage
- Weapon Ability Damage +5% - Increases damage of weapon abilities
- Enduring Vengeance - Increases the duration of Vengeance Mode
- Siphon Fang HP Up - Siphon Fang restores more HP
Renegade's Collar
The Renegade's Collar enhances Red's ability to be the party's tank.
Recommended Skills:
- ATB Charge Rate - Increases ATB gain
- Siphon Fang HP Up - Siphon Fang restores more HP
- Invigorating Vengeance - Restores some HP when activating Vengeance Mode
- Selfish Recovery +25% - Restores more HP when being healed
- Enhanced Physical Guard - Reduces damage when guarding
Silver Collar
The Silver Collar increases Red's effectiveness as both an offensive and supportive magic user.
Recommended Skills:
- MP Recovery Rate Up - Recover more MP over time in battle
- Offensive MP Saver - Magic attacks consume less MP
- Max MP +3 - Increases MP
- Restorative MP Saver - Healing magic consumes less MP
Amethyst Collar
The Amethyst Collar is a solid all-round weapon for Red, granting a variety of skills.
Recommended Skills:
- Enduring Vengeance - Increases the duration of Vengeance Mode
- Enhanced Counterspin - Increases Counterspin damage
- Attack Power +20 - Increases attack
- ATB Charge Rate Up - Increases ATB gain
Golden Collar
The Golden Collar is another weapon that offers a spread of skills, but with a slight focus on enhancing Red's magic.
Recommended Skills:
- Vengeance Charge Rate Up - Increases Vengeance Gauge gain
- Invigorating Vengeance - Restores some HP when activating Vengeance Mode
- Magic Attack Power +20 - Increases magic attack
- Opening ATB Bonus - Fills a portion of the ATB bar at the start of combat
Mystic Collar
The Mystic Collar bolsters Red's physical attacks.
Recommended Skills:
- Weapon Ability Damage +5% - Increases damage of weapon abilities
- Attack Damage +5% - Increases attack
- Weapon ATB Recovery - Restores some ATB after using a weapon ability
- Stagger Recovery - Restores some HP and MP after staggering an enemy
Brisingamen
The Brisingamen is a good all-round weapon for Red, offering buffs for Vengeance Mode, normal attacks, and magic usage.
Recommended Skills:
- Vengeance Gauge Charge Rate Up - Increases Vengeance Gauge gain
- Enhanced Counterspin - Increases Counterspin damage
- Attack Damage +5% - Increases damage of normal attacks
- MP Recovery Rate Up - Regain more MP over time
Yuffie
Overview
Yuffie is another highly versatile party member, capable of dealing good physical and magical damage through her unique fighting style. Up close, her slashing shuriken attacks are fast and cover a wide radius, while at range, her magic-infused mini-explosions are great for locking lesser enemies in place, or for hitting evasive flying foes.
Yuffie is best utilised as a guerrilla fighter; her quick movement speed means that she can duck in and out of the fray, while her ranged abilities allow her to maintain her damage output even when she's away from the action. That said, her decent MP and magic stats shouldn't be ignored. She can provide additional magic support if needed.
Strengths
- A versatile fighter who can deal consistent physical and magical damage
- Effective at attacking up close or at range
- Physical attacks are fast and often evasive
- Physical attacks can cover a wide area
- Fast movement speed
- Good dodge
- Builds ATB well
- Decent MP and magic stats make her an able magic user if needed
Weaknesses
- Damage output can be somewhat limited without ATB
- Outclassed by other characters if you're looking for a much more specialised role
Key Weapon Abilities for Yuffie
These are the weapon abilities that we highly recommend learning in order to maximise Yuffie's effectiveness in combat.
Art of War
Weapon: None (already learned at the start of the game)
As is the case with most other characters, Yuffie's readily available weapon ability is your main means of dealing decent damage. Art of War is a multi-hit attack that pummels the opponent, and can actually grow stronger when it's used back-to-back.
Elemental Ninjutsu
Weapon: 4-Point Shuriken
Elemental Ninjutsu allows Yuffie to imbue her ranged attacks with different elements, exploiting enemy weaknesses in the process. It's a great way to save on MP across the party, as you can just have Yuffie handle magic damage (assuming you're dealing with standard enemies, and not bosses).
Windstorm
Weapon: Twin Viper
Windstorm is a wide-range wind attack that's great for dealing with crowds, although its effectiveness against bosses is fairly limited. Still, Windstorm dishes out good damage, and can even pull lesser foes to the ground while the rest of the party hammers them.
Doppelganger
Weapon: Bird of Prey
Easily one of Yuffie's best abilities, Doppelganger makes a clone of Yuffie that copies her actions, albeit with a slight delay. This effectively means that you're increasing her damage output by a noticeable degree (we don't think it's quite doubled), and Yuffie's already capable of good, consistent damage numbers. As a general rule, you should always activate Doppelganger as Yuffie's first ability in any given fight, because the benefits are just too great to ignore.
Banishment
Weapon: Crystalline Cross
Banishment lets Yuffie deal big elemental damage, depending on her selected Elemental Ninjutsu. The ability itself powers up with every other ability that you use, and so it's best thought of as a kind of super attack. An excellent substitute for powerful magic spells during longer boss fights.
Purification
Weapon: Fuma Shuriken
Purification, like Banishment, powers up as you use other abilities. Basically, you need to decide whether the situation calls for Purification or Banishment; the former absorbs HP and MP from the enemy instead of dealing elemental damage, giving Yuffie a surprising degree of survivability when the going gets tough.
Recommended Weapon Skills for Yuffie
Weapon skills are passive perks that unlock as your weapon level increases. Later in the game, you can equip several of them at a time in order to bolster your style of play. Here, we're going to recommend skills for Yuffie.
4-Point Shuriken
The 4-Point Shuriken increases Yuffie's effectiveness as a magic user.
Recommended Skills:
- Fire Damage Up - Increases fire damage
- Lightning Damage Up - Increases lightning damage
- Shuriken Mastery - Yuffie's thrown shuriken stays stuck to the enemy for longer
- Max MP +3 - Increases MP
- MP Recovery Rate Up - Regain more MP over time
Savage Dagger
The Savage Dagger grants bonuses for perfect defending as Yuffie.
Recommended Skills:
- Precision Defense ATB - Increases ATB gain after a perfect guard
- Precision Defense Regen - Activates Regen after a perfect guard
- Enhanced Magic Guard - Reduces magic damage when guarding
Twin Viper
The Twin Viper enhances Yuffie's elemental magic and her overall attack.
Recommended Skills:
- Fire Damage Up - Increases fire damage
- Wind Damage Up - Increases wind damage
- Weapon Ability Damage +5% - Increases damage of weapon abilities
- Attack Damage +5% - Increases damage of normal attacks
Bird of Prey
The Bird of Prey is all about critical hits.
Recommended Skills:
- Critical Hit Rate +5% - Increases chances of a critical hit
- Critical Hit Damage +10% - Increases critical hit damage
Crescent Sickle
The Crescent Sickle bolsters Yuffie's ATB gain and her physical attacks.
Recommended Skills:
- Precision Defense ATB - Increases ATB gain after a perfect guard
- Attack Power +20 - Increases attack
- Limit Break Damage +10% - Increases limit break damage
- Opening ATB Bonus - Fills a portion of the ATB bar at the start of combat
Crystalline Cross
The Crystalline Cross is an all-round weapon with an emphasis on buffing specific magic spells.
Recommended Skills:
- Lightning Damage Up - Increases lightning damage
- Wind Damage Up - Increases wind damage
- Magic Attack Power +20 - Increases magic attack
Fuma Shuriken
The Fuma Shuriken is all about enhancing Yuffie's prowess as a magic user, while also buffing her ATB gain.
Recommended Skills:
- Fire Damage Up - Increases fire damage
- Ice Damage Up - Increases ice damage
- MP Recovery Rate Up - Regain more MP over time
- Max MP +3 - Increases MP
- Magic Attack Power +20 - Increases magic attack
- ATB Charge Rate Up - Increases ATB gain
Cait Sith
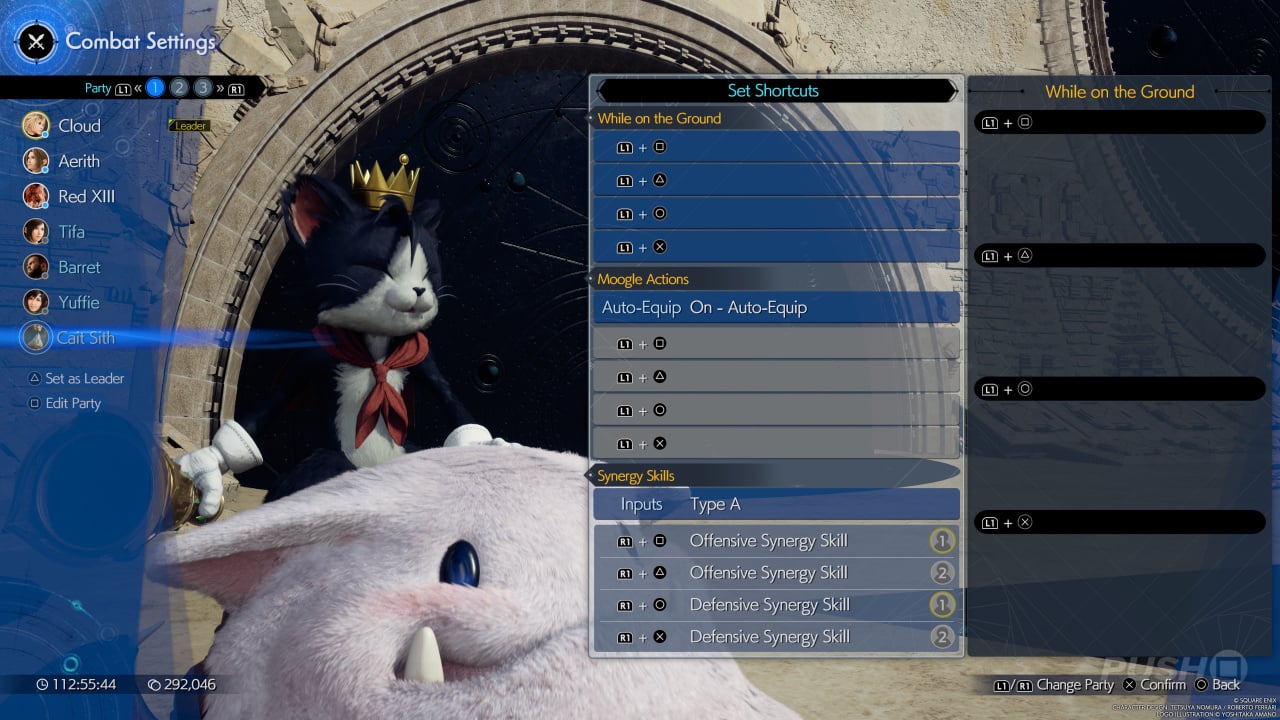
Overview
Cait Sith is a strange character — much like he was in the original Final Fantasy 7 — but he can certainly hold his own in combat with the right strategies. By himself, Cait is a fast-moving, fast-attacking party member with a fairly limited set of moves. But when he summons his Moogle companion, he can fulfil multiple roles rather effectively thanks to a solid spread of stats.
Cait's weapon abilities are varied, and can add some real spice to each battle. Some of these abilities rely purely on luck, granting powerful buffs to the party depending on dice rolls. Naturally, you shouldn't be completely reliant on this stuff, but they can still really help in a pinch.
When riding atop his Moogle, Cait gets access to new normal attacks (and some weapon abilities), but can't dodge. As such, he plays a bit like a tank, drawing enemy attention and retaliating with good damage. However, in a lot of situations, the Moogle is best utilised as a fourth party member — albeit one that you can't control directly.
Strengths
- Fast attacks, builds ATB well
- Can effectively summon a fourth party member
- Luck-based abilities can provide amazing buffs
- Good MP and magic stats make him a decent magic user
- Moogle attacks and weapon abilities can deal big damage
Weaknesses
- Has to spend ATB on summoning his Moogle to be fully effective
- The Moogle can be defeated with surprising ease if it takes a direct hit
- Can't dodge when riding the Moogle
- Relying on luck-based abilities isn't the best strategy
Key Weapon Abilities for Cait Sith
These are the weapon abilities that we highly recommend learning in order to maximise Cait Sith's effectiveness in combat.
Let's Ride
Weapon: None (already learned at the start of the game)
Let's Ride is the foundation for almost everything that makes Cait Sith an effective fighter. It summons his Moogle ally, which he can then ride in order to take direct control, or simply have it fight as a fourth party member. Having the Moogle present unlocks other abilities for Cait Sith while in combat.
Roll o' the Dice
Weapon: Yellow Megaphone
Roll o' the Dice does exactly what the name suggests. Cait Sith rolls a big die with six sides, and each number grants a different bonus. Some deal elemental damage to your enemies, while others bestow buffs on the party. Generally speaking, the buffs are the best rolls that you can get, as the magic may not be very effective against your opponents. In any case, at the cost of just one ATB bar, you could end up with some fairly significant buffs, and so it's worth a gamble every now and then.
Moogle Mine
Weapon: Resounding Megaphone
Moogle Mine is great for crowd control, as Cait's Moogle drops a bunch of explosives around the battlefield. The blasts knock lesser enemies to the floor and deal good damage, while against much larger foes — like bosses — multiple mines can be tripped at once, dealing potentially huge damage. Not to be underestimated.
Moogle Magic
Weapon: Crystal Megaphone
Admittedly, this ability is a little hit and miss, but we think the positives do outweigh the negatives in the end. Basically, if you have a summon available, Moogle Magic lets you use that summon's abilities without actually summoning it. Now, you could argue that you should just have your summon take to the battlefield anyway, but with this ability, you can effectively stall for time while still keeping your summon as an option. It adds a lot of potential versatility to Cait Sith's toolkit.
Moogle Knuckle
Weapon: Golden Megaphone
You can't really go wrong with Moogle Knuckle's damage. It's great for building stagger, it activates instantly, and it knocks lesser foes flying. Simple is sometimes best.
Recommended Weapon Skills for Cait Sith
Weapon skills are passive perks that unlock as your weapon level increases. Later in the game, you can equip several of them at a time in order to bolster your style of play. Here, we're going to recommend skills for Cait Sith.
Golden Megaphone
The Golden Megaphone enhances Cait Sith's abilities as an aggressive frontline fighter.
Recommended Skills:
- Moogle Vanguard - Increases Moogle's damage
- Weapon Ability - Increases damage of weapon abilities
- Attack Power +20 - Increases attack
- ATB Charge Rate Up - Increases ATB gain
Yellow Megaphone
The Yellow Megaphone makes Cait Sith's Moogle more of a tank who can keep enemies busy.
Recommended Skills:
- Moogle Decoy - Moogle draws more enemy attention
- Moogle Sentinel - Moogle takes less damage
Iron Megaphone
The Iron Megaphone buffs Cait Sith's Moogle, both offensively and defensively.
Recommended Skills:
- Moogle Vanguard - Increases Moogle's damage
- Moogle Sentinel - Moogle takes less damage
- Attack Damage +5% - Increases damage of normal attacks
- Attack Power +20 - Increases attack
Red Megaphone
The Red Megaphone is all about critical hits, spurred by Cait Sith's high luck stat.
Recommended Skills:
- Lucky Jockey - Increases luck while riding Moogle
- Critical Hit Damage +10% - Increases damage of critical hits
- Critical Hit Rate +5% - Increase chance of critical hits
Resounding Megaphone
The Resounding Megaphone transforms Cait Sith and his Moogle into much more defensive party members.
Recommended Skills:
- Moogle Decoy - Moogle draws more enemy attention
- Moogle Sentinel - Moogle takes less damage
- Enhanced Physical Guard - Reduces damage when guarding
- Selfish Recovery +25% - Restores more HP when being healed
Crystal Megaphone
The Crystal Megaphone is an all-round weapon for Cait Sith with an emphasis on enhancing his magic.
Recommended Skills:
- Offensive MP Saver - Magic attacks consume less MP
- Restorative MP Saver - Healing magic consumes less MP
- Max MP +3 - Increases MP
- MP Recovery Rate Up - Regain more MP over time
Did you find this Final Fantasy 7 Rebirth character builds guide useful? Check out our Final Fantasy 7 Rebirth guide for much more help with the game, and then tell us all about your own character strategies in the comments section below.


Comments 1
This is epic. Can’t imagine the amount of work this took, so just to say appreciate the effort that’s gone into this team to get it out so timely. First guide I have personally seen like this.
Tap here to load 1 comments
Leave A Comment
Hold on there, you need to login to post a comment...