Where do you find all Artefacts, Trading Cards, Journal Entries, Workbenches, and Safes in the Downtown chapter of The Last of Us 2? This is by far the biggest chapter in the game, as Ellie and Dina search Seattle for gas in order to enter the Serevena Hotel. There are 18 Artefacts, 5 Trading Cards, 2 Journal Entries, 1 Workbench, and 3 Safes to find. In this The Last of Us 2 guide, we’re going to reveal the locations of all collectibles in Downtown, in the order that you'll find them. Please note that if you're trying to visit every location in downtown Seattle for the Sightseer Trophy, we have a separate guide for that: The Last of Us 2: How to Visit Every Location in Downtown Seattle.
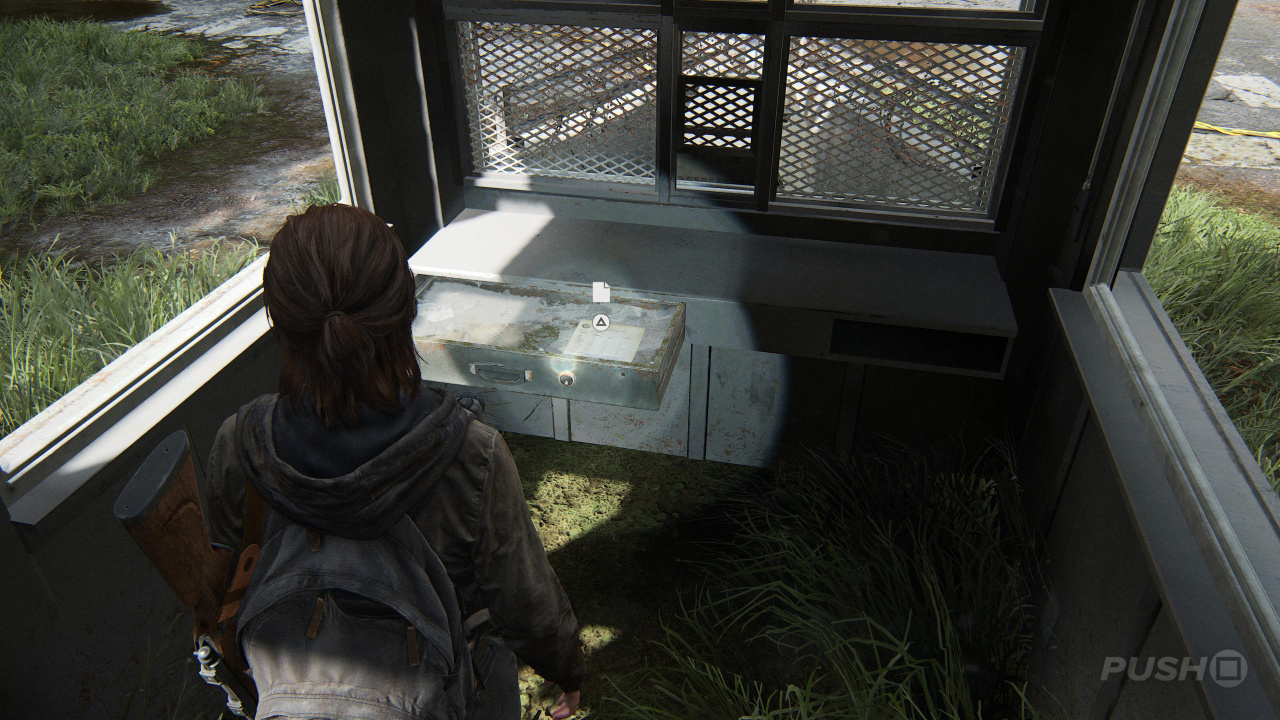
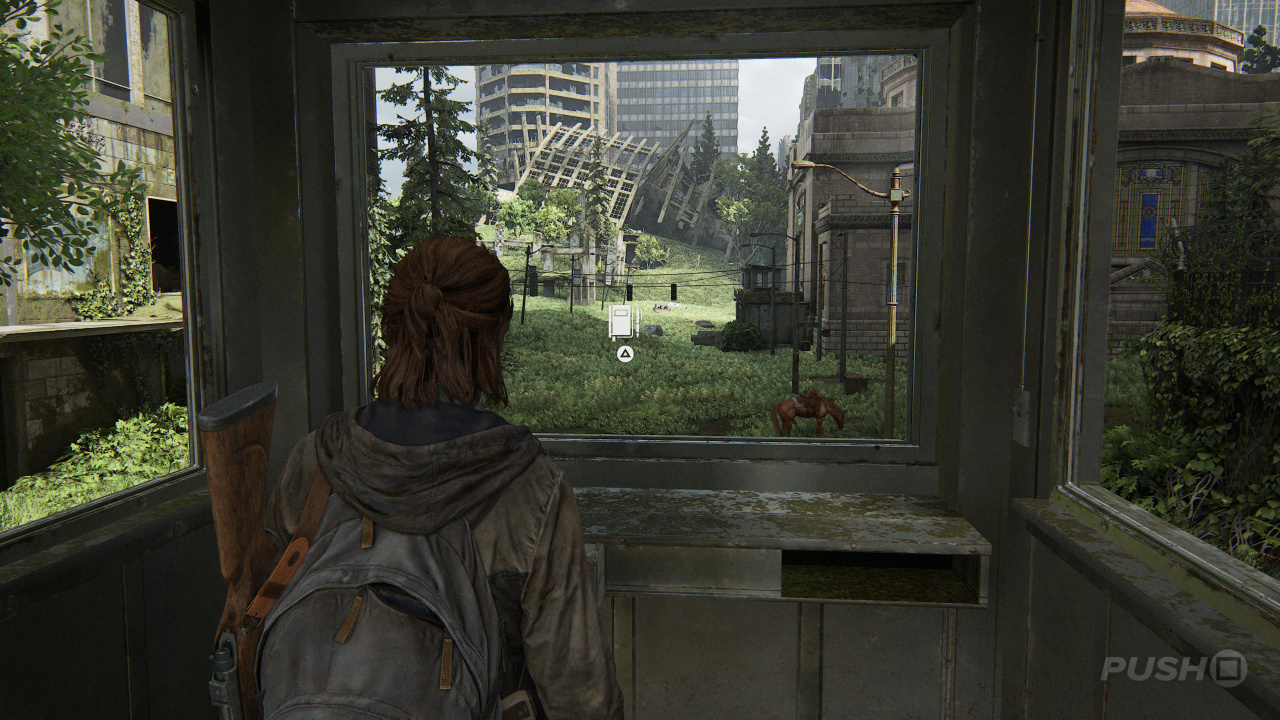
Artefact #1: FEDRA Census Document
Upon reaching the 'Fuck FEDRA Gate', look inside the checkpoint booth directly to the left of the gate. There's a drawer and inside it is the Artefact (See Also: The Last of Us 2: All Artefacts Locations).
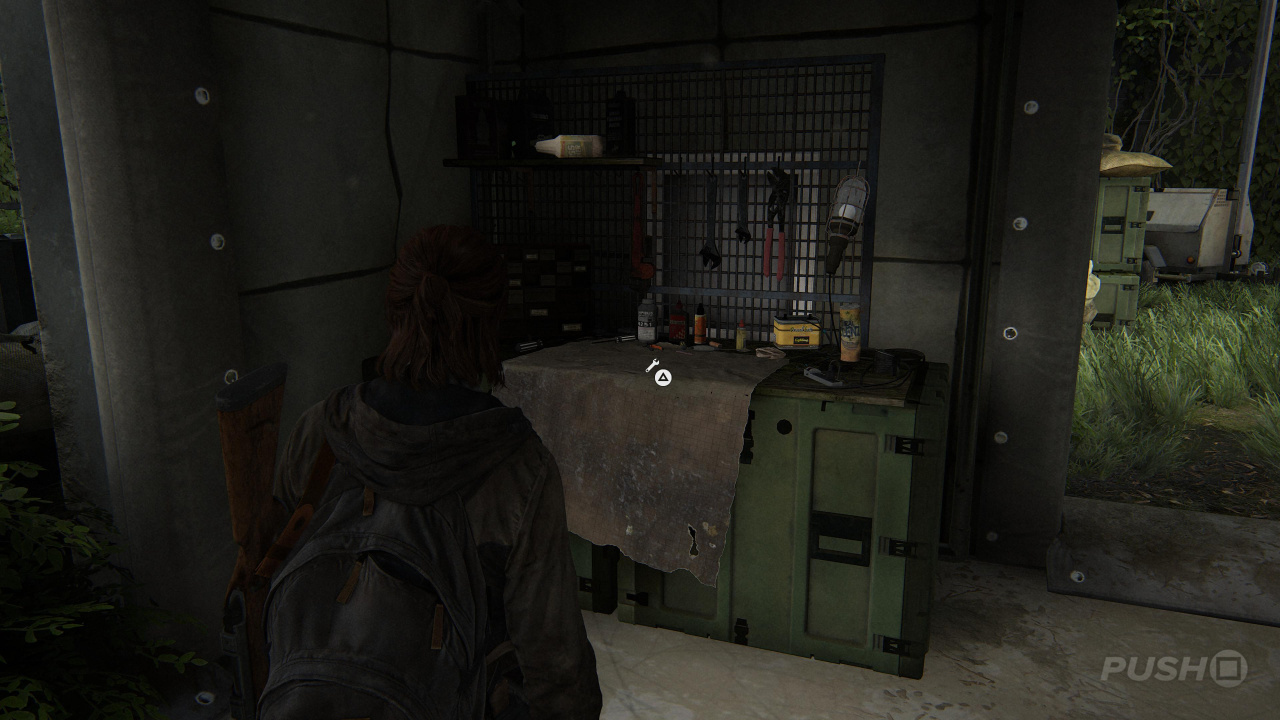
Workbench #1
Opposite the Valiant Music Shop, there's a military tent with some spare parts and a couple beds inside. You'll find the Workbench (See Also: The Last of Us 2: All Workbench Locations) in the upper-left corner.
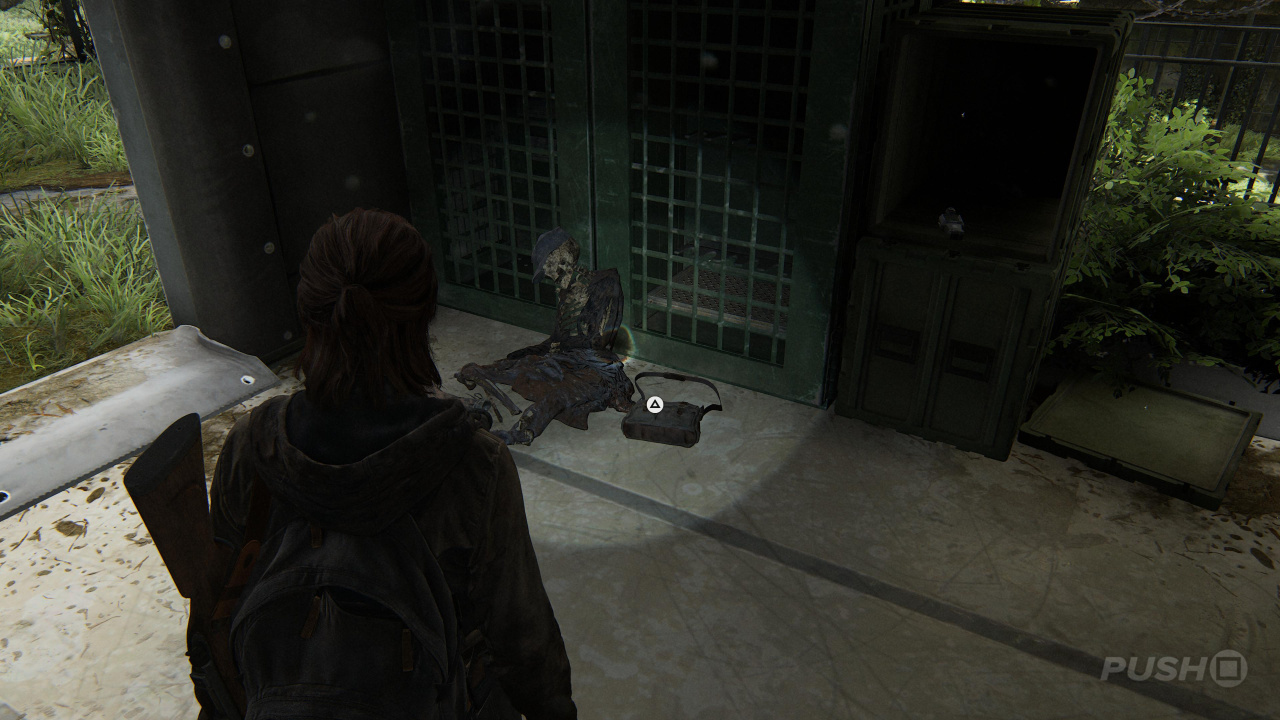
Artefact #2: Cache Hunter Note
In the same area as the Workbench, there's a decomposing body opposite the aforementioned beds. Take a look in the bag next to the corpse, and you'll find the Artefact inside.
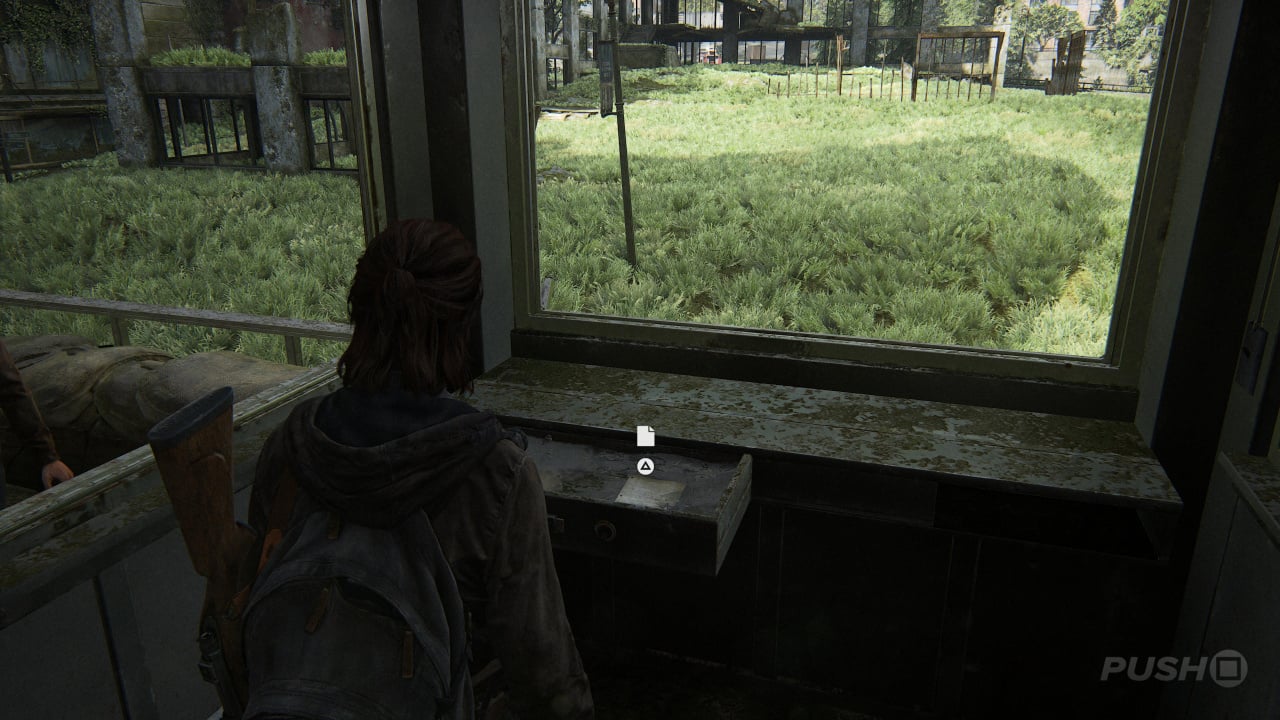
Artefact #3: Street Drawing
Travel over the checkpoint bridge to the Valiant Music Shop, and you'll happen upon a lookout point roughly halfway across. Inside this structure is a drawer, and you'll find the Artefact inside.
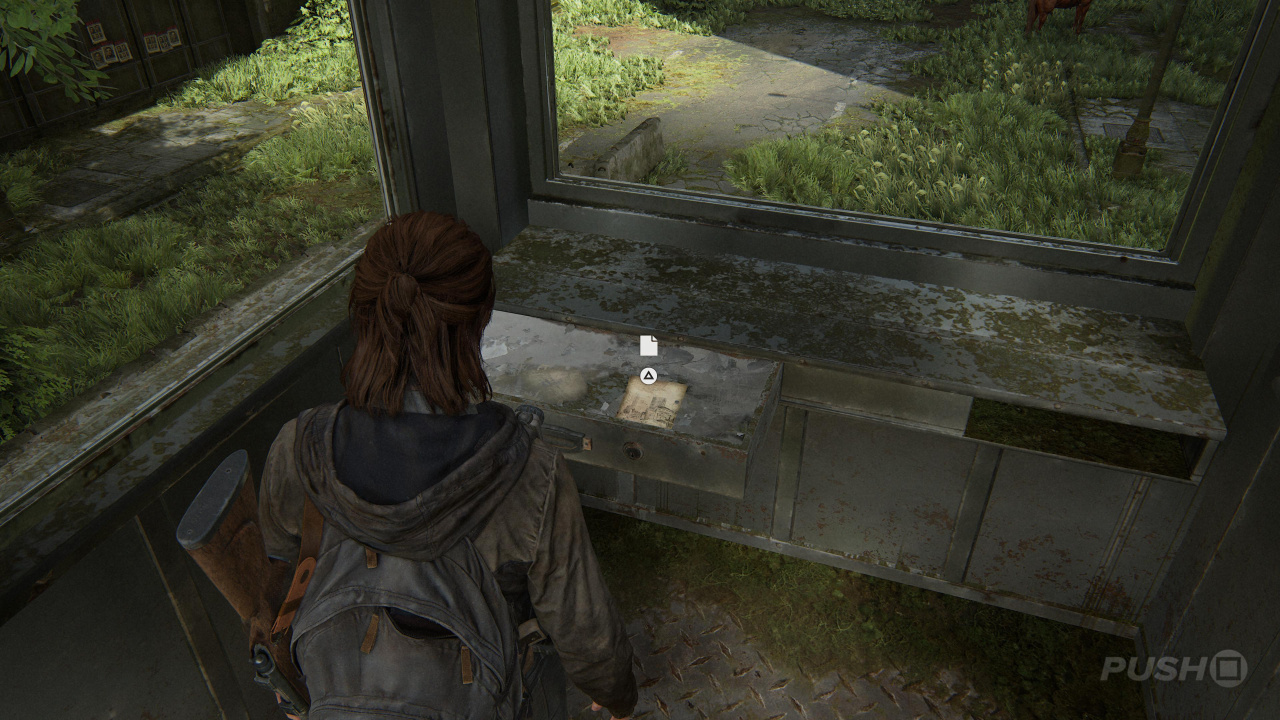
Journal Entry #1
Immediately after picking up Artefact #3, you'll have the opportunity to sketch a new Journal Entry (See Also: The Last of Us 2: All Journal Entries) in your notebook.
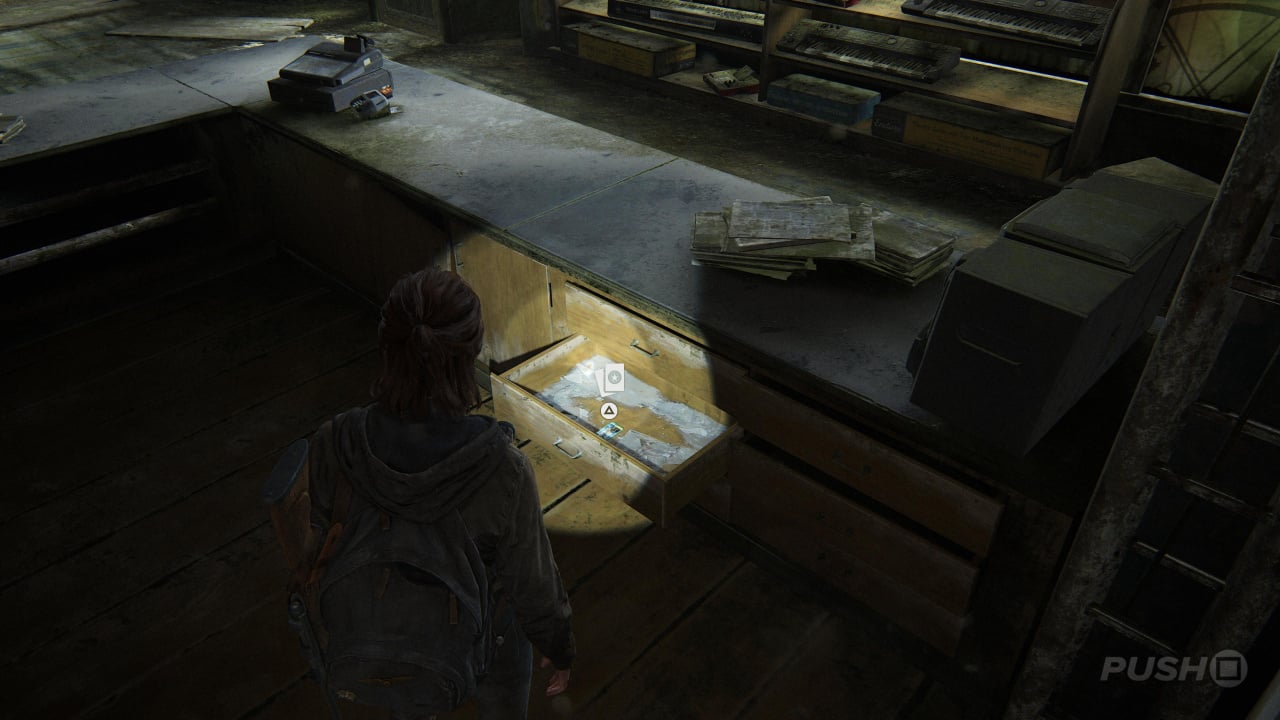
Trading Card #1: Das Wort
In the Valiant Music Shop, head downstairs and explore the cash register area opposite the staircase. There's a drawer you can open beneath a pair of speakers. You'll find the Trading Card (See Also: The Last of Us 2: All Trading Cards Locations) inside.
Trading Card #2: Doctor Uckmann
Exit the Valiant Music Shop through the downstairs door (to the left of the shelf with keyboards on them), and move left up the hill to a bus stop with Dawn of the Wolf: Part 2 posters on it. Opposite is a dilapidated building which you can scavenge up, At the top are a series of sandbags and a desk made out of storage boxes. You'll find the Trading Card inside the left-most box.
Artefact #4: Emergency Protocols Memo
When you get to the synagogue, cut through the FEDRA wall and directly to the right is a ladder. Climb up it and you'll reach a lookout point. The Artefact is inside the drawer.
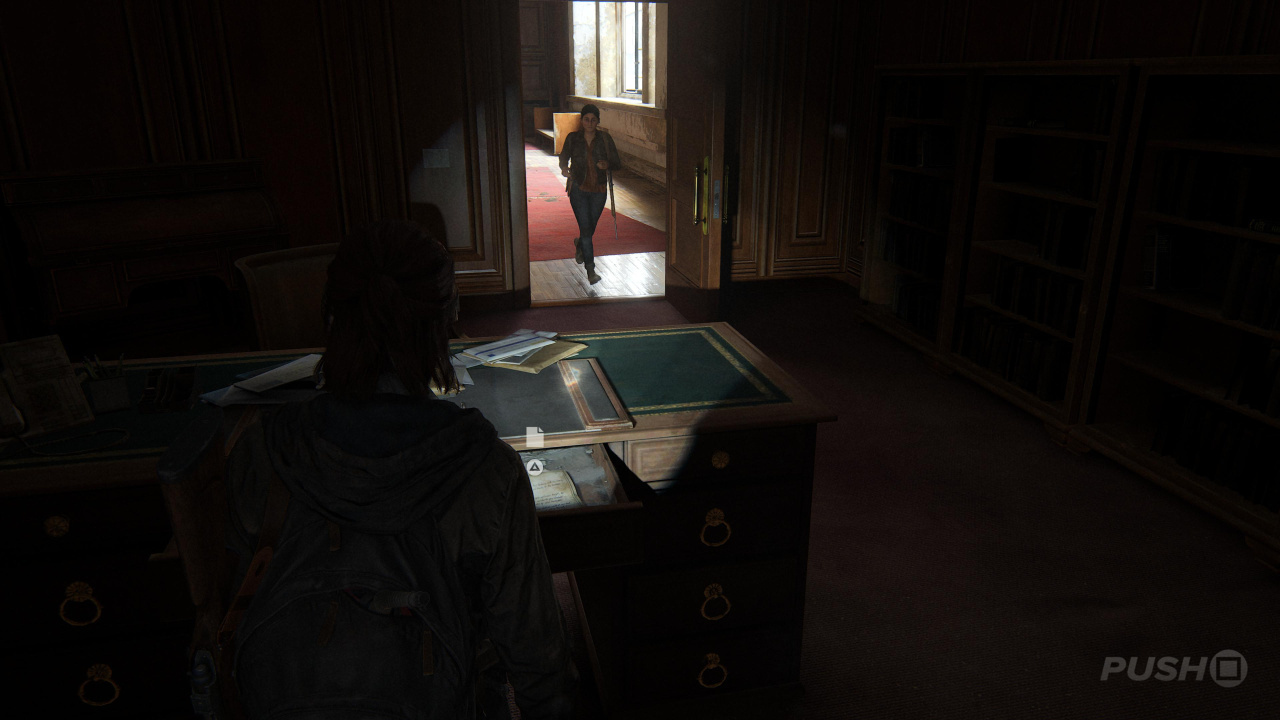
Artefact #5: Rabbi Saunders' Letter
Inside the synagogue, there's a moment where you'll need to swing from one balcony to another in order to exit the building. Before you climb through the window, enter the door on the opposite end of the hallway with the Hebrew Calendar on the wall. There's a desk in the centre of the room and the Artefact is inside its drawer.
Journal Entry #2
You'll unlock this Journal Entry immediately after reading Rabbi Saunders' Letter for Artefact #5. This is an automatic addition, so don't worry about looking for any other prompts to trigger it. You'll be notified when it's been added to Ellie's notepad.
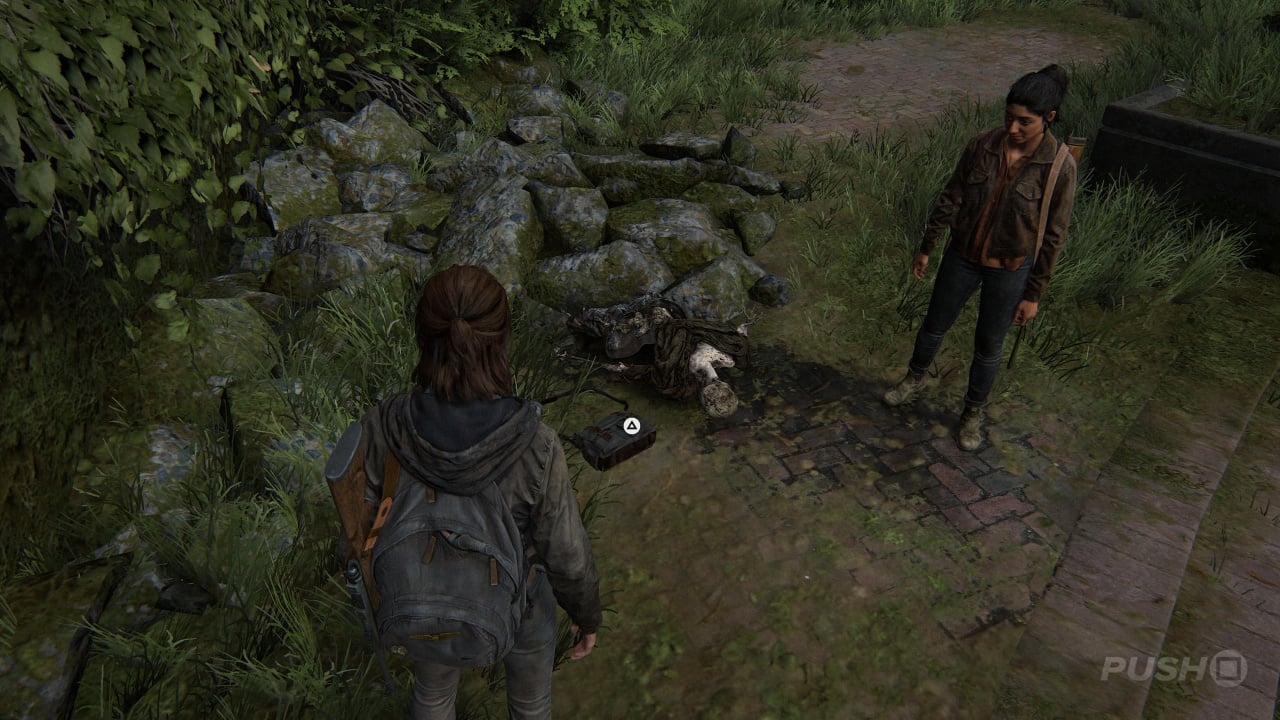
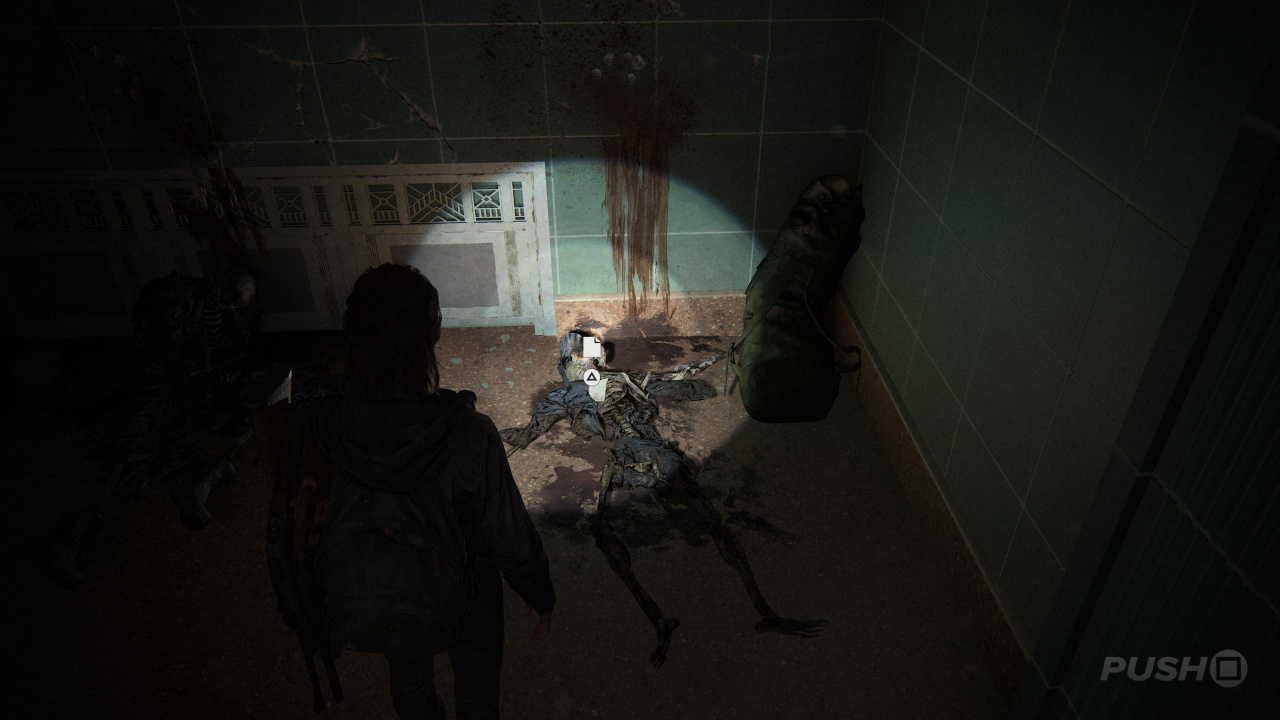
Artefact #6: Letter from Isaac
When exiting the synagogue, head directly right and you'll find an abandoned tank. Near to the tank, among the shrubbery, is a corpse and a bag. Look inside the bag for the Artefact.
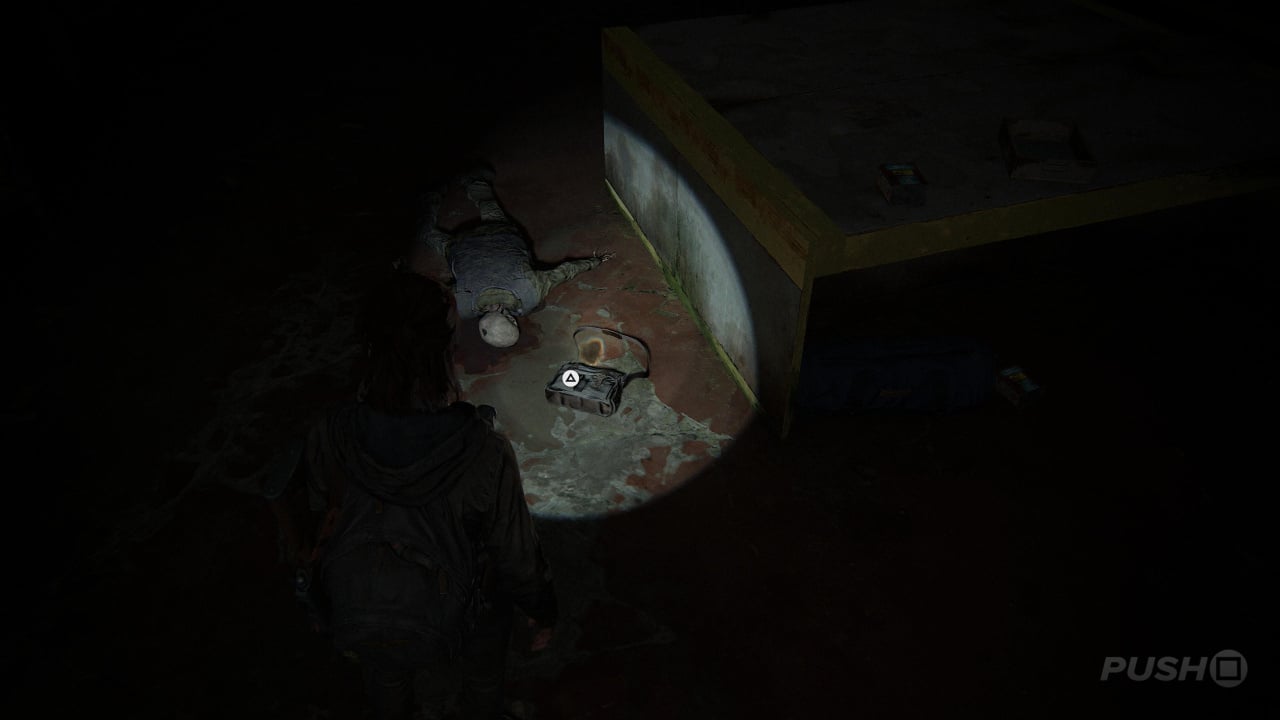
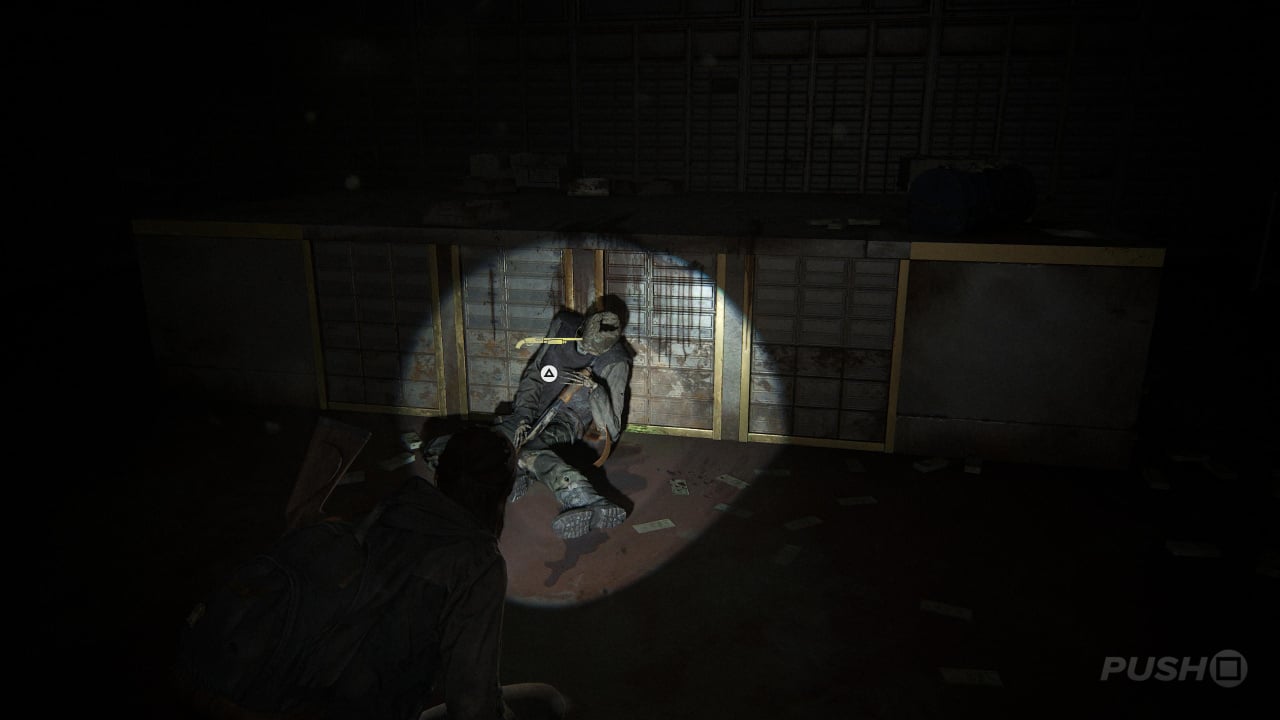
Artefact #7: Bank Heist Plans
Inside the Westlake Bank, kill all of the Clickers and head inside the vault. There's a corpse on the floor with a discarded bag. The Artefact is inside the bag.
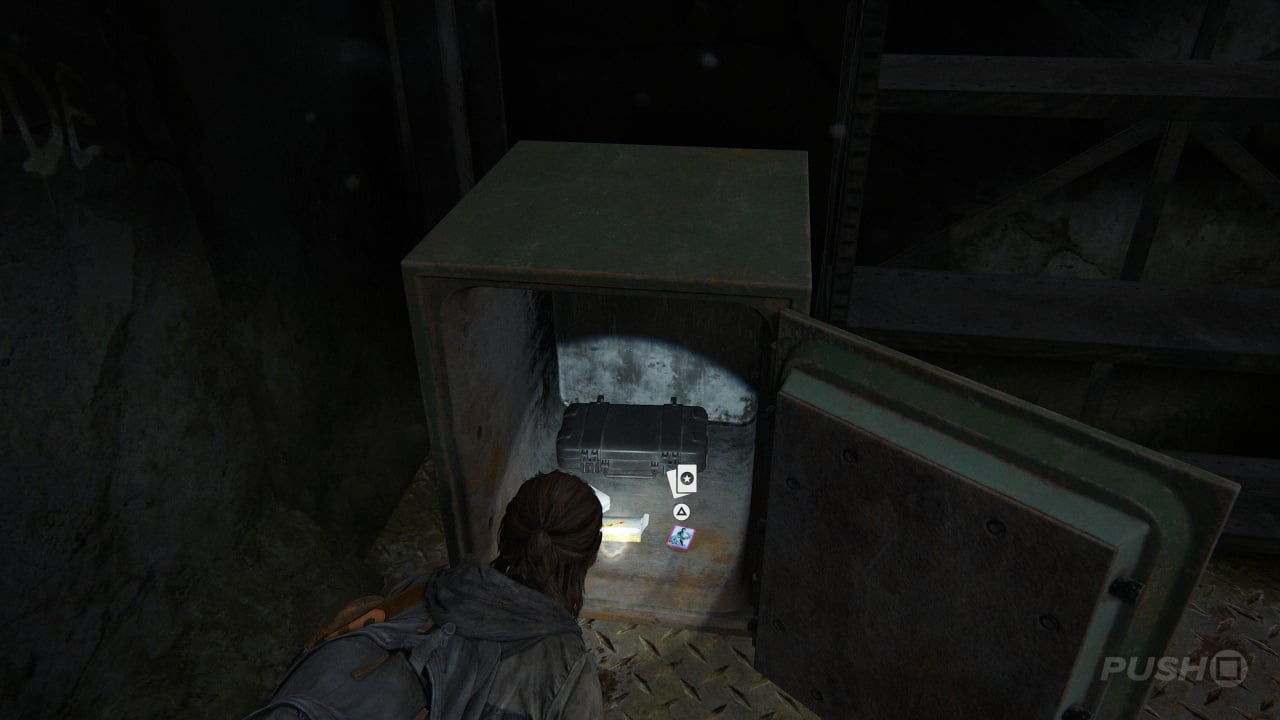
Safe #1
The Safe (See Also: The Last of Us 2: All Safe Code Combinations) is the reinforced door inside the Westlake Bank's vault. The Safe Combination Code is 602306. For more information, refer to the following guide: The Last of Us 2: How to Open the Westlake Bank Vault Door.

Artefact #8: Engraved Ring
Once you've successfully opened Safe #1 and gained access to the Westlake Bank's vault, follow the wall to the right and there's a drawer you can open behind a trolley of money. The Artefact (See Also: The Last of Us 2: How to Find the Engraved Ring) is inside.
Weapon: Pump Shotgun
In the centre of Westlake Bank's vault, next to a corpse is a new Weapon (See Also: The Last of Us 2: All Weapon Locations and Upgrades): the Pump Shotgun.
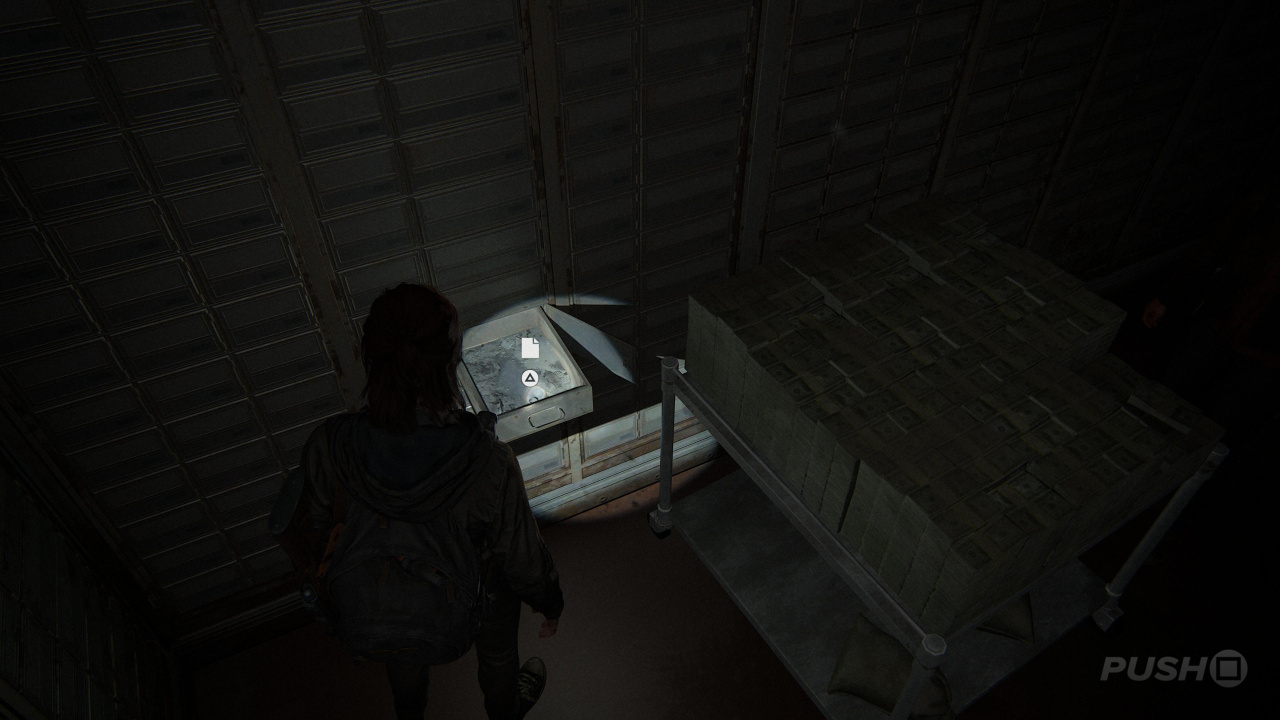
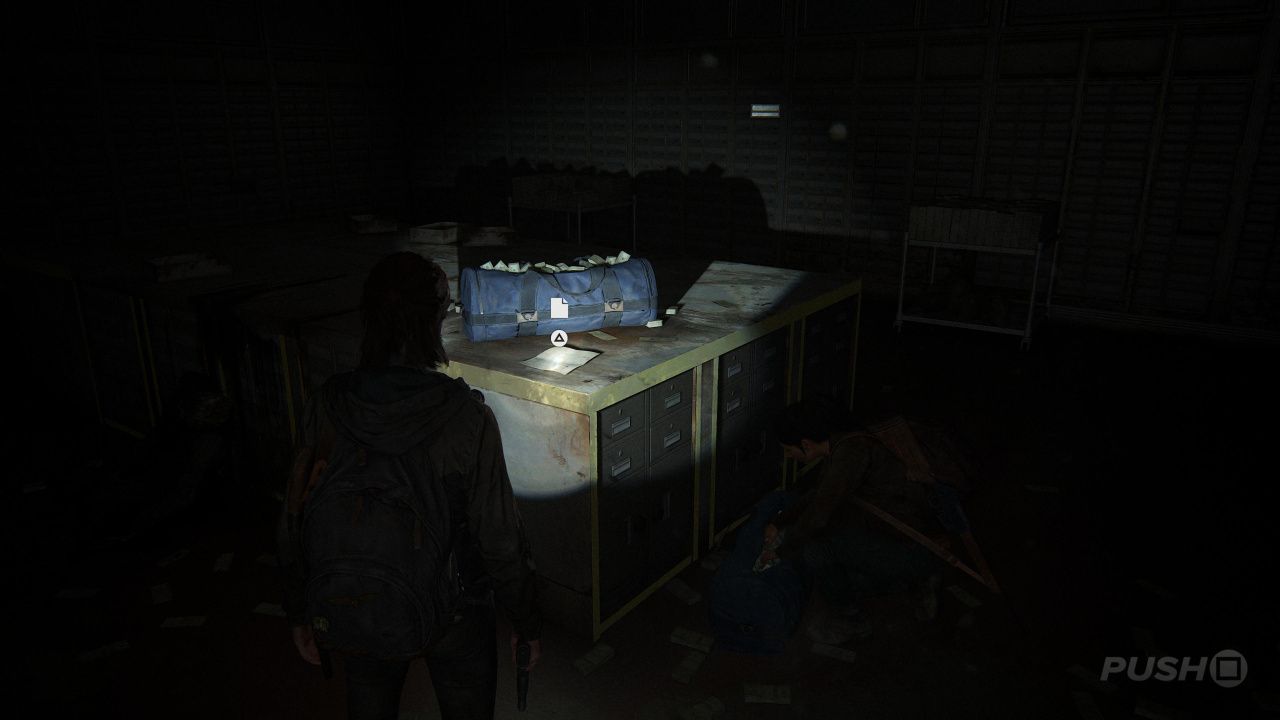
Artefact #9: Bank Robber Letter
Still inside Westlake Bank's vault, behind the corpse where you get the Pump-Action Shotgun, there's a desk. To the right of the dead body, you'll find the Artefact on top of the desk.
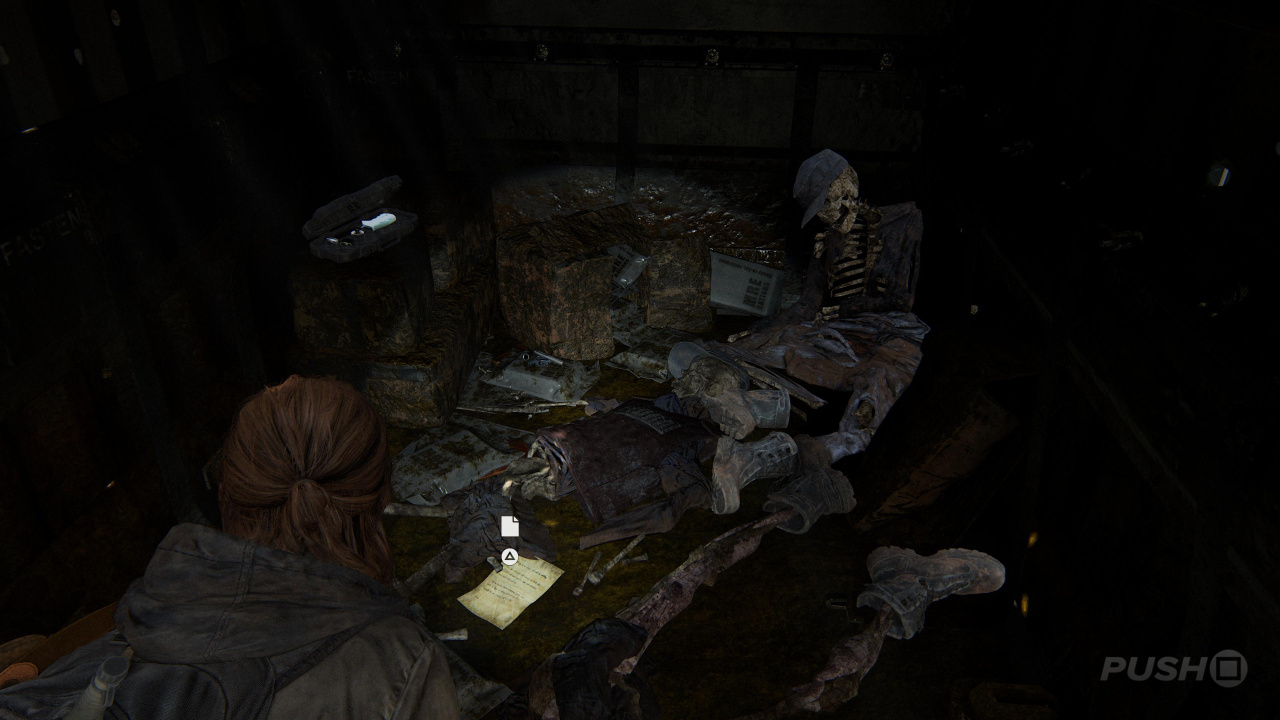
Artefact #10: Note to Informant
Outside of the Westlake Bank, follow the river and roads until you reach a series of FEDRA trucks. One has 'Fascists' written on it. Open it up, and you'll find the Artefact inside.
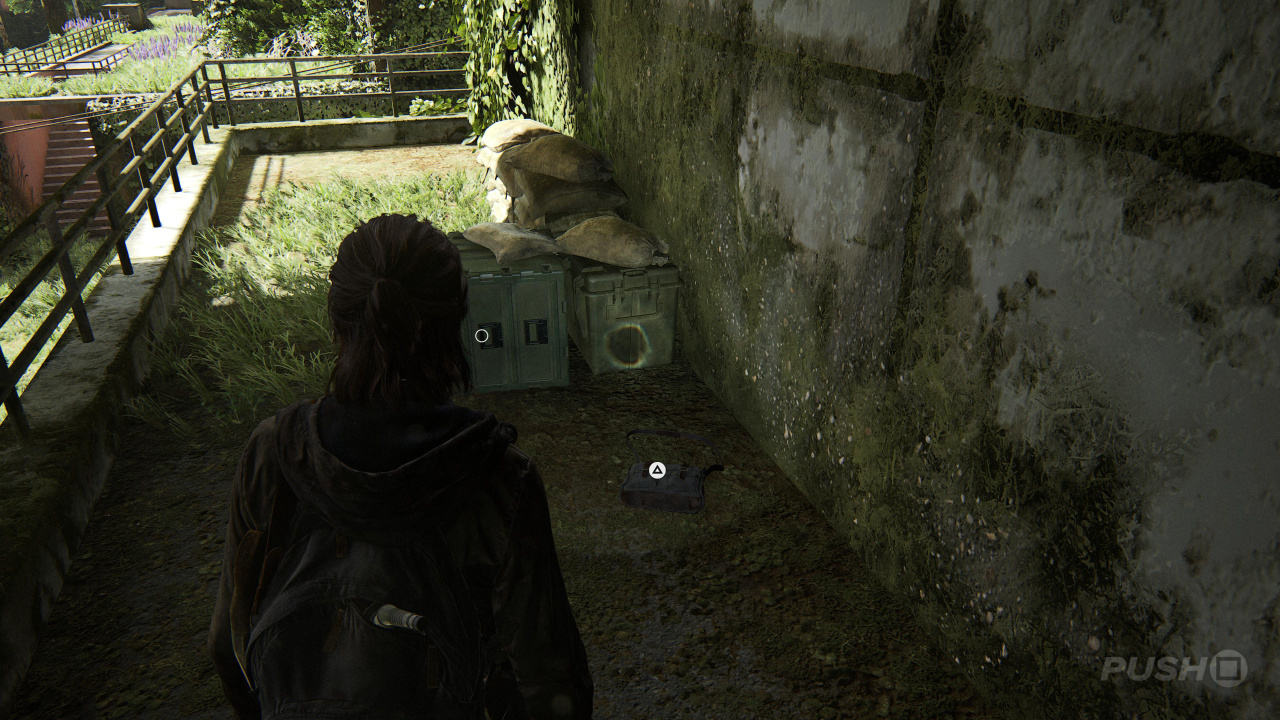
Artefact #11: WLF Community Supply Chest Note
When looking at the front entrance to the Courthouse, there are some steps you can on the other side of the street to the right. Head up and you'll find a disbanded bag with the Artefact inside.
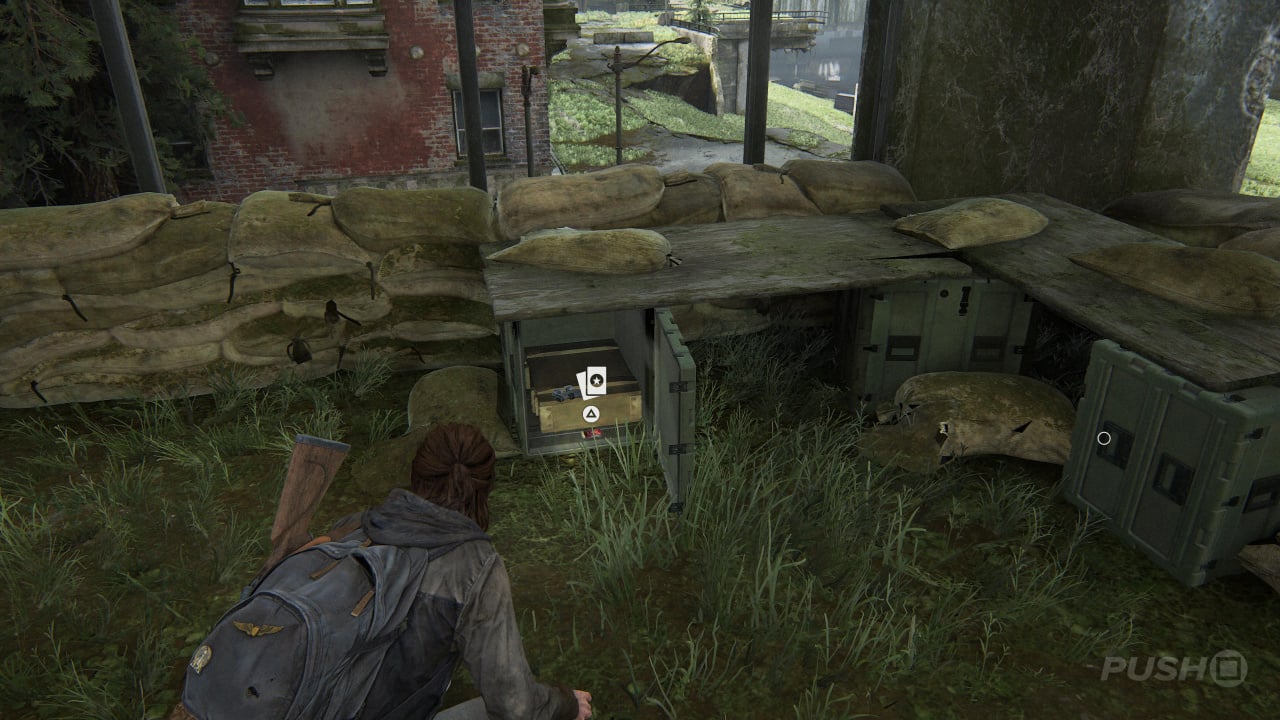
Safe #2
On Madison Street, near to the Valiant Music Shop is the Checkpoint Gate West 2. Squeeze through the revolving door and you'll find the Safe under some cover, to the left of some shelves. The Safe Combination Code is 0451, as revealed by the Checkpoint Gate Codes. For more information, refer to the following guide: The Last of Us 2: How to Open the Gate West 2 Safe.

Trading Card #3: Flo
You'll find the Trading Card inside Safe #2. It can't be missed if you've managed to open the Safe, as explained above.
Artefact #12: WLF Safe House Supply Note
To the left of Courthouse if you're looking at it, there's a shop called Ruston Coffee. Smash its window to gain entry, and on the counter you'll find the Artefact.

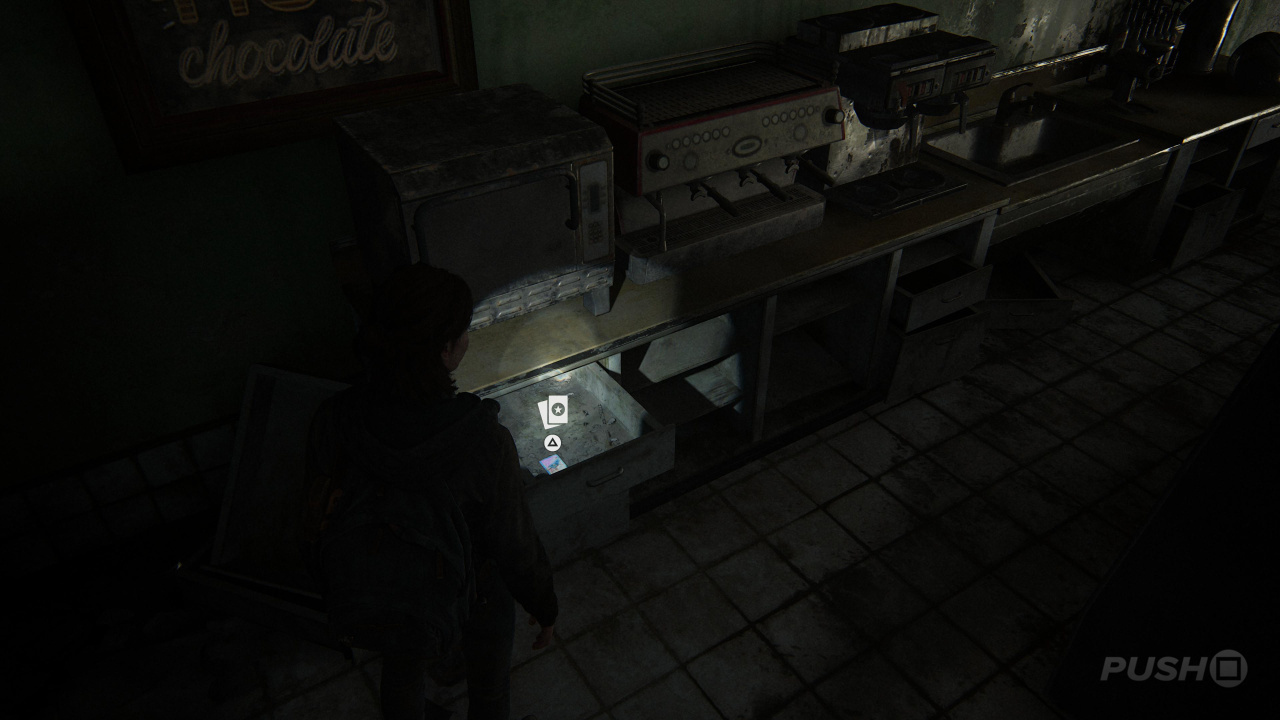
Trading Card #4: Big Blue
Still in Ruston Coffee, behind the counter in the drawer to the upper-right corner of the machine. You'll find the Trading Card beneath some coffee-making machines.
Artefact #13: Pet Store Key
Explore deeper into the Ruston Coffee store until you reach a toilet with a Runner inside. Kill it and then investigate the baby changing facilities. The Artefact is on top.

Artefact #14: Join WLF Note
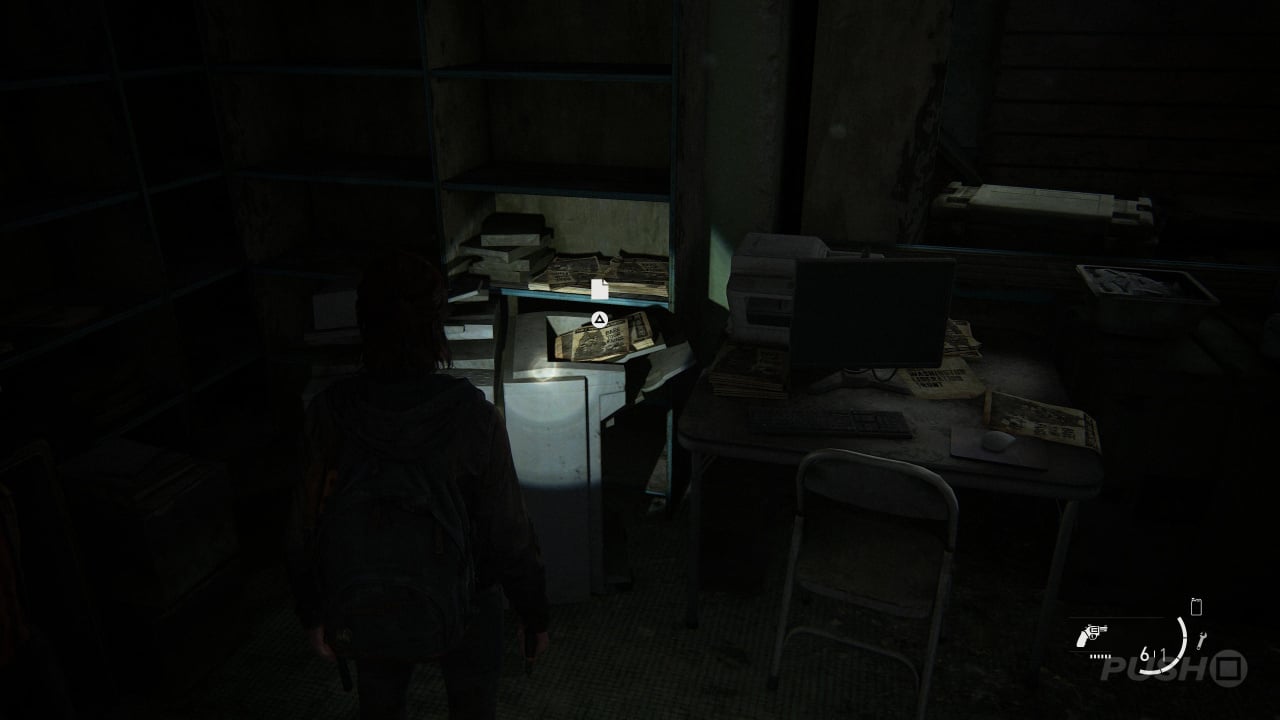
Inside Barko's Pet Store, which is located to the right of the Courthouse when you're looking directly at its front entrance, you'll need the Pet Store Key to gain access. The Artefact is on top of a printer once you've entered the main room.
Artefact #15: Plea to a Friend Letter
Once you get inside the Courthouse, you'll need to fight with a bunch of Clickers. Head down the stairs into a large rectangular room with security gates to the right. Follow the room down to it's furthest away wall. You'll find the Artefact upon a corpse in the top-right corner.
Artefact #16: Lt. Torres' Final Memorandum
Left of Artefact #15, smash the glass to infiltrate a side office and remove the machete from the corpse on the floor. You'll pick up the Artefact once it drops out.
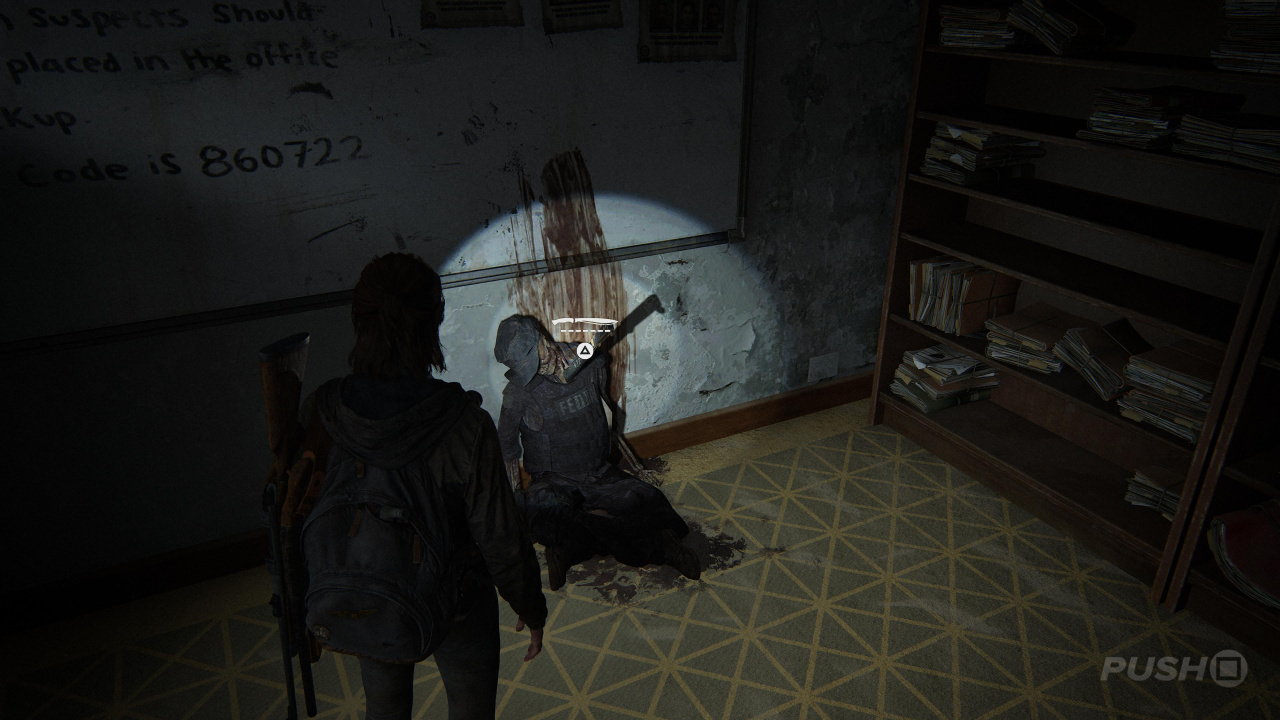
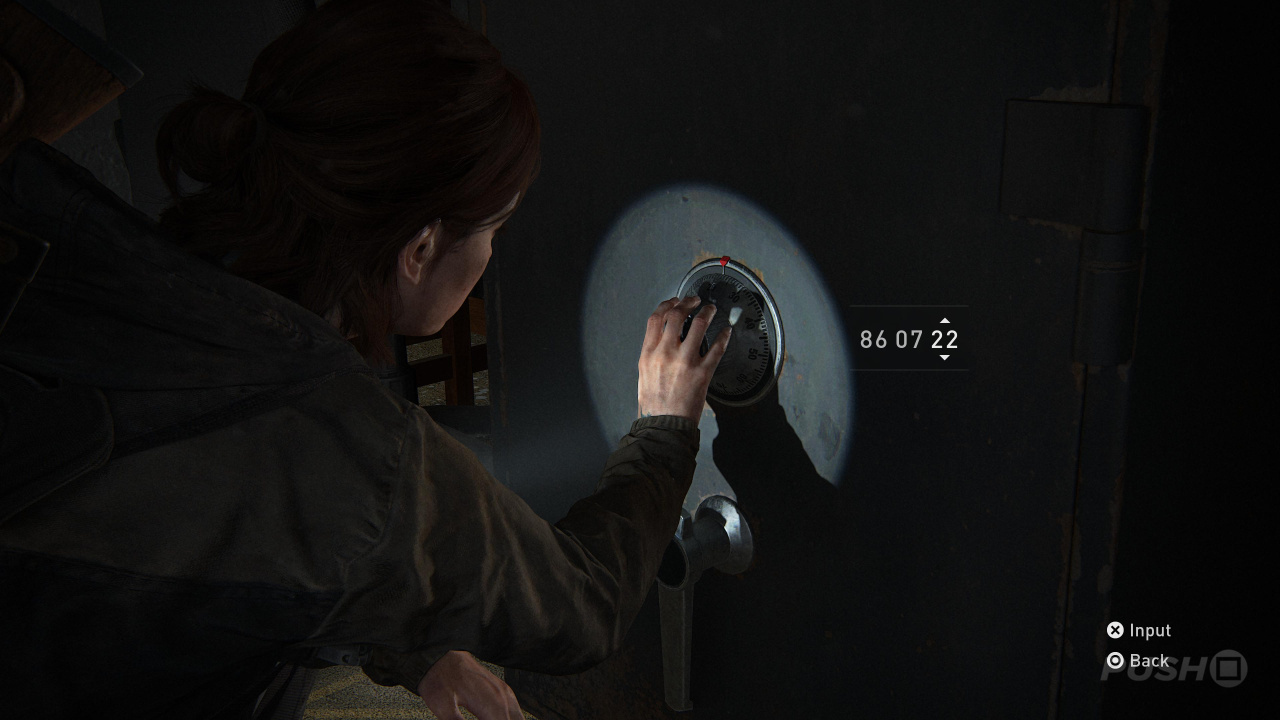
Safe #3
Smash the glass to enter the room to the left of the corpses, and you'll find the Safe directly beneath the window. The Safe Combination Code is 860722. Fore more information, refer to the following guide: The Last of Us 2: How to Open the Courthouse Safe.
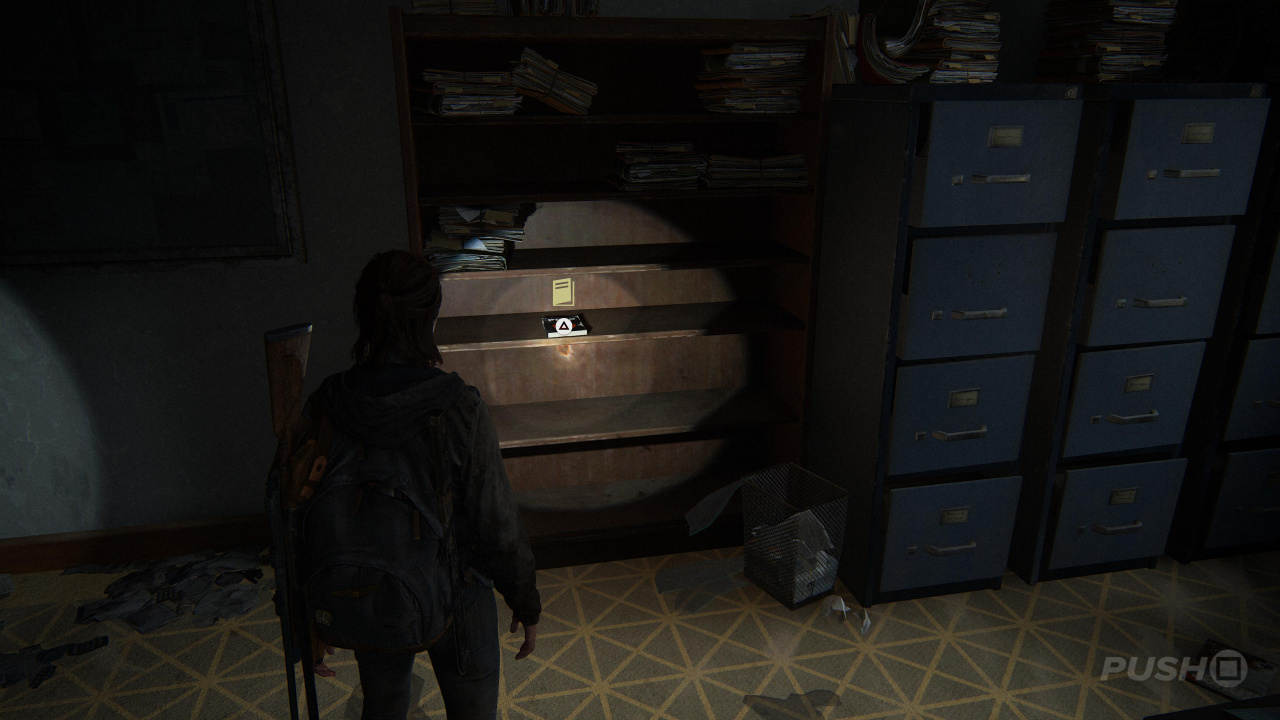
Training Manual: Crafting Training Manual
Opposite the Safe, you'll find the Training Manual (See Also: The Last of Us 2: How to Find All Training Manuals and Learn All Player Upgrades) on a set of shelves, opposite the whiteboard.
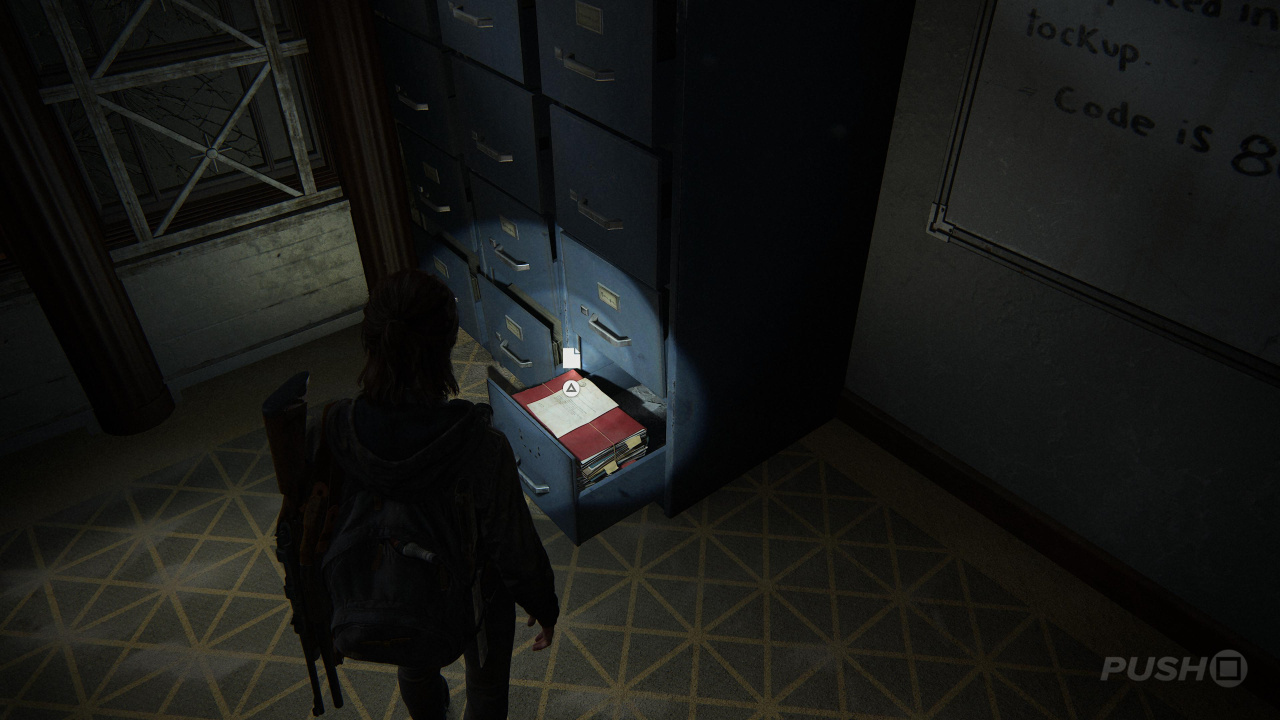
Artefact #17: List of Known WLF Agitators
In the same room as the Safe, to the left of the whiteboard, there are some blue filing cabinets. Open the bottom drawer and you'll find the Artefact inside.
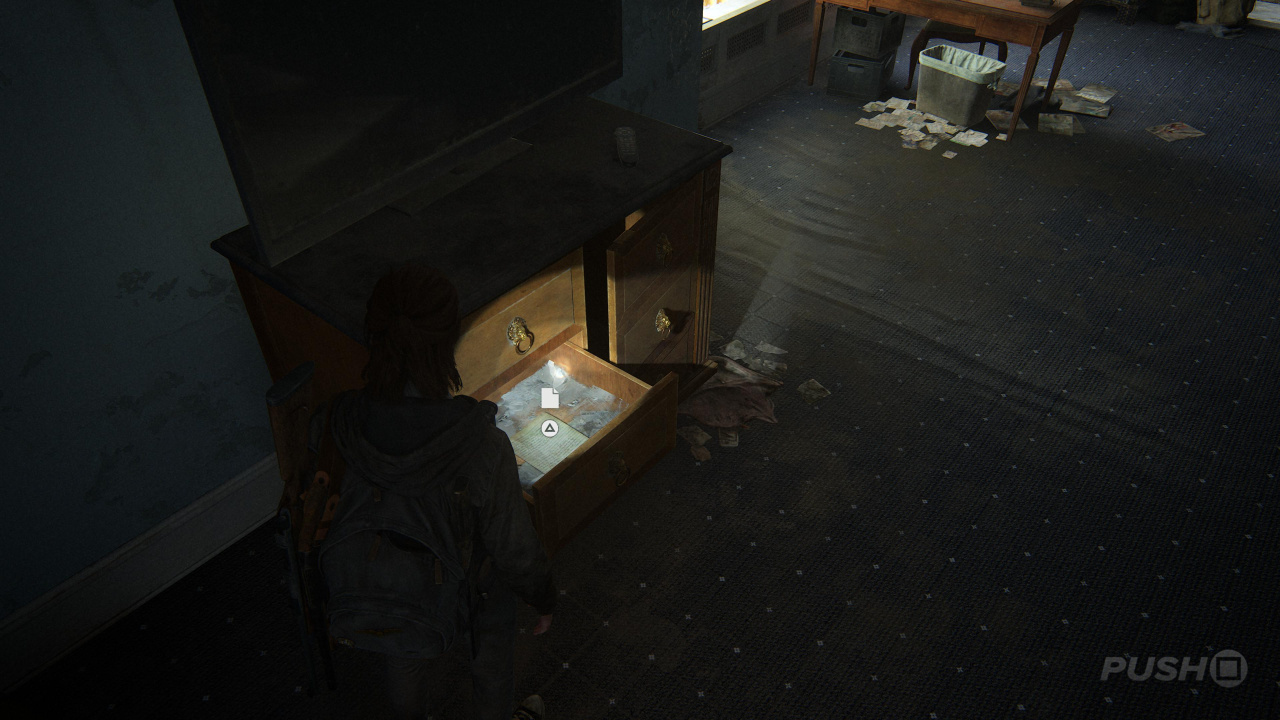
Artefact #18: WLF Recruiter Journal
Once you're in the Serevena Hotel, kill the Clickers and head upstairs. Directly across the staircase is a room with an en-suite and a second room. Look in the drawer beneath the television in the second room. The Artefact is inside.
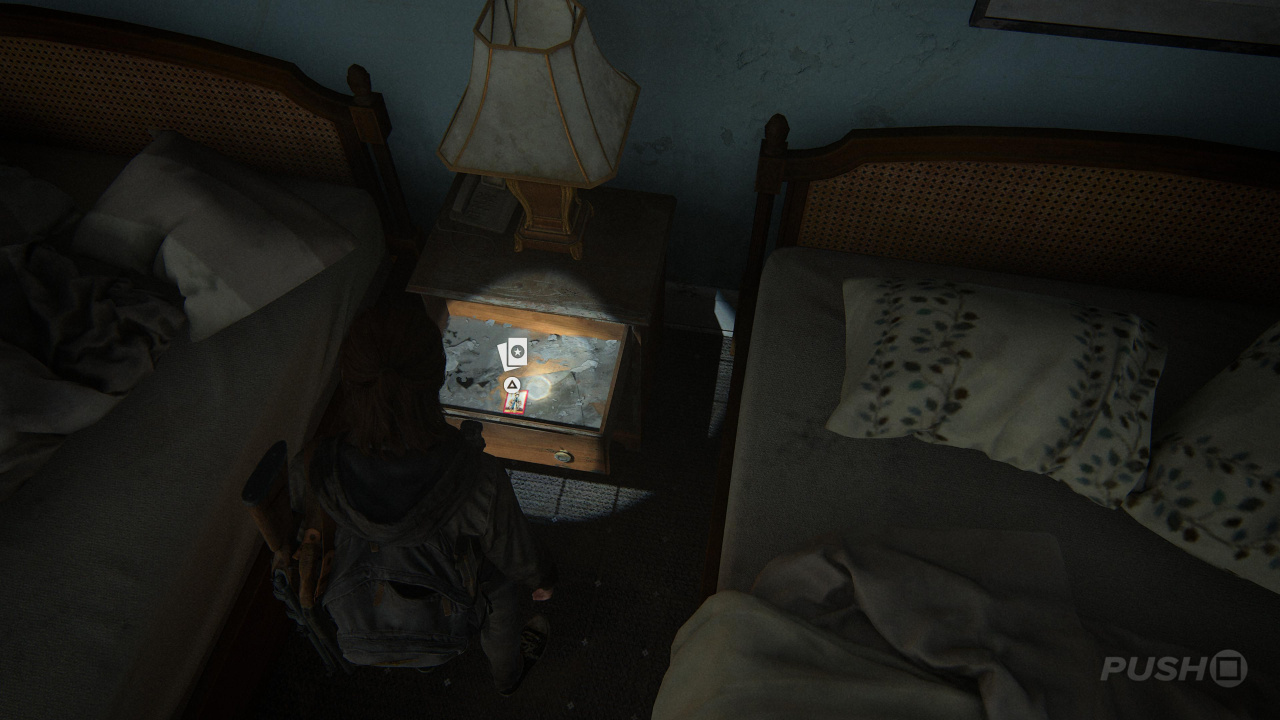
Trading Card #5: Know It All
Directly opposite the television are two beds. In between them is a chest of drawers. Open the drawers and you'll find the Trading Card inside.
Did you find all the Artefacts, Trading Cards, Journal Entries, Workbenches, and Safes in Downtown in The Last of Us 2? If you're missing anything, head back to our The Last of Us 2: The Gate - All Collectibles: Artefacts, Trading Cards, Journal Entries guide or move on to our The Last of Us 2: Eastbrook Elementary - All Collectibles: Artefacts, Trading Cards guide to continue to the next part of our The Last of Us 2 guide.


Comments 0
Wow, no comments yet... why not be the first?
Leave A Comment
Hold on there, you need to login to post a comment...